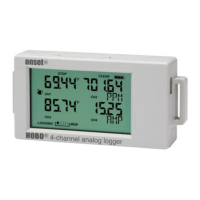
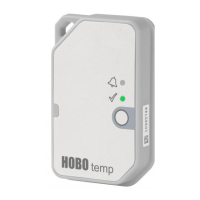
HOBO MX100 Temp Logger Manual
U.S. and International Sales: 1-508-759-9500 3 www.onsetcomp.com
Tap this: To do this:
have the time to complete the entire update
process, which requires that the logger remains
connected to the device during the upgrade.
Configuring the Logger
Use the HOBOconnect app to set up the logger, including
setting alarms, selecting the options to start and stop logging,
and choosing a logging mode. These steps provide an overview
of setting up the logger. For complete details, see the
HOBOconnect User Guide.
1. Press the button on the logger to wake it up.
2. In the app, tap Devices. If you are working with multiple
loggers, press the button on the logger a second time to
bring it to the top of the list. Tap the logger tile in the app to
connect to the logger.
3. Tap Configure & Start to configure the logger.
4. Tap Name and type a name for the logger (optional). If you
do not enter a name, the app uses logger serial number as
the name.
5. Tap Group to add the logger to a group (optional).
6. Tap Logging Interval and choose how frequently the logger
will record data unless operating in burst logging mode (see
Burst Logging).
7. Tap Start Logging and select when logging begins:
• On Save. Logging begins immediately after configuration
settings are saved.
• On Next Interval. Logging begins at the next even
interval as determined by the selected logging interval.
• On Button Push. Logging begins when you press either
the Start/Stop logging button on the logger for 3 seconds
or start logging with the app.
• On Date/Time. Logging begins at a date and time you
specify. Select the Date and Time.
8. Tap Stop Logging and specify when logging ends.
• Never Stop (Overwrites Old Data). The logger does not
stop at any predetermined time. The logger continues
recording data indefinitely, with newest data overwriting
the oldest.
• On Date/Time. The logger stops logging on a specific
date and time that you specify.
• After. Select this if you want to control how long the
logger should continue logging once it starts. Choose the
amount of time you want the logger to log data. For
example, select 30 days if you want the logger to log data
for 30 days after logging begins.
• Stop When Memory Fills. The logger continues recording
data until the memory is full.
9. Tap Pause Options, then select Pause On Button Push to
specify that you can pause the logger by pressing its button
for 3 seconds. Select Allow Button Resume to specify that
you can press the Start/Stop button on the logger to
resume logging.
10. Enable or disable Show LED. If Show LED is disabled, the
alarm and status LEDs on the logger are not illuminated
while logging (the alarm LED does not blink if an alarm
trips). You can temporarily turn on LEDs when Show LED is
disabled by pressing the button on the logger for 1 second.
11. Enable or disable Bluetooth Always On. If Bluetooth Always
On is enabled, the logger advertises or regularly sends out a
Bluetooth signal for the phone or tablet to find via the app
while it is logging, which uses battery power. When
Bluetooth Always On is disabled, the logger advertises only
during logging when you press the button on the logger to
wake it up, thereby preserving as much battery power as
possible.
12. Tap Alarms to open that area of the screen.
13. Select Low if you want an alarm to trip when the sensor
reading falls below the low alarm value. Enter a value to set
the low alarm value.
14. Select High if you want an alarm to trip when the sensor
reading rises above the high alarm value. Enter a value to
set the high alarm value.
15. For the Duration, select how much time should elapse
before the alarm trips and select one of the following:
• Cumulative Samples. The alarm trips once the sensor
reading is out of the acceptable range for the selected
duration any time during logging. For example, if the high
alarm is set to 85°F and the duration is set to 30 minutes,
the alarm trips once the sensor readings have been
above 85°F for a total of 30 minutes since the logger was
configured.
• Consecutive Samples. The alarm trips once the sensor
reading is out of the acceptable range continuously for
the selected duration. For example, the high alarm is set
to 85°F and the duration is set to 30 minutes, the alarm
trips only if all sensor readings are 85°F or above for a
continuous 30-minute period.
16. Tap Start to save the configuration settings.
Logging begins based on the settings you selected. Press the
start button on the logger if you set it up to start logging with a
button push. See Mounting the Logger for details on mounting
and see Downloading Data From the Logger for details on
downloading.
If the logger is configured with alarm settings, an alarm trips
when the temperature reading is outside the range specified in
the logger configuration. When an alarm trips, the logger alarm
LED blinks every 4 seconds (unless Show LED is disabled), an
alarm icon appears in the app, and an Alarm Out of Range
event is logged. Even if the temperature reading returns to a
normal range, the alarm indicator does not clear in the app and
the alarm LED continues to blink.
Setting a Password
You can create an encrypted password for the logger that is
required if another device attempts to connect to it. This is
recommended to ensure that a deployed logger is not
mistakenly stopped or purposely altered by others. This
password uses a proprietary encryption algorithm that changes
with every connection.
To set a password:
1. Tap Devices. Press the Start/Stop button on the logger to
wake it up, if necessary. Tap the logger tile in the app to
connect to it.
 Loading...