Do you have a question about the OOSSXX 6-in-1 DVR & DVR Security System and is the answer not in the manual?
| Brand | OOSSXX |
|---|---|
| Model | 6-in-1 DVR & DVR Security System |
| Category | Security System |
| Language | English |
Statement regarding the manual's accuracy and potential changes in product features or operation.
Notice about adhering to legal and regulatory requirements for surveillance equipment usage.
Information on default settings for administrator account, password, IP address, subnet mask, and gateway.
Overview of the OOSSXX advanced Plug and Play security system and its capabilities.
Detailed specifications for the OOSSXX DVR, including video input, output, resolution, and storage.
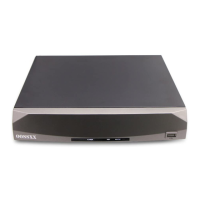
Description of the indicators on the front panel of the OOSSXX DVR unit.
Identification and explanation of the various ports and connections on the rear panel.
Tips for ensuring reliable operation and proper installation environment for the DVR system.
Step-by-step guide for installing a hard drive if the DVR system was purchased without one.
Procedure for starting the DVR and the initial login process.
Methods for safely turning off the DVR system, including soft and hard switches.
Explanation of user roles (admin, guest) and login process with different access privileges.
Steps to configure encoding settings for individual channels, including resolution and frame rate.
Methods for selecting channels for recording configuration and settings.
Configuration for recording file double backup using two hard disks.
Setting the duration for each recording file.
Configuring the DVR to record a period before an alarm or motion detection event.
Explanation of recording modes: manual, stop, and schedule (regular, detect, alarm).
Steps to query recorded video files based on time period and recording mode.
How to play back recorded video files after querying them.
Description of icons and controls used for playback operations like play, pause, and fast forward.
Configuration for alarm settings, including channel, sensitivity, region, and time periods.
Setting specific time periods for alarm detection and triggering on different days.
Setting the time interval between motion detection events that trigger an alarm.
Configuring actions to be taken when a motion detection alarm is triggered.
Setting up external alarm outputs and their delay times.
Linking motion detection events to specific recording channels.
Setting the delay for recording linkage after an alarm is triggered.
Configuring the tour function to cycle through selected camera channels during an alarm.
Setting up PTZ (Pan-Tilt-Zoom) linkage to run when an alarm occurs.
Configuring the system to send email notifications when an alarm event occurs.
Enabling on-screen messages to indicate alarm states.
Enabling audible buzzer alerts for alarm events.
First steps for adding an IP camera, including accessing the main menu.
Configuring the network mode and restarting the DVR for IP camera integration.
Methods for automatically or manually adding IP cameras within the local network.
Instructions for accessing the DVR remotely via a web browser.
Guide to using the CMS3.0 software for managing multiple devices simultaneously.
Procedure for logging into the cloud service platform, including Active-X installation.
Accessing devices via user or device login, including language and login method choices.
Managing devices, including adding, editing, deleting, and viewing devices remotely.
Modifying user account passwords and information within the cloud service.
Procedure for logging out of the cloud service system.
Steps to create a device name, scan QR code, or manually enter Cloud ID.
Initiating the preview to view cameras from your phone after device setup.
Explanation of different options for adding devices: QR code, manual, or intranet search.
How to view live video streams, switch between channels, and manage the display.
Description of various icons and their corresponding functions in the application.
