PART 2: Using The Studio 4
46 Opcode Systems, Inc.
Using MIDI Routing
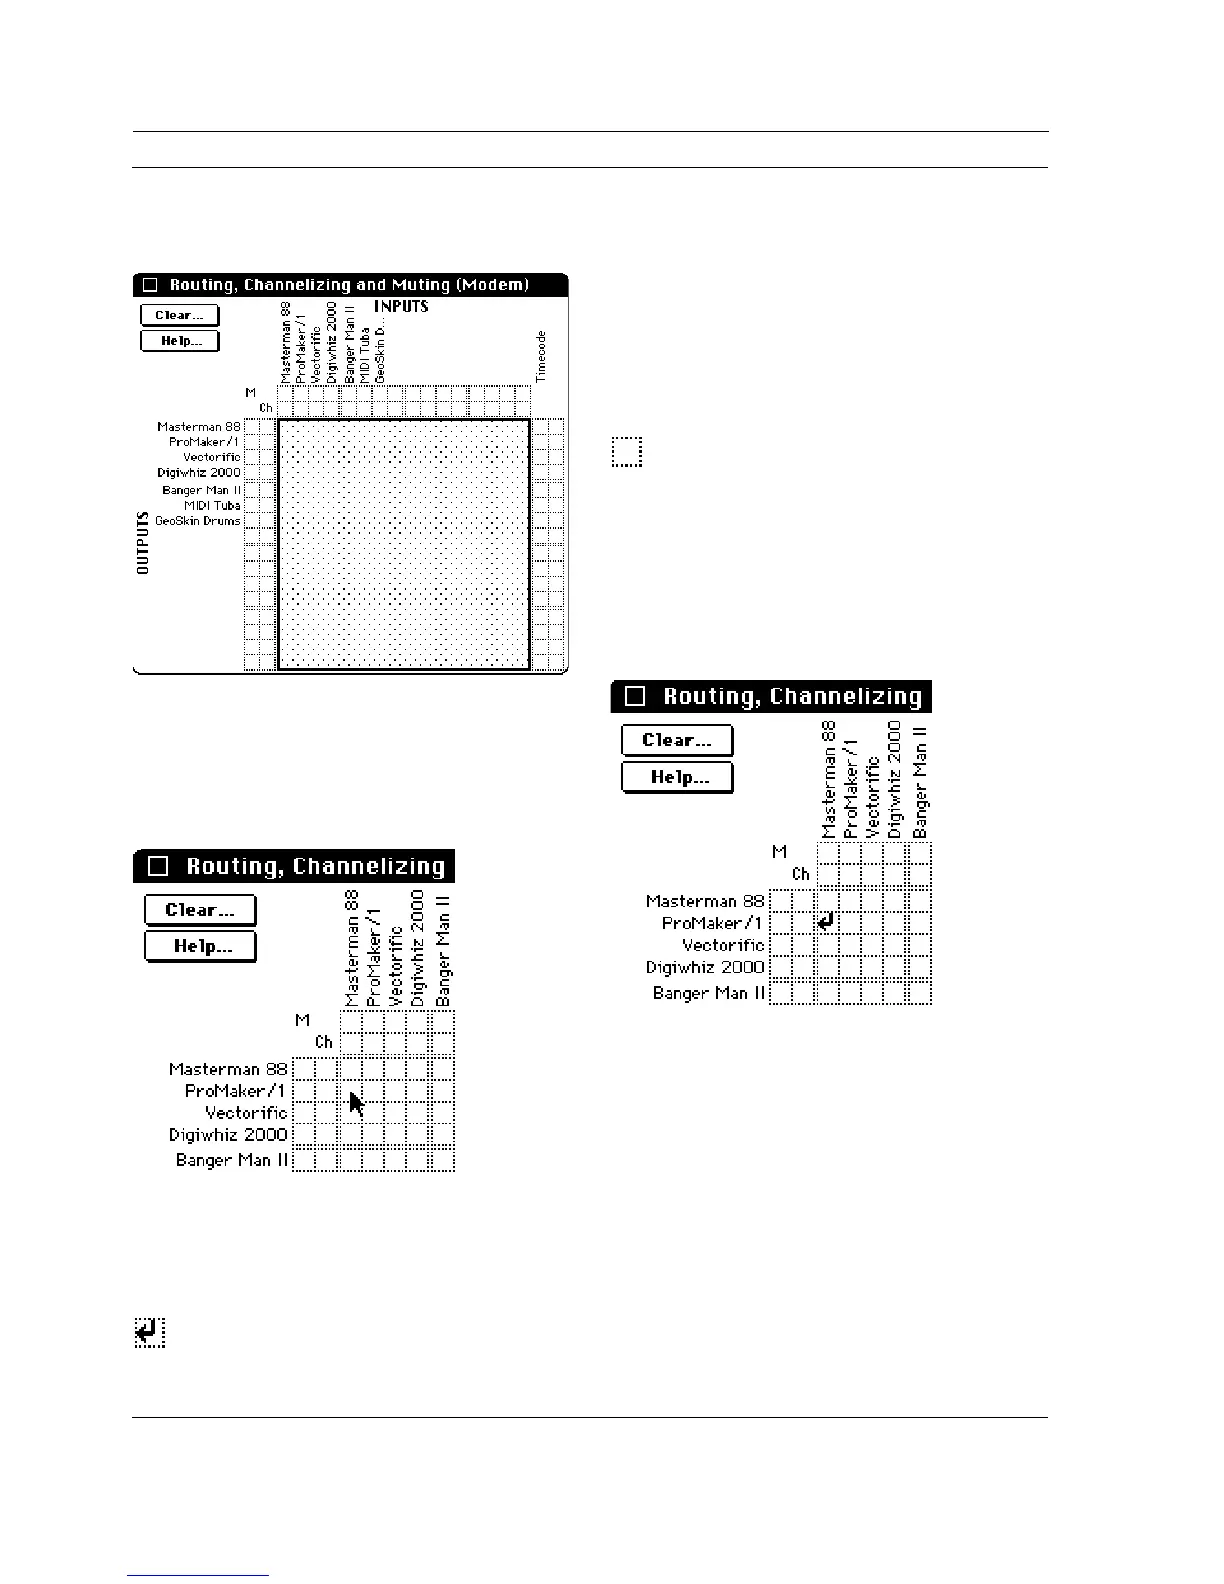
Figure 7.15: MIDI Routing Area
Click one of the squares in the 16 X 16
grid (as shown in Figure 7.16) to create a
MIDI routing.
Figure 7.16: Clicking the MIDI Routing Grid
When you click an empty square, a small
MIDI routing arrow appears.
A MIDI routing arrow points from an
input device at the top of the window to an
output device at the left. This indicates
the direction of MIDI flow.
When you click an arrow, it disappears
and the routing is removed.
In Figure 7.17, the MIDI routing arrow
indicates that MIDI is routed from the
Masterman-88 keyboard to the Pro-
Maker/1 sound module. The ProMaker/
1 plays on the same MIDI channel trans-
mitted by the Masterman-88.
Figure 7.17: Simple MIDI Routing