STEERING GEAR ASSEMBLY 3D- 31
Figure
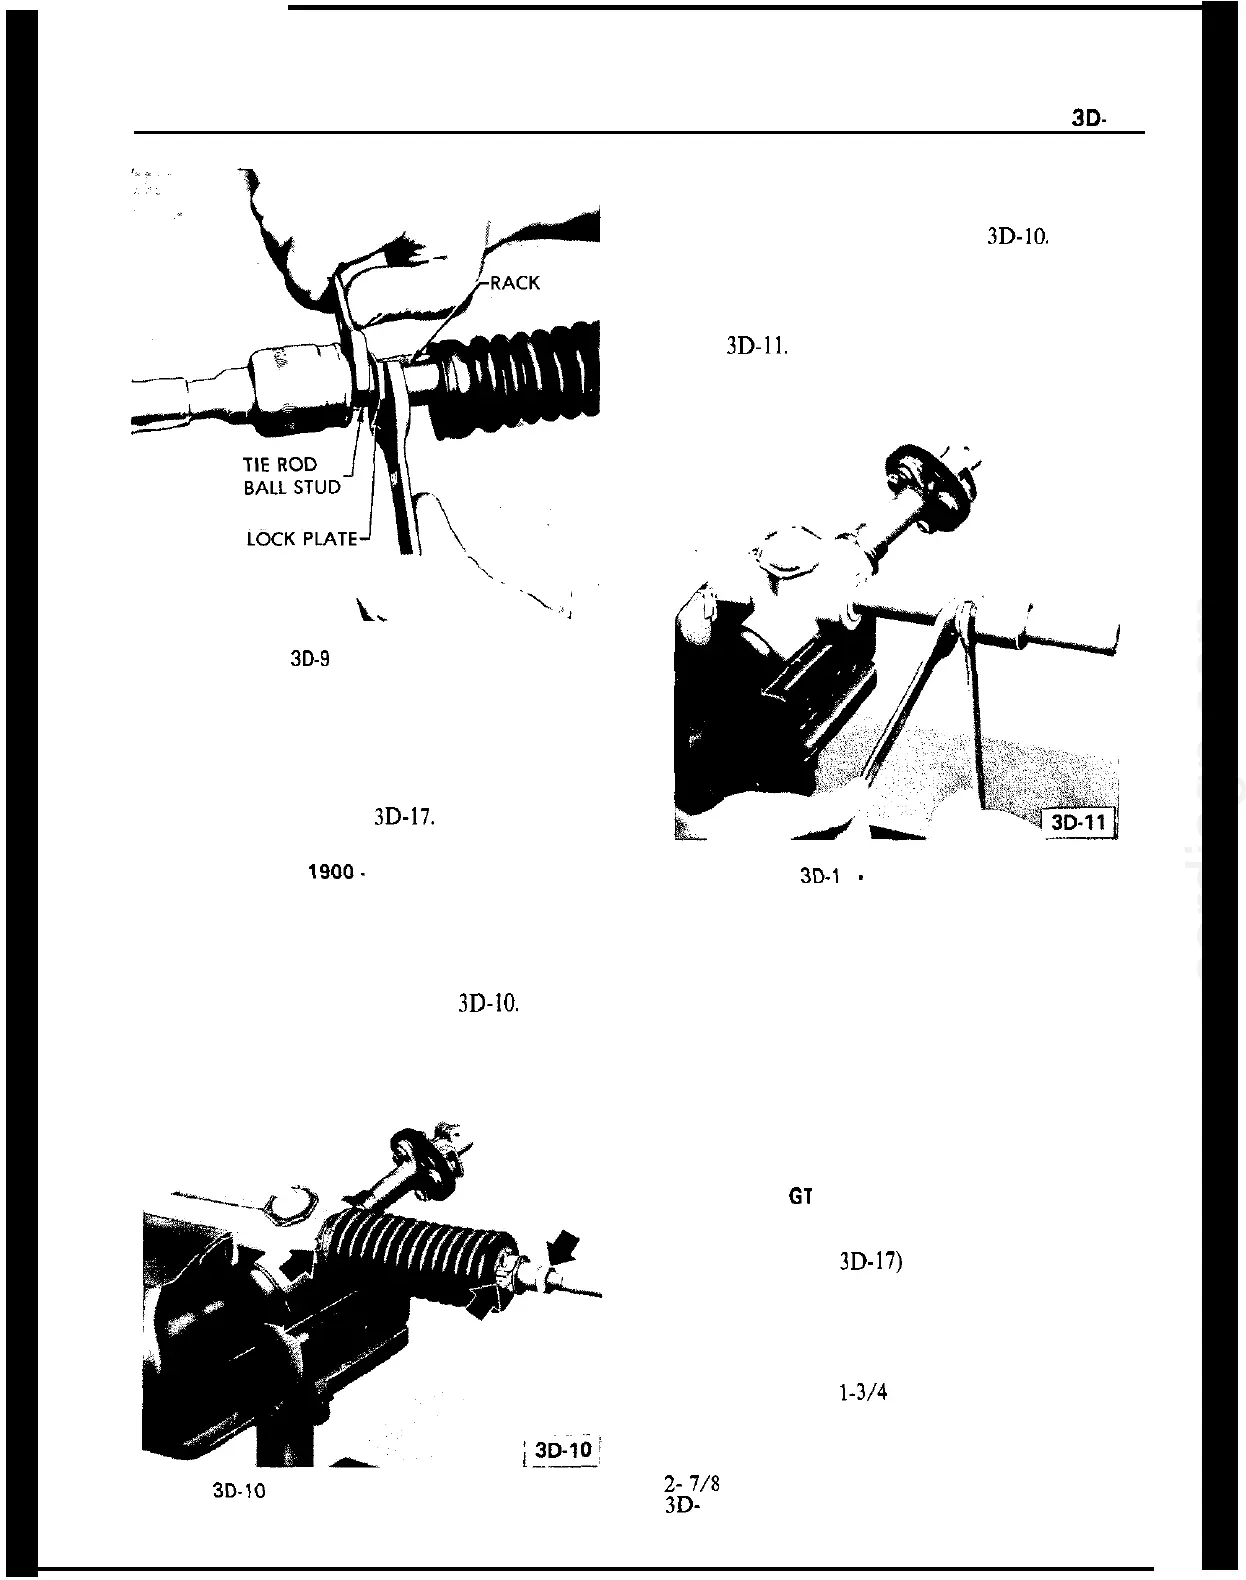
3D-9
Removing Tie Rods
5. Remove pinion shaft from gear assembly, and then
withdraw rack from gear assembly.
6. From steering gear housing remove “0” rings
from retainer and pinion bushing. Also take out
thrust washer. See Figure
3D-17.
Disassembly (Opel
1900.
Manta)
1. Carefully clamp steering gear assembly in soft jaw
vise.
2. Disconnect left and right tie rod end from respec-
tive axial joint (locknut). See Figure
3D-10.
The ball
joint of the tie rod end is maintenance-free, must not
be disassembled and has to be replaced as an assem-
bly only.
Figure 3D-10 Removing Tie Rod Ends from Axial
Joint
3. Remove clamping wire and hose clamp from rub-
ber bellows. Remove bellows from steering gear
housing and axial joint. See Figure
3D-10.
4. Disconnect ball stud of axial joint from rack (lock
plate, stop plate). To do this, counterhold rack with
open-end wrench to avoid damage to the teeth. See
Figure
3D-11.
The axial joint is maintenance-free,
must not be disassembled and has to be replaced as
an assembly only.
Figure
3D-1
1
-
Removing Axial Joint
5. Loosen adjusting screw locknut, screw out adjust-
ing screw and remove thrust spring as well as bearing
shell out of adjusting screw opening.
6. Remove sheet metal cap from steering gear hous-
ing and remove hex nut from pinion. Do not turn
pinion in end position.
7. Pull pinion and rack out of steering gear housing.
Reassembly. GT
1. Clamp steering gear housing in a soft jaw vise as
shown (see Figure 3D-17) and reassemble new “0”
rings onto retainer and pinion shaft bushing. Also
install thrust washer onto pinion bushing.
Coat all moving parts during reassembly with suita-
ble steering gear lubricant. Fill long end of housing
with approximately
l-3/4
oz. steering gear lubricant.
2.. Insert long toothless end of rack into short end of
housing until rack protrudes equally (approximately
Z-
7/S inch) out of both ends of housing. See Figure
3D- 13.