Do you have a question about the Optex SAFARI 6D and is the answer not in the manual?
The Safari 6D Dual Screen Action Camera Kit is a versatile electronic device designed for capturing high-quality video and photos in various environments, including underwater and during action sports. This user manual provides comprehensive instructions for operating the camera, managing its settings, and connecting it to mobile devices.
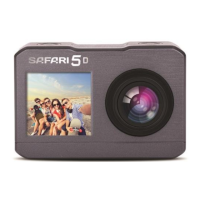
The Safari 6D is primarily an action camera capable of recording videos and taking photographs. It features a dual-screen design, with a 1.3-inch front HD LCD screen and a 2-inch rear HD LCD screen, allowing for flexible viewing and framing, including selfie shots. The camera offers multiple video recording modes, such as Normal, Loop Recording, Video Time-lapse, Slow Motion, and Fast Motion, catering to different creative needs. For photography, it provides modes like Normal, Burst, Photo Time-lapse, Self-Timer, and Long Exposure. The camera is equipped with a built-in microphone and speaker, enabling audio recording and playback. It supports external storage via a Micro SD card slot, allowing for extensive media storage. Connectivity options include a USB-C port for charging and data transfer, and a Micro HDMI port for video output. The camera also features Wi-Fi functionality, enabling connection to a mobile app for remote control, preview, and media transfer.
To power on the camera, press and hold the Power/Mode button for 3 seconds. The screen will turn on, indicating readiness for use. To power off, hold the Power/Mode button for 3 seconds again. The camera can be charged by connecting it to a computer or a USB wall charger using the provided USB cable. A red Charging Indicator light will illuminate during charging and turn off once the battery is fully charged. It is recommended to ensure the battery is fully charged before use.
To insert a Micro SD card, push it into the slot until it clicks into place, ensuring the label faces the back of the camera. To remove the card, gently press its tail inward, and it will eject.
After powering on, the camera defaults to Video Recording Mode. Pressing the Power/Mode button cycles through Video Recording, Photography, and Menu modes.
In Video Recording Mode, press the Shutter/OK button to start recording and press it again to stop. The camera offers various video recording modes, which can be accessed by pressing and holding the Shutter/OK button. Use the Up/Down buttons to select a desired mode (Normal, Loop Record, V-Timelapse, Slow Motion, Fast Motion, Wi-Fi) and press Shutter/OK to confirm. The selected mode icon will appear in the top left corner of the screen.
To enter Photography Mode from Video Recording Mode, press the Power/Mode button once. In Photography Mode, press the Shutter/OK button to take a photo. Similar to video modes, different photography modes (Single, Burst, P-Timelapse, Self-Time, LongExp, Wi-Fi) can be selected by pressing and holding the Shutter/OK button, then using the Up/Down buttons to choose and Shutter/OK to confirm.
To switch between the front LCD screen and the rear LCD screen, press and hold the WiFi/Down button while in video recording or photography mode.
A blue Busy Indicator light illuminates when the camera is actively recording videos or shooting photos.
To access Menu Mode, press the Power/Mode button twice from the initial power-on state. The Menu Mode offers three main options: Playback, Video Setup, and Photo Setup. Use the Up/Down buttons to navigate between these options and the Shutter/OK button to confirm.
Connect the camera to a computer using the USB cable. Four options will appear: MSDC, PC Camera, Working, and Charging.
The camera is a sensitive electronic device. Handle it with care and avoid dropping it. Keep it away from strong magnetic fields or radio signals, as these can affect sound and image quality or overall functionality. Do not expose the camera to direct sunlight or high temperatures. Store the camera in a dry and protective area.
The camera contains a lithium battery. Do not attempt to open the product or expose it to heat, water, moisture, or direct sunlight. Exercise caution when charging batteries and keep them away from children.
The camera will automatically stop recording if the memory card is full. Regularly check and manage the storage space on your Micro SD card to ensure continuous recording.
Specifications and features may be subject to modification due to upgrading or updating. Refer to the actual product as the standard form.
For further information or service, contact the Customer Service Department via email at support@safaricam.ca or by phone at 905-513-7733.
| LCD Screen Size | 2.0" |
|---|---|
| Lens | 170° wide-angle lens |
| Waterproof | Yes (up to 30m) |
| Storage Media | MicroSD card |
| Battery Life | Up to 90 minutes |
| Connectivity | Wi-Fi, HDMI, USB |
| Storage | MicroSD card |