39
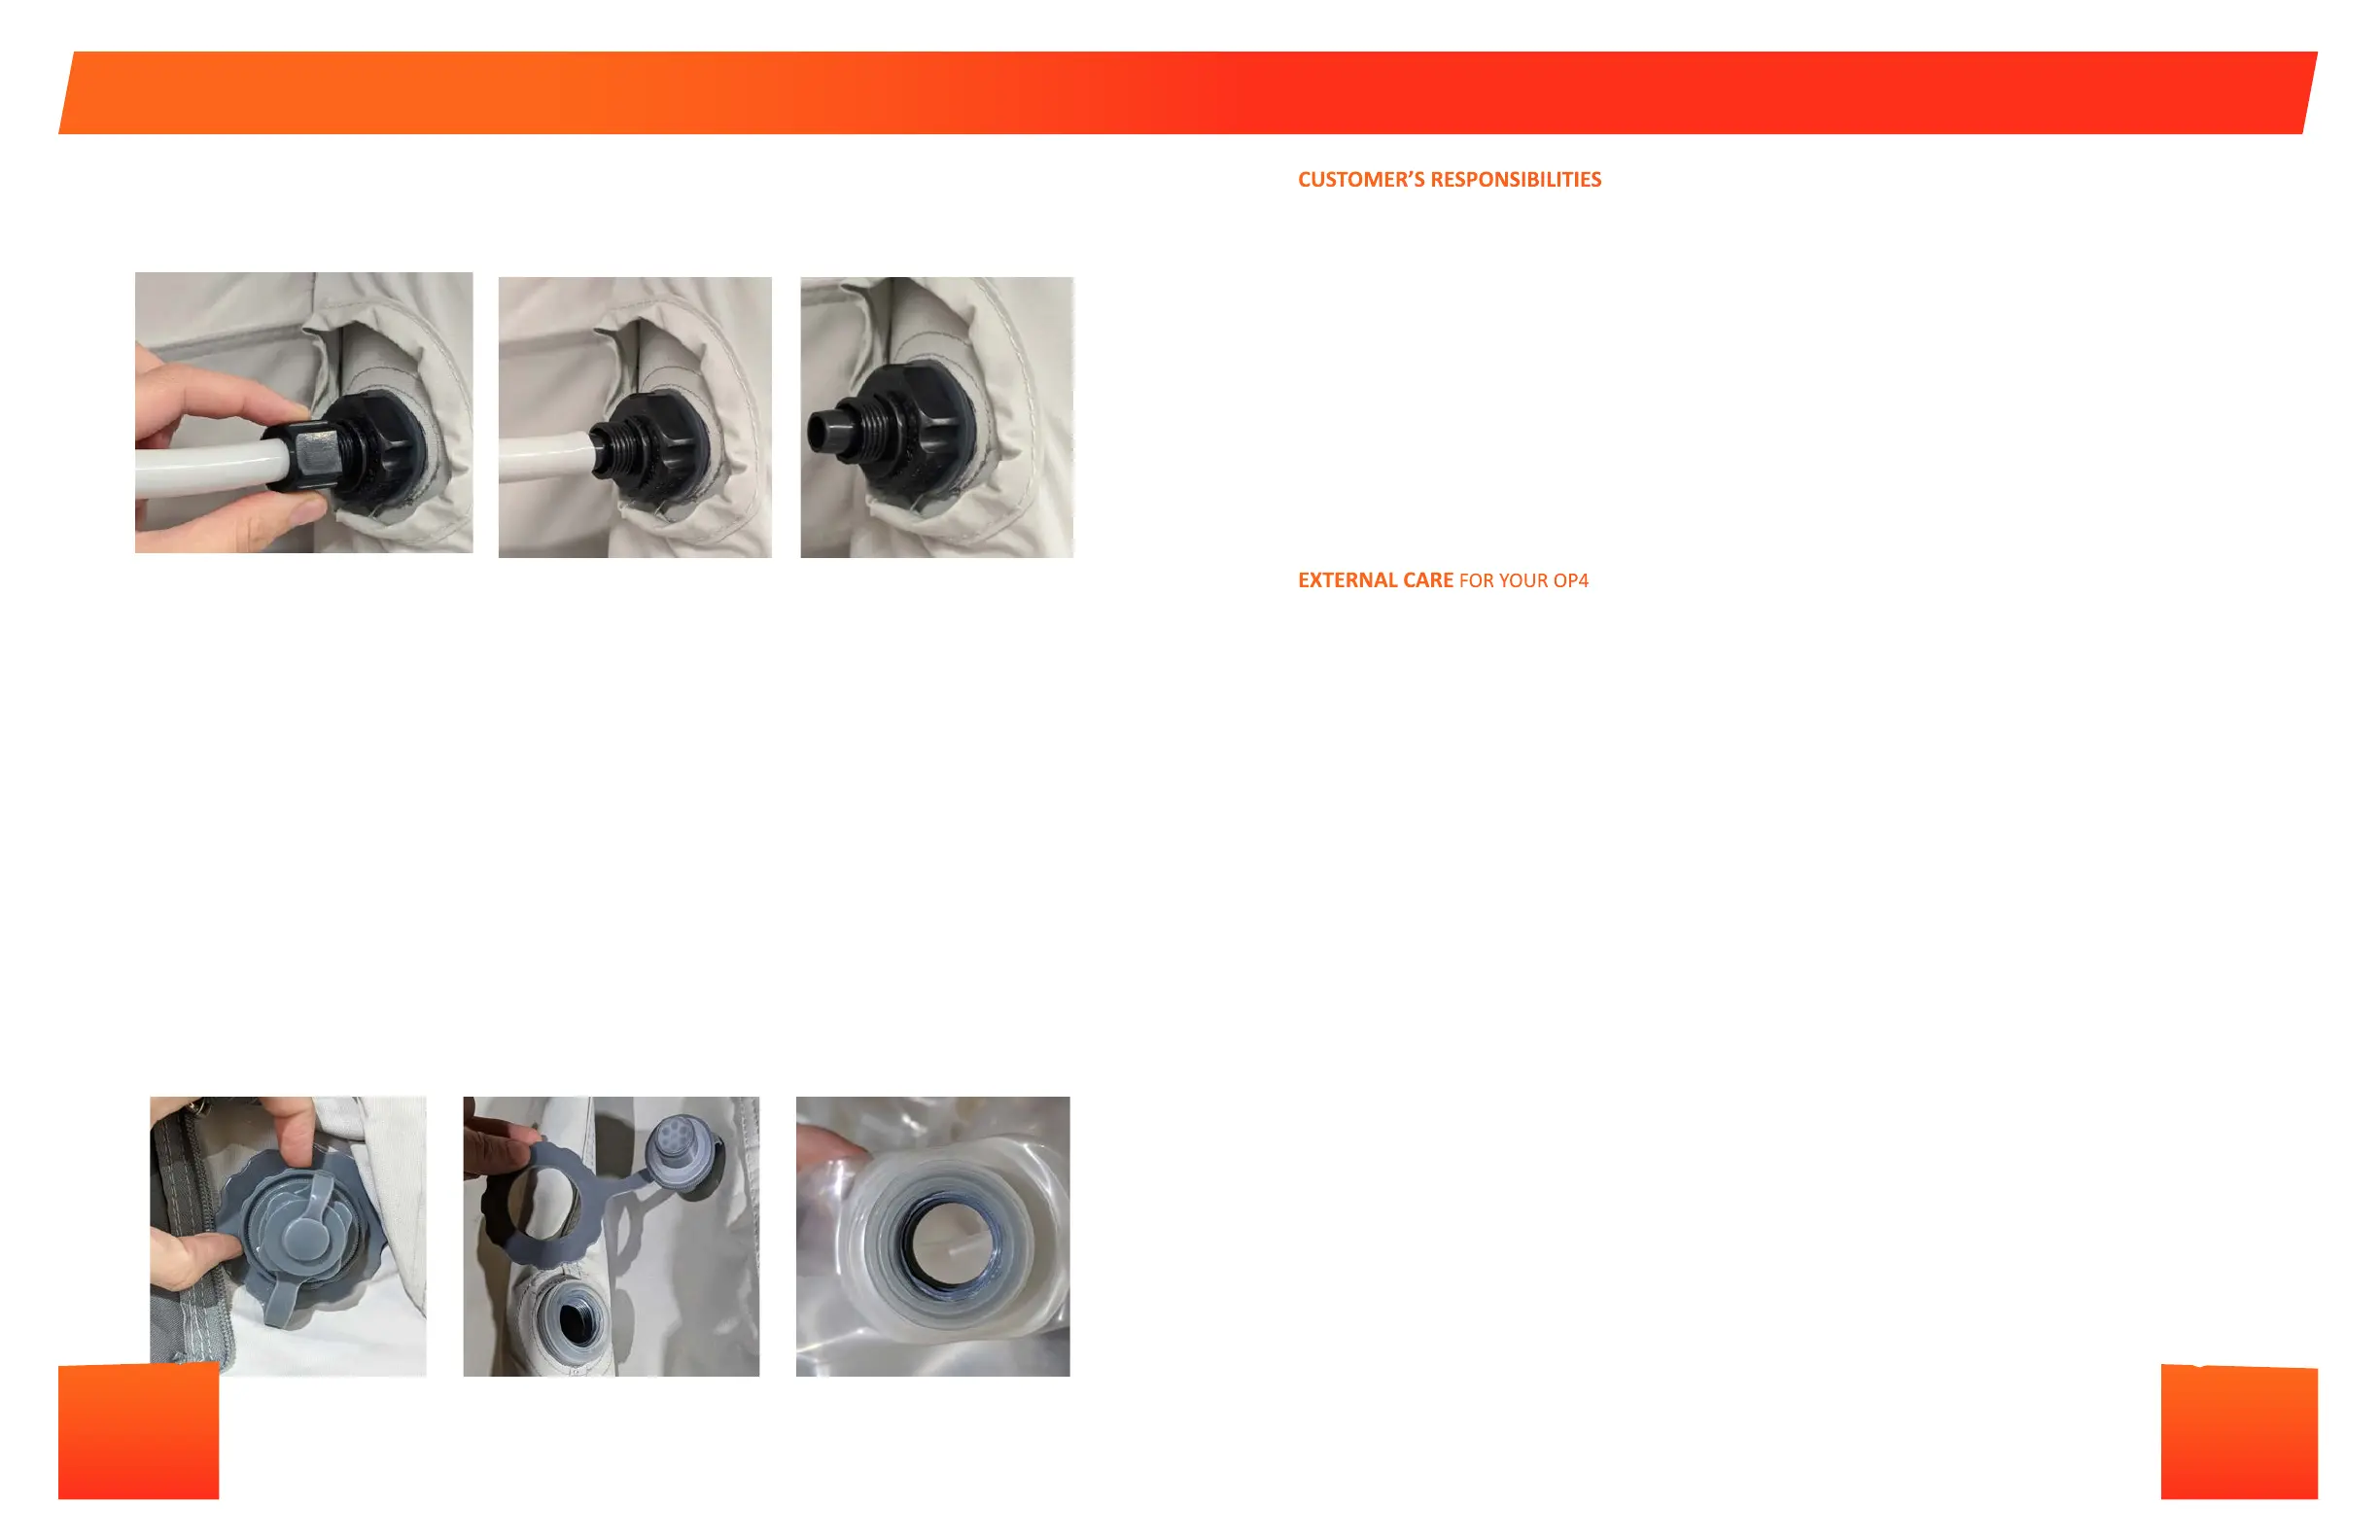
3. Disconnect the faulty beam from the AIR transfer hoses connecng it to the rest of the tent. Make sure the isolaon
valves are in the closed posion on both sides of the AIR transfer hose. Unscrew the front part of the isolaon valve unl
you can slide it along the gray hose. Pull the gray hose o of the valve. It is not screwed or glued in place, just a ght t.
Take care not to damage or stretch the gray hose and do not use tools to pry it o.
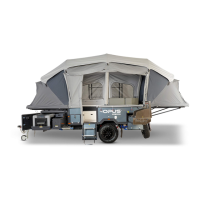
4. If the air beam you are replacing is 1T through 5T then you will need to disconnect the exterior quick release valve.
Unscrew the valve including the larger retaining nut at the back of the valve. This will allow you to push the rubber part
of the valve connected to the air beam through the main tent and disconnect it from the inner protecve layer.
5. You should now be able to remove the faulty AIR beam inside the inner protecve sheath. Please note that it may be held
in place by Velcro at the ends. You can now unzip this and remove it for inspecon and patching or replacing.
6. Next, take your repaired or replacement AIR Beam and insert it back into the inner protecve sheath. Take care to avoid
damaging the exposed rubber beam and do not catch the beam in the zip. Make sure there are no twists in the air beam
and that the valves properly t through the apertures in the sheath.
7. Re-insert the beam into the main tent. If the beam is 1T through 5T you can start by feeding the quick release valve back
through to the exterior of the tent and replace the retaining nut and valve.
8. Re-connect the AIR transfer hose on the main tent to the new beam. Push the gray transfer hose over the isolaon valve
on the new beam and screw the front part of the valve back in place on the valve. Please note that you may nd this part
on the isolaon valve on your new AIR beam too - of so, please retain this as a spare.
9. If you are sased the replacement AIR beam has been inserted correctly and the tube is fully inserted into the valve,
zip the new beam inside the outer protecve layers aached to the tent and replace the Velcro straps. Posion the ends
against the Velcro on the other beams or the interior furniture as required.
10. Open your isolaon valves on the new beam and on the connecng AIR beams. You should hear and see the new beam
ll with air quickly. Depending on which beam you are replacing, you may need to open the rest of the isolaon valves
and press the AIR compressor buon to fully inate the tent.
CUSTOMER’S RESPONSIBILITIES
In order to ensure you get the most out of your OP4 and that warranty claims may be processed in a swi and mely
manner, we ask that our customers adhere to the following guidelines:
1. Regular and proper maintenance of your OP4, including but not limited to the steps outlined in this user manual. If
you have maintenance or service quesons not covered by this manual OR you noce something out of the ordinary
with your camper please contact your dealership for more informaon This includes scheduled maintenance of
your OP4 and addressing any issues as they arise and without delay
2. Get to know your OP4 well. By learning about your camper and its components you will get an enhanced user
experience and avoid issues arising from mis-handling as well as become more likely to spot if something requires
addional servicing
3. It is the responsibility of the OP4 owner to ensure all warranty work is completed by an approved OPUS dealership.
Failure to do so may result in incomplete or refusal of warranty claim repair cost reimbursement.
Any modicaons without wrien consent from OPUS Camper could result in loss of warranty coverage. Contact us or
your dealer before compleng any work.
EXTERNAL CARE FOR YOUR OP4
• Closer and more thorough inspecon of your OPUS exterior will be required aer extended trips and a higher amount
of tough, o-road runs. Inspect the outside panels of your OPUS® including the roof (bed lids) for any damage, cracks
or wear. Proper maintenance of seals is necessary to keep moisture from entering and causing severe damage such as
rot, mold or mildew. If you nd missing, damaged, dry, cracked or weathered seals, reseal or replace as necessary by
contacng your purchasing dealership. Check with your dealer for the type of caulking required for and correct methods
of resealing or replacing.
• Inspect the sealant around the panels to verify that there is adequate bonding around the body panels and exterior
features such as the front storage box/fridge cabinet. This is especially important aer an impact/accident to the camper
to ensure the integrity of the body’s resistance to water ingress.
• Regularly check the seals (inner and perimeter) of the camper, to ensure there has been no damage. Ensure your OPUS®
is packed properly on level ground to seal the camper and prevent water ingress. Failure to properly maintain your seals
may be classed as neglect of maintenance and result in a decrease in coverage under your warranty
• Keep the body and the roof of the camper clean, it is best to clean any mud and dirt o the camper immediately aer
every journey to maintain its clean nish.
• Prolonged exposure to mud, dirt and salt may deteriorate the nish of the camper.
• Extended exposure to sunlight, air pollutants and excessive moisture can also negavely impact the nish of the camper.
We recommend regular washing and protecon during storage to maximize the lifespan of the nish.
• Inspect the condion of the frame, under-body, suspension and chassis regularly to keep it clean and address any damage
that may lead to rust. This is parcularly important to complete aer each tough o-roading run or when driving during
winter when road salts are in use. Always clean down your trailer fully if you have driven in snow, mud or wet condions
and is road salt use is suspected.
• The body of the camper can be washed with soap and water using a so sponge. Rinse the camper thoroughly aer
washing. A damp cloth may be preferred especially for small spots and dirt. Do not use a pressure washer as this can
damage the nish. Avoid spraying water into vents and seals.
• Specialist products such as ‘Waterless Wash and Shine’ products may be used where/when adequate water is not readily
available. Read and follow the instrucons carefully and it is advisable to try any product to be used on the camper on a
small inconspicuous spot to ensure/verify it is suitable before full use.
• Any form of damage or scratch to the paint work or nish of the camper on the body may be repaired or cleaned by using
a suitable ‘touch up’ sck/paint. Contact OPUS® camper directly for further informaon.
• If your camper has been vinyl wrapped to a custom color care must be taken to prevent peeling of the wrap if a scratch or
tear has occurred on the body panel.
CARE AND MAINTENANCE
38
 Loading...