14
15
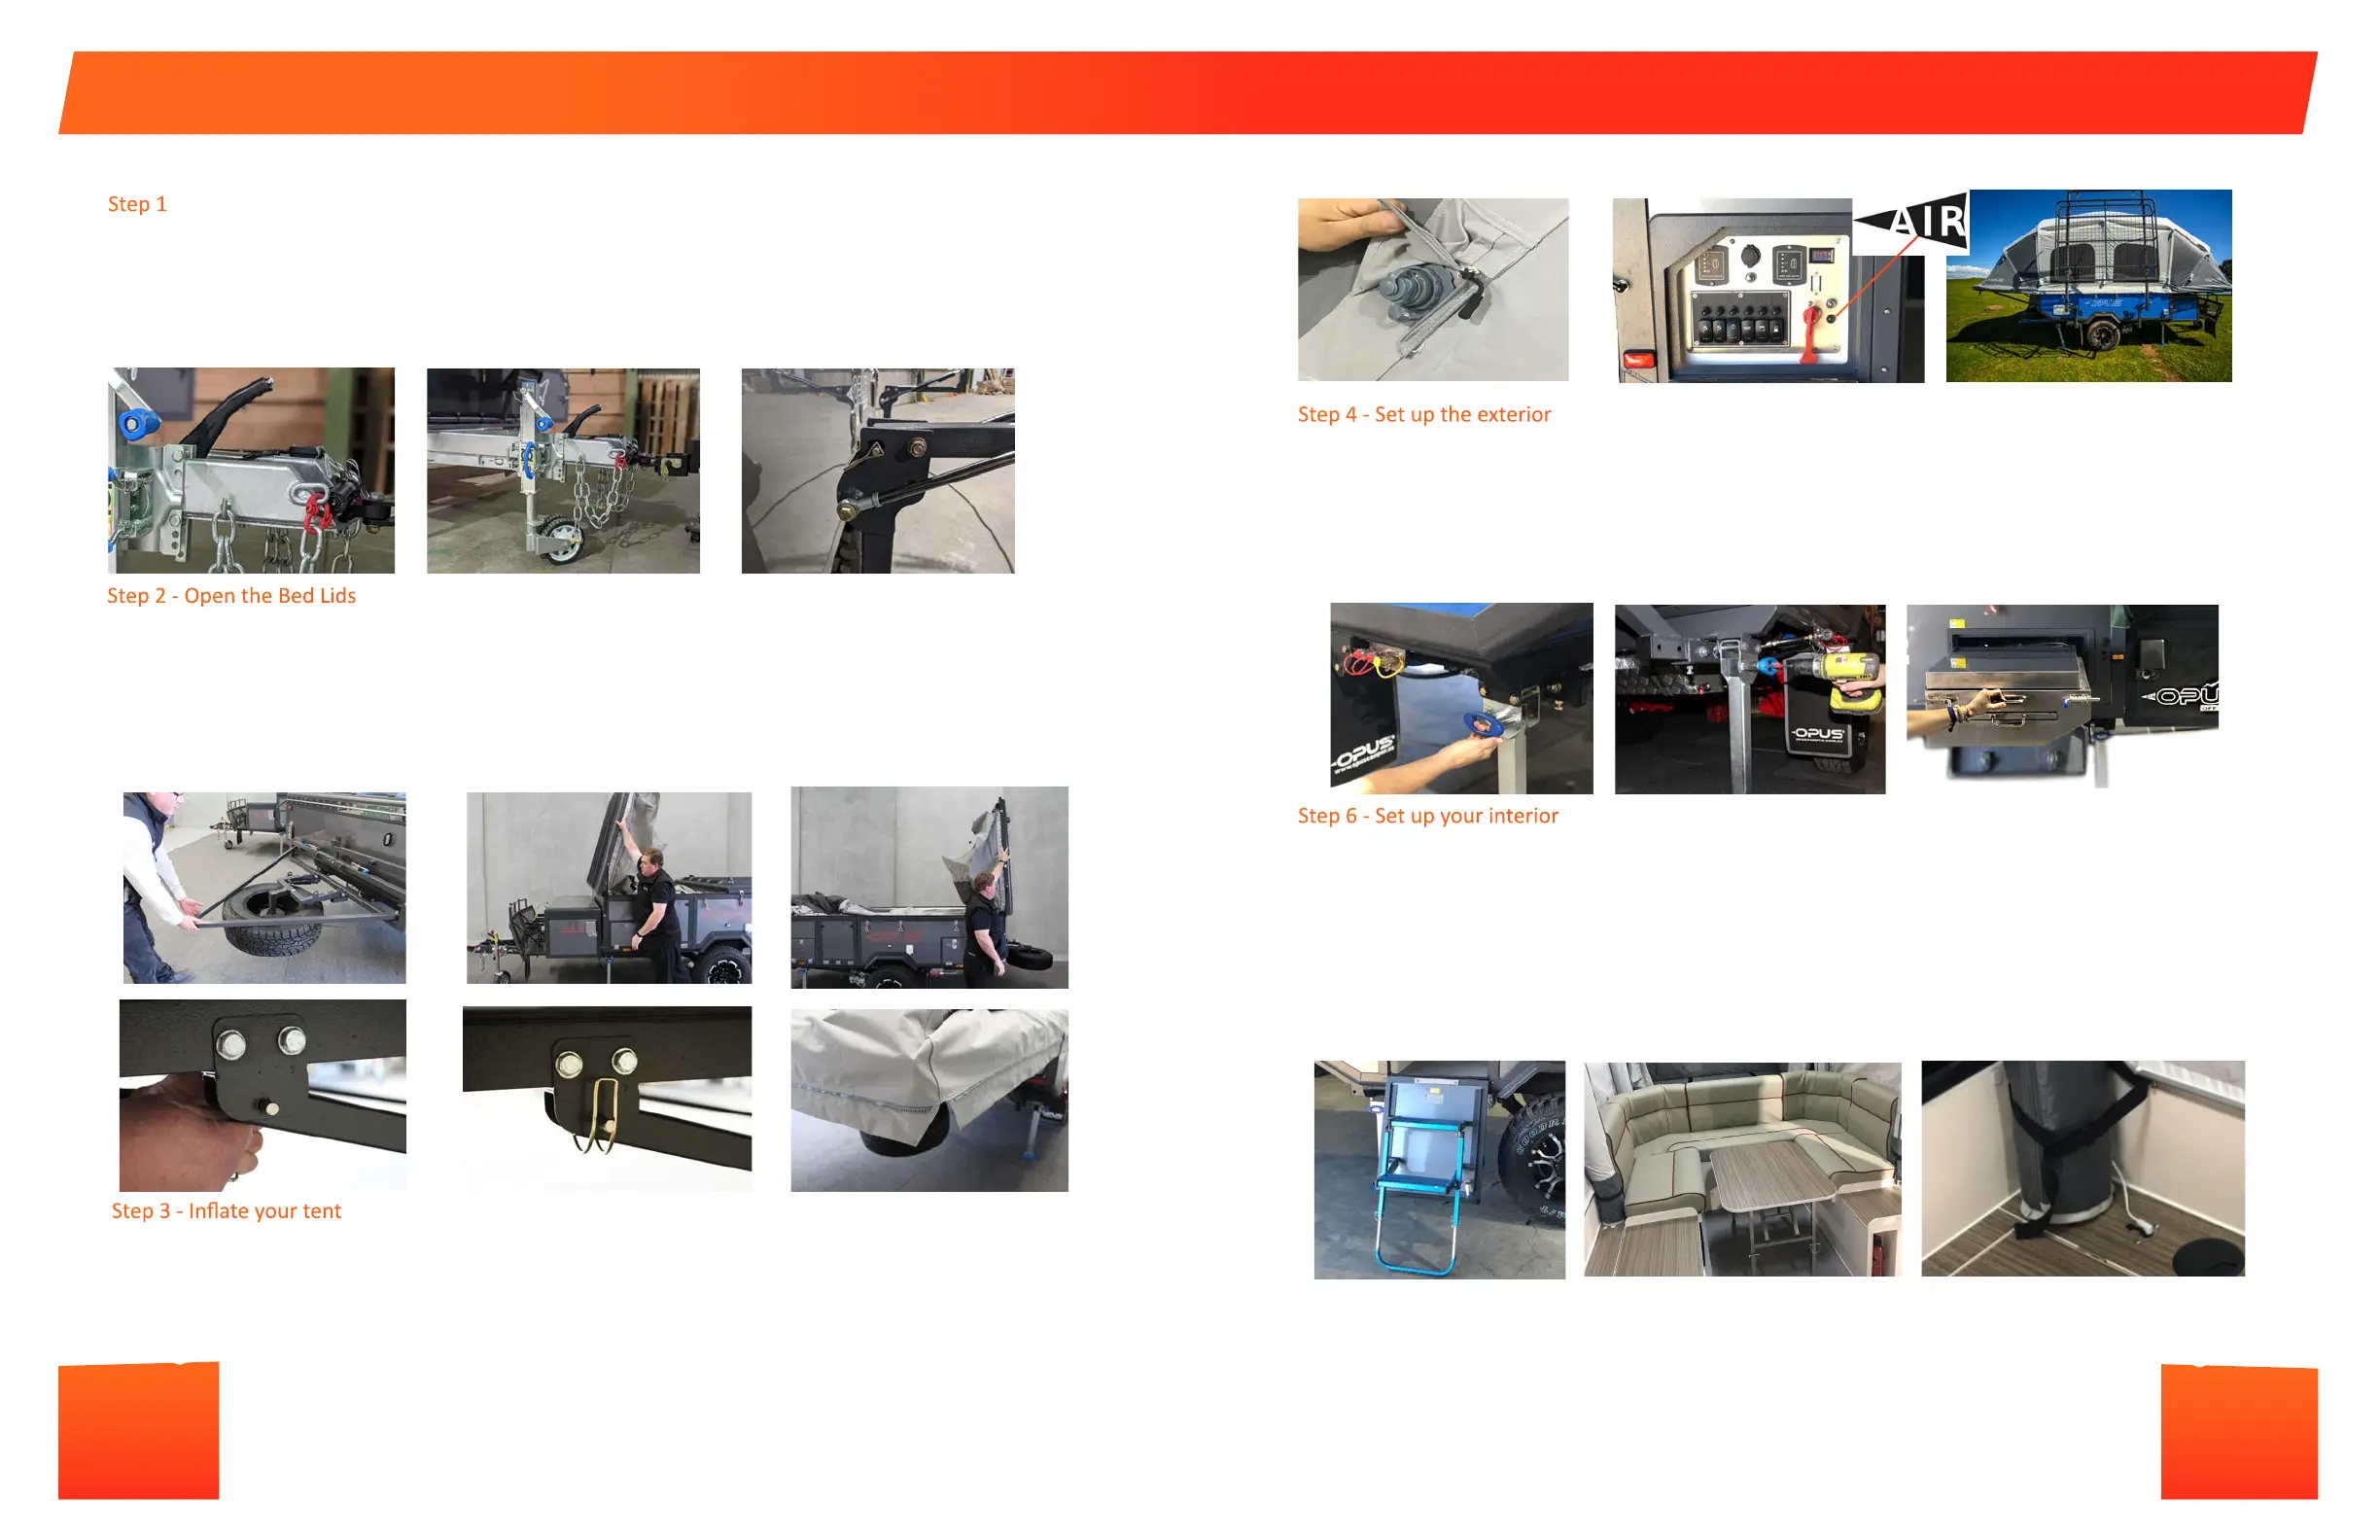
SETTING UP YOUR OPUS
Step 4 - Set up the exterior
• Whilst the tent is inang, level and stabilize the trailer. Fold down the stabilizer leg using two hands; one to pull out
the blue handle and the other to support the weight of the leg into the vercal posion. This helps prevent damage to
the locking pins.
• Use the included corner steady winder or 3/4’’ hex socket cordless drill/driver aachment, wind down each corner
steady leg unl it touches the ground.
• Depending on the terrain, you may need to adjust each corner to level the OPUS® to achieve a good level.
• While your tent is inang you can use this me to set up your kitchen. See page 20 for more instrucons.
Step 6 - Set up your interior
• Use the triangle-end key to turn your door latches and open the door. Take care to hold the weight of the door as you
fold it down to prevent it swinging down and causing injury. Adjust the height of the steps as required by unhooking
the pins, sliding the legs out and replacing the pins.
• Turn the lights on via the control panel. The foot-well lights are controlled by the dimmable light switch on inside
on the right of the door. Connect the interior ceiling lights into the 12v mini outlet. The ceiling lights are controlled
individually via switches on their lines. The exterior wall light by the kitchen is controlled by the toggle switch next to
the dimmable light switch.
• Set up your sofa. Start with the center-back cushion, followed by the corner back cushions, then the side-back
cushions. Fold out the legs of the table. Adjust the height of the table by pulling out the pins and extending the legs.
Step 1 - Prepare to deploy your camper
• Once you have posioned your OPUS® in the desired locaon, engage the handbrake.
• Raise or lower the tongue jack wheel to level your OPUS® length ways.
• Remove all items from the Cargo Rack. Un-clip the securing latches on the passengers side. On the drivers side remove
locking pins and unfold the Cargo Rack and secure the locking pins back in place.
• Un-clip the spare wheel carrier and swing it down to the horizontal posion, taking care to support the weight of the
spare wheel carrier so that it does not swing free and fall whilst out of control.
Step 2 - Open the Bed Lids
• Open the front lid through 180°. Gas struts are ed to support the weight of the lid at this stage. Secure the front lid
to the stone guard frame with the latch and secure with the retaining pin.
• Repeat the process with the rear lid and fold out the two rear support legs. Secure the legs into place by inserng the
D-pin clips through the aligned holes in the lid and locking the clip.
• At this stage walk around the OPUS® and inspect the tent to ensure that the canvas is properly located within the
aluminum channels and that no part of the tent is caught or snagged. Fit each corner of the canvas over the corner of
each bed tray. The seam on the canvas should line up with each corner of the bed lid.
Step 3 - Inate your tent
• Ensure all ve of your quick release valves on the driver’s side are closed.
• Open the control panel door and if not already connected, insert and turn the red turn-key to power-on your OPUS.
• Press the Air Inaon buon on your control panel to acvate your compressor.
• Wait for the tent to inate to its full height before entering the camper. The compressor may sll be running aer
the tent has extended to its full height; this is normal and is simply the compressor increasing the PSI to the required
seng to make the Air Poles appropriately inated. Once the correct air pressure is achieved the compressor will shut
o automacally. There is no need to press the buon again.
IMPORTANT: Do not set up the interior of the camper unl the tent has inated to its full height. This can be
idened by the visual ‘popping-up’ movement of the camper and by the straightening of the air poles.
For informaon on seng up your water system, propane system, kitchen, accessories and electrical
system please see the relevant chapters of this manual.
 Loading...