5
User Interface
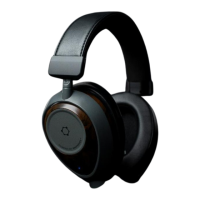
Fitting the Headphones:
Ensure proper fitting of your Ora Headphones. Left / Right indications are located inside the ear pads.
Adjust the headband to the appropriate length before placing them on the head. The GQ™ headphones are
designed to customize to your head. The headphones should sit high and tight with the band barely
touching the top of the head. The ear cups should fully surround the ear. Most of the force should be on the
ear pads, not on the headband. Adjust the angle of the ear cups using the sliders to ensure the pressure is
evenly distributed around the ear pad. To test the fit, rotate the cups back a bit and make sure the rear of the
ear pad is sealed against the head, behind the ear.
The GQ™ headphones use a flexible spring steel band to provide the user’s desired “clamping force”. The
spring steel can be flexed to provide the desired tension. If the headphones are too tight, flex the band out a
bit. If they are too loose, twist the headphones in for a snug fit. The spring steel band will flex and flatten for
wider heads, this keeps the force perpendicular to the head regardless of head size. The curved metal
sliders should be extended to produce a comfortable angle of the ear cups to the head for your individual
head size.
Button (Left Ear Cup):
Hold 5 seconds to turn on
Hold 10 seconds at start-up for forced pairing mode
Press once to pause playback
Press once to restart playback
Press once to answer call
Press once to hang-up call
Hold 5 seconds to turn off
Track Pad (Right Ear Cup):
Swipe Forward for skip-track
Swipe Backward for back-track
Swipe Up for volume increase
Swipe Down for volume decrease
LED (Right Ear Cup):
Blue: Power On
Blink Blue-Green: Pairing Mode
Blink Blue: Connected
Red: Shutting Down
Blink Red: Battery Low
With USB-C (Red): Charging
With USB-C (Green): Fully Charged
Audio Jack (Right Ear Cup):
⅛” (3.5mm) TRS connector
(Microphone is digital – no analog mic connection)
USB-C Connector (Left ear Cup):
USB-C for charging only
Microphone (Right Ear Cup):
 Loading...