4
- Locate the bearing assembly in the lower section of the packaging. Remove the 3
mounting screws.
- Locate the tool kit in the lower section and select the appropriate allen key...
9/64th
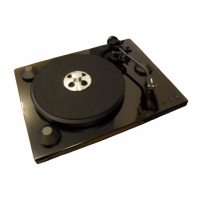
- Lift the subchassis straight up and mount the bearing assembly from underneath
(ground lug side). The bearing assembly can only be mounted in one position
Note: Important, the main bearing mounting flange is marked with a red dot. When
installed this red dot must be on the axis of the motor pulley and the platter
spindle. Any other positionning will impair the operation of your Delphi.
- Set the subchassis aside.
... adjust the plinth assembly
- Remove the styrofoam support blocks from around the suspension posts.
- Remove the suspension modules ( ie. the suspension housing, the spring and all
related parts ) Remember that each module has or could have a different color
coded spring. The modules have to go back on the same stem they came from.
- Remove the protective film from around the acrylic base.
- Level the plinth by turning the adjustable feet below.
Note: If you do not have a small carpenter's level to do this job, use the styrofoam
blocks as they were originally installed around the three suspension posts.
Seat the subchassis evenly on the 3 blocks and use the spirit level on the
subchassis to level the plinth.The suspension modules are not required for
this operation.
... install the tone arm and phono cartridge
Note 1: The tonearm installation and calibration will be easier and safer with the
sub-chassis resting on the foam shipping blocks as described earlier.
Note 2: The drive belt should not be used for this operation
Note 3: Do not pour the oil in the bearing well for this operation.
Note 4: Handle the platter installation carefully to prevent any damages to the
bearing assembly.
- Install the platter without the drive belt.
- Place the tone arm mounting board loosely in the sub chassis mounting ring and
determine the correct way to mount the arm to the arm board.
- Mount the tone arm to the pre-cut tone arm board.
- Install the tone arm following the manufacturer’s recommendations.
- Properly secure the tone arm mounting hardware.
... install the tone arm and phono cartridge ...