EasyManua.ls Logo

oraimo OIM-812A - User Manual

oraimo OIM-812A
11 pages
Print Icon
To Next Page IconTo Next Page
Loading...
ICE MAKER
OIM-812A
User Manual
contact@oraimo.com
us.oraimo.com
Scan to Visit Our Website
Question and Answer IconNeed help?

Do you have a question about the oraimo OIM-812A and is the answer not in the manual?

Summary

Important Safety Instructions

Intended Use

Defines the intended household use and user restrictions for the ice maker.

Electricity Safety

Covers essential electrical precautions, including plug handling and socket usage.

Related to Use

Provides guidance on product placement, operation, and maintenance to avoid damage or hazards.

Specifications

Lists key technical details of the OIM-812A ice maker, including power and capacity.

Knowing Your Ice Maker

Control Buttons Overview

Details the functions and operation of the ice maker's control buttons.

LED Display Indicators

Explains the meaning and function of each indicator light on the LED display.

Using Your Ice Maker

Getting Started

Provides initial setup steps and crucial pre-operation guidelines for the ice maker.

Manual Water Addition

Instructions for filling the water tank manually for ice production.

Automatic Refilling Setup

Guide on how to connect the ice maker to a water supply system for automatic refilling.

Cleaning and Maintenance

Self-Cleaning Cycle

Instructions for initiating and performing the self-cleaning cycle for hygiene.

Regular Cleaning Procedure

Steps for routine cleaning of the ice bin, water filter, and water tank.

Scale and Mineral Build-up Removal

Method for deep cleaning to remove scale or mineral deposits using vinegar.

Troubleshooting Guide

Ice Maker Not Working or Stops Suddenly

Addresses common issues causing the ice maker to stop functioning unexpectedly.

Noise During Ice Making

Explains normal operating sounds and potential causes of unusual noises.

Water Leaks

Troubleshooting steps for identifying and resolving water leakage issues.

Ice Cubes Easily Melted

Explains why ice cubes may melt and how to prevent it.

Warranty and Service Information

Normal Ice Making Sounds

Describes common sounds produced by the ice maker during operation and their causes.

Warranty Coverage Details

Outlines the terms and conditions of the Oraimo ice maker's 12-month warranty.

Warranty Exclusions

Lists conditions under which the product warranty will not apply.

Overview

This document provides a comprehensive user manual for the Oraimo OIM-812A Ice Maker, detailing its function, usage, and maintenance.

Function Description

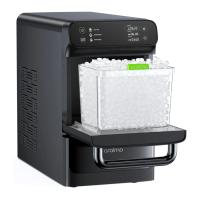
The Oraimo OIM-812A is an automatic ice maker designed for household use. Its primary function is to produce nugget ice efficiently. The device features a control panel and display for easy operation and monitoring of its status. Key indicators include "Ice Full," "Add Water," and "Defrosting," which provide real-time feedback on the ice maker's operational state. The "Ice Full" indicator illuminates when the ice bin is full, prompting the user to remove ice. The "Add Water" indicator signals when the water tank is low, requiring a refill. The "Defrosting" indicator activates during the automatic defrosting cycle, which typically lasts between 30 to 45 minutes, during which other buttons are unresponsive. The ice maker is equipped with an ice full sensor and a water level detector to ensure optimal performance and prevent issues like overflow or running dry. It also includes a water filter to improve ice quality and prolong the device's service life. The front door features a transparent window, allowing users to visually monitor the ice production process.

Usage Features

The ice maker offers several user-friendly features for operation and convenience. Getting Started: Before initial use, it is crucial to set the ice maker upright on a flat, level surface for at least 2 hours to allow the refrigerant fluid to settle, especially if it was tilted or placed upside down during transportation. The device requires at least 6 inches of clearance on the sides and back for proper ventilation. Manual Water Addition: Users can manually fill the water tank by opening the front door, pulling out the ice bin, and pouring potable water below the MAX line. Distilled or demineralized water with a hardness of less than 12 grains per gallon and a temperature between 40-82°F is recommended for best results. Automatic Refilling: For continuous ice production, the ice maker can be connected to a water supply system using the included hose. An adapter (not included) may be necessary depending on the water supply system type. It is important not to add water manually when the device is already connected to the water supply to prevent overflow. Connecting to a water filtration system is recommended to avoid blockages from scale or mineral buildup. Control Buttons:

  • ON/Standby: A single press starts the ice making cycle or turns the unit off into standby mode. The indicator remains solid during ice making.
  • Preset/Current Time Setting: This button allows users to set the current time or two preset times for ice making. Pressing it cycles through Current, Preset 1, and Preset 2 settings. The time can be adjusted using the time adjustment button within 5 seconds of the time flashing. Preset times determine when the ice making cycle begins. Holding the button for 3 seconds cancels a preset time. The current time setting is retained for 90 days even if power is disconnected.
  • Time Adjustment: Used to adjust the time period (hour or minute) when setting current or preset times. Pressing it repeatedly during preset time setting will display "cancel" to clear the setting. The preset time is always remembered even if power is disconnected. Ice Production: The ice maker typically starts producing ice within 15 minutes. Once ice cubes are made, they can be scooped out using the provided ice scoop. To prevent melting, ice should be used immediately or stored in a freezer. The ice maker will pause if the ice bin is removed for more than 5 minutes, resuming once it's placed back within the 5-minute window.

Maintenance Features

Regular maintenance is essential to ensure the longevity and optimal performance of the ice maker, as well as to maintain fresh-tasting ice. Self-Cleaning Cycle:

  • Initiation: The "CLEAN" button, when held for 3 seconds, initiates a self-cleaning cycle.
  • Process: The ice maker automatically cleans for the first 3 minutes (with the "CLEAN" indicator solid). After this, the indicator flashes quickly for 5 minutes, prompting the user to confirm a deep clean by pressing the "CLEAN" button again. If no action is taken within 5 minutes, the cleaning cycle stops automatically, and the ice maker returns to standby mode.
  • Reminder: After 100 hours of continuous operation, the "CLEAN" indicator will flash slowly for 30 seconds to remind the user to perform a cleaning cycle. Regular Cleaning:
  • Weekly Cleaning: It is recommended to clean the ice bin and water tank once a week to remove fallen dirt or fibers. This involves unplugging the unit, removing the ice bin and water filter, rinsing them with diluted detergent and warm water, and then cleaning the water tank with diluted detergent, warm water, and a soft cloth. After cleaning, add water to rinse and drain it out.
  • Exterior Cleaning: The exterior of the ice maker should be gently wiped with a soft, damp cloth. Removal of Scale/Mineral Build-up:
  • Procedure: To address scale or mineral buildup, fill the water tank with warm water (around 90°F) below the MAX line. Add distilled white vinegar or a dedicated ice maker cleaner and let it sit for at least 18 hours.
  • Cleaning Cycles: After soaking, hold the "CLEAN" button for 3 seconds to start a self-cleaning cycle. If the "CLEAN" indicator flashes, press it again to continue. This process should be repeated for at least 3 cleaning cycles.
  • Rinsing: After the cleaning cycles with the mixture, drain the mixture and run 3 additional cleaning cycles with fresh water to thoroughly rinse the system. Storage: When not in use for an extended period, the water tank should be drained and cleaned as instructed. The ice maker should then be covered and stored in a cool, dry location away from direct sunlight. Troubleshooting: The manual includes a troubleshooting guide for common issues such as the ice maker not working, sudden stops, noise during operation, water leaks, normal ice making cycle with no ice production, and easily melted ice cubes. For persistent problems, users are advised to contact customer support.

oraimo OIM-812A Specifications

General IconGeneral
ModelOIM-812A
CategoryIce Maker
Water Tank Capacity2.2L
Voltage220-240V
Noise Level≤45dB
Ice Production Capacity12 kg/24 hours
Frequency50Hz