USER’S INSTRUCTIONS FOR PRESSURE SPRAYER
Quick Start Instructions
What’s in the box?
The Pressure Sprayer requires some
assembly before use. These items are
included in the box.
1) Tank (#33)
2) Connecting rod (#2)
3) Wand (#13)
4) Rocker bar (#31)
Inside the Sprayer (Remove the tank
lid – Part #38 – & the lter screen –
Part # 37- to take the parts)
Hose (#19)
Trigger (#14)
Plastic bag with :
The rocker bar fastener (#22)
Nozzle assy. (2 types) (#11)
Split pins (#4 & 40)
Washer (metallic) (#23)
Rocker bar xer (#39)
All other parts are spare parts
(washers, O-rings & cup ring)
1 Ring, rocker bar fixer
2 Connecting rod
3 Guide bushing
4 Splitpin
5 Base
6 Washer
7 Nut
8 Washer
9 Screw
10 Strap buckle
11 Nozzle assy
12 Washer
13 Wand
14 Trigger
15 Screw for switch
16 Wandnut
16-1 Locking sleeve
16-2 O-ring
17 Seal insert
18 Hosenut
19 Hose
20 Carrying strap fixer
21 Carrying strap hook
22 Rocker bar fastener
23 Washer
24 Carrying strap fixer
25 Pump
26 Seal ball
27 Seal valve
28 Seal ball
29 Cup ring
30 Carrying strap
31 Rocker bar
32 Airchamber
33 Tank
34 Felt seal
35 Rocker bar grip
36 Pressure lid of air chamber
37 Filter screen
37-1 Sealing washer
38 Tanklid
39 Rocker bar fixer
40 Split pin
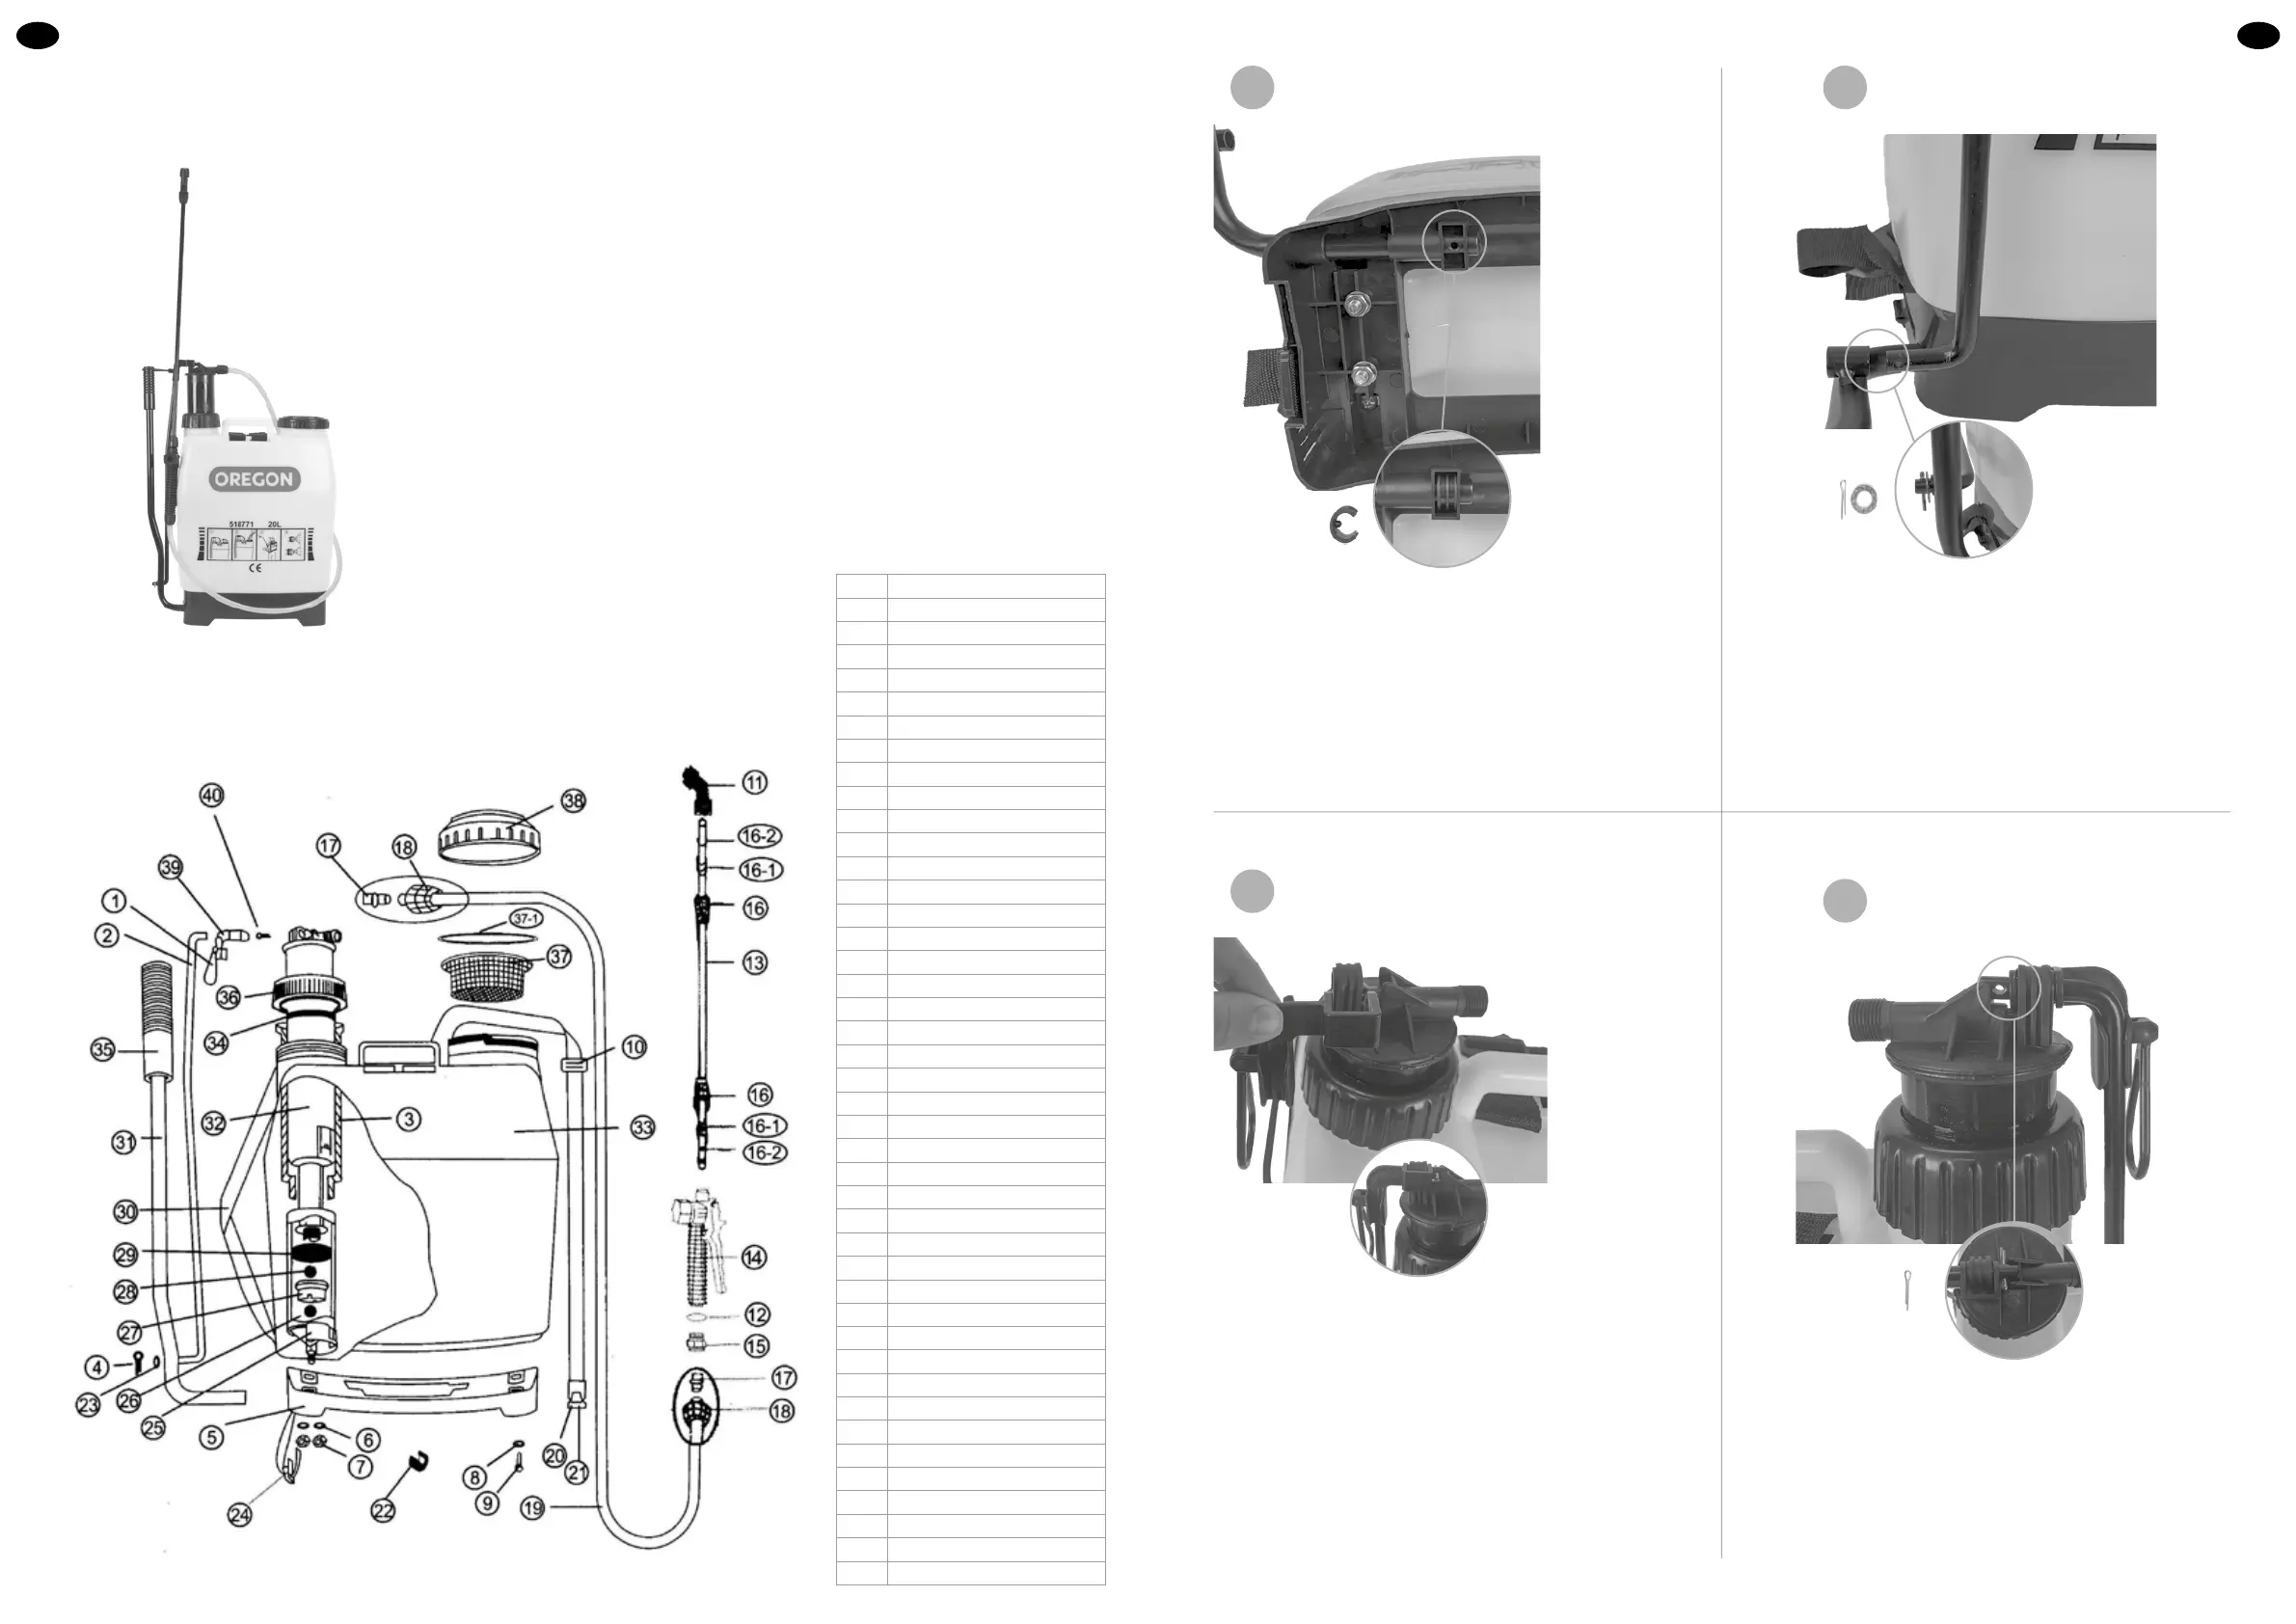
FIX THE ROCKER BAR
STEP 1: Insert the rocker bar (#31) into the hole at the
tank bottom�
STEP 2: Insert the fastener for rocker bar (#22),
fixing the small pin of the fastener into the
small hole of the rocker bar�
THE ROCKER BAR FIXER
STEP 5: Put the rocker bar fixer (#39) onto the top of
air chamber, leaving the little clip pointed
down the outside of the tank�
THE ROCKER BAR FIXER
STEP 6: Lever up the pressure lid of air chamber
(#36) so that the hole of the rocker bar fixer
aligns with the connecting rod� Insert the
connecting rod into the rocker bar fixer�
STEP 7: Fix it using the second split pin (#40)�
ATTACH THE CONNECTING ROD
STEP 3: Attach the connecting rod (#2) to the
rocker bar by the smaller end of the
connecting rod� The long end should be
at the top, facing the pump�
STEP 4: Put on the washer (#23) and insert the
split pin (#4) to secure it�
ENEN
4 5
1-2 3-4
5
6-7
↑
 Loading...