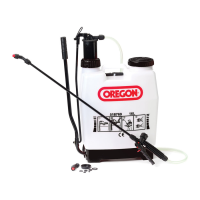
ATTACH THE SPRAY HOSE
STEP 8: Screw the spray hose (#19) to the other side
of the air chamber
STEP 9: Screw the trigger (#14) to the other side of
the spray hose
SCREW THE WAND
STEP 10: Screw the wand (#13) to the trigger (#14),
using wand nut (#16)
ATTACH THE WAND
STEP 11: At the other end of the wand (#13), screw
one of the 2 nozzles (#11), using wand nut
too (#16)�
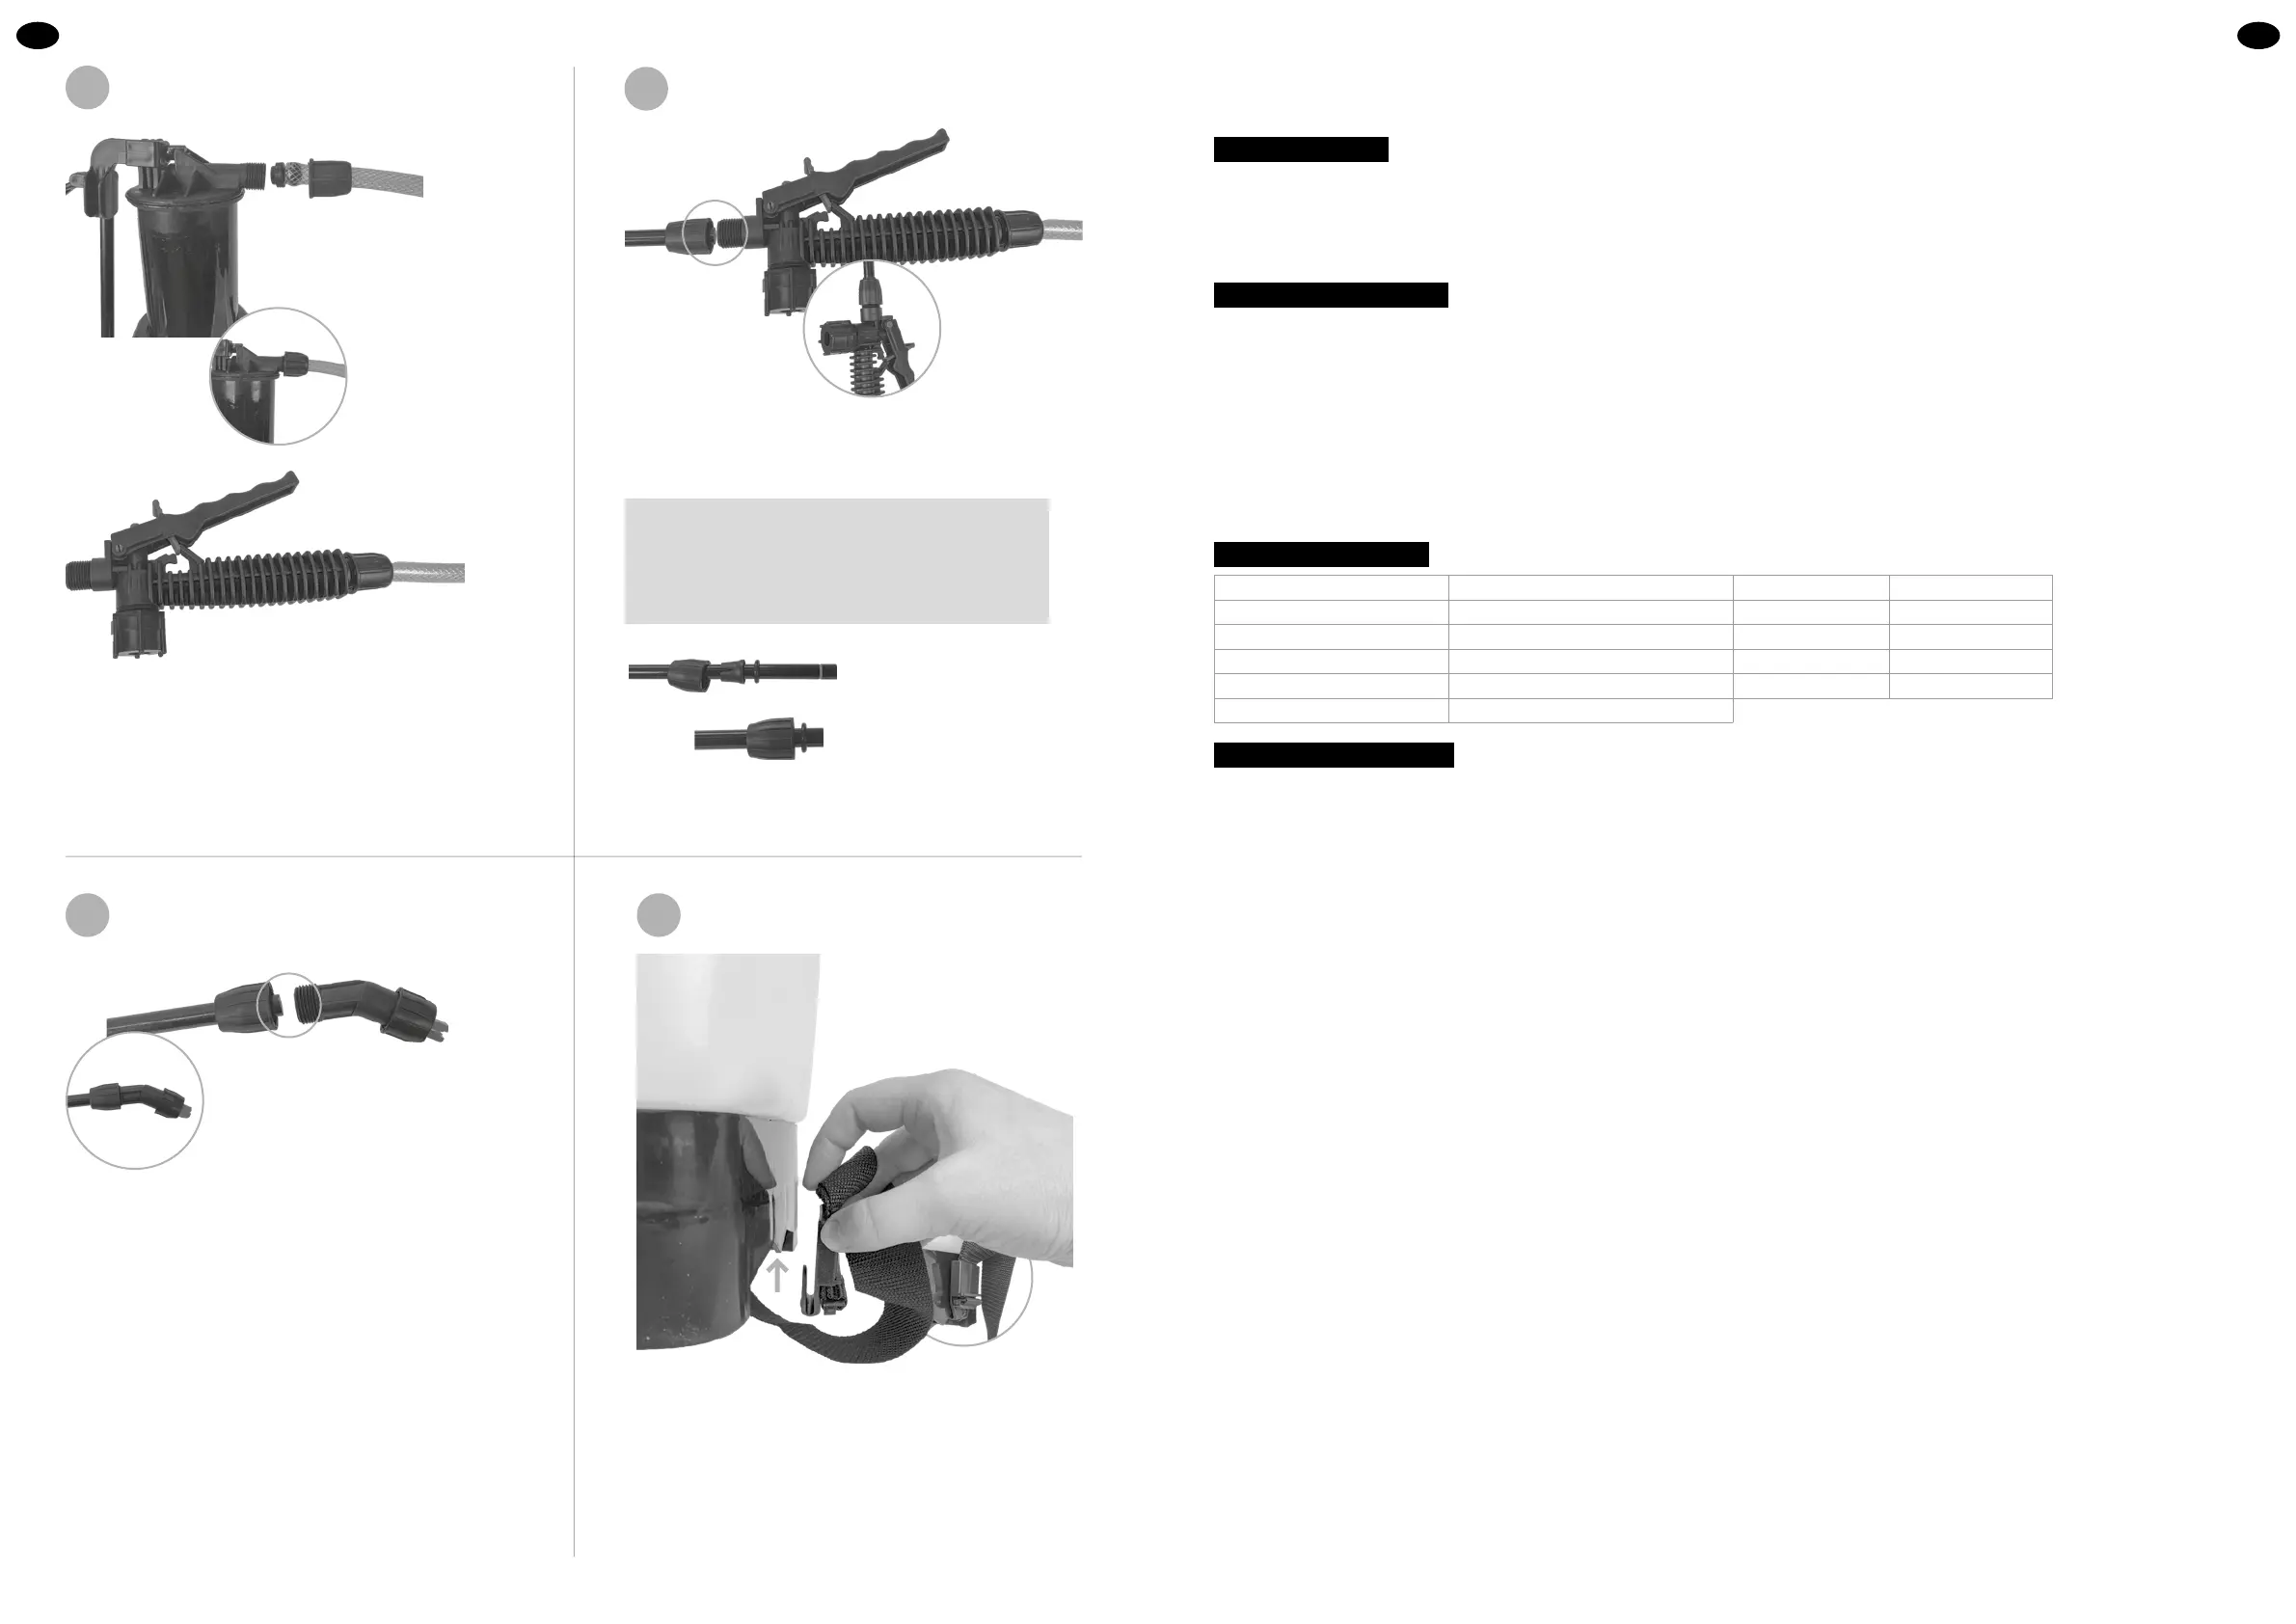
CARRYING STRAP
STEP 12: Clip the carrying strap of the harness to the
bottom of the sprayer�
1� Before attaching the wand (#13) to the trigger
(#14), make sure that the O-rings (#16-2) are seated
correctly at each end of the wand (they should be
seated in the white grooves at each end� You will then
hear a ‘click’)�
↑
ENEN
Model Designation: 578771, 578769
The Oregon backpack sprayer family is economical, safe, highly efficient, and leak proof� Suitable for use with insecticides and herbicides,
as well as environmental disinfection of houses, public areas, farms etc�
PRODUCT FEATURES
The Oregon backpack sprayer family is manufactured with high quality materials� Designed for ease of use, with minimal effort needed to
maintain pressure� Built with ergonomics in mind, the back of the tank is shaped to fit comfortably against the back of the user, giving improved
weight distribution for comfortable operation during extended periods of use� The T-shaped design allows for airflow around the operator’s
back� The tank lid safety valve ensures the inlet of air as well as preventing leaks� There are fill markers on the tank for convenience of use�
The sprayer has fixing brackets for the rocker bar and spraying lance for convenient storage and transport�
MAINTENANCE AND SAFETY
Aer every use, rinse the inside of the tank with clean water�
Regularly lubricate the sealing washer of the air chamber to ensure smooth operation and prevent leaks�
When changing the cup ring at the bottom of the air chamber, take out the air chamber, remove the seal valve, install the replacement cup ring
and reassemble�
Do not smoke, eat or drink while using the sprayer� Always wear protective clothing and do not spray against the wind�
Keep the sprayer out of reach of children, and in a well-ventilated area�
Store out of direct sunlight, and do not expose to extreme cold�
The sprayer is designed for use with most pesticides, herbicides, cleaning agents, and other chemical, but do not use with caustic or corrosive
solutions�
NB� The manufacturer is not responsible for any damage through improper use�
TECHNICAL PARAMETERS
Capacity 16L / 20L Working pressure 0�2-0�3Mpa
Net weight (kg
)
3�4 / 3�5 Lance length 60cm
Gross weight (kg) 3�8 / 4�0 Hoselength 120cm
Packing dimension 36x20�5x53�5cm / 36x21�5x57�5cm Carrying strap 100cm x 3�5cm x2
Air chamber capacity 0�9L Tank capacity 16L / 20L
Max� pressure of air chamber 1�0Mpa
DIRECTIONS FOR OPERATION
1� Open the tank lid, (leaving the filter in place) and pour in the required chemicals�
2� Put the sprayer on your back and adjust the carrying straps for comfort�
3� Pump the rocker bar 6-8 times to pressurise the air chamber�
6 7
8-9
10
11 12
↑
 Loading...