3
Make sure that flames are completely extinguished and that
there is no heat-glow on top of the tanks, and then lift out
fuel tanks.
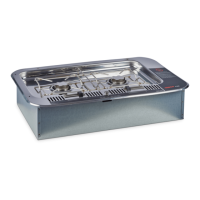
• Hold each tank (one at a time) as shown (Picture 4), then
pour alcohol directly into the opening covered by wire
mesh. Maximum capacity from empty to full is 1 quart.
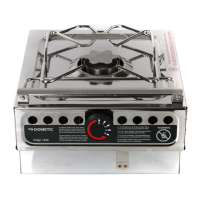
• Check fuel level by tilting the tank on its side vertically as
shown. (Picture 5)
• Hold in this position a few moments. When fuel is visible
in recess, tank is filled to maximum recommended level.
Do not overfill.
NOTE: It is not necessary to fill tank completely to operate.
Stove will operate with less than maximum capacity of fuel.
• Wipe tank dry and replace tank in stove making sure it is
fitted properly in the mounting.
• Close the stovetop by reversing the opening procedure.
Make sure the latch secures the stovetop and that the top is
level.
To Light the Alcohol Burner.
An ORIGO lighter is recommended for lighting purposes.
• Turn knob A to the maximum position to open the burner.
• Place a long match or long butane lighter at tank opening.
(Picture 6)
NOTE: If stove is warm from previous use, burner may
ignite, then immediately go out. In this event, blow down
into the burner opening to dissipate vapor and relight as
above.
To Extinguish the Alcohol Burner.
To Extinguish the Alcohol Burner.To Extinguish the Alcohol Burner.
To Extinguish the Alcohol Burner.
• Turn knob all the way to ”0”.
• Wait a moment, then turn burner back towards ”Max” to
make sure flame is out.
• Turn knob to ”0” again.
• Wait until the stove has completely cooled before closing
the glass top or replacing the cutting board.
Gaskets.
The stove is equipped with a rubber gasket for each fuel tank.
Gaskets are to be installed when the stove will not be operated
for a period of time and will protect against alcohol evapora-
tion.
To install:
• Open stovetop and make sure all parts are cool and place
the gaskets over the tank openings.
• Close the stovetop making sure it is level and that the latch
is properly secured.
Cleaning.
WARNING!
REGARDING CLEANING FLUIDS AND ELEC-
TRICAL COMPONENTS.
SWITCH BREAKER OFF!
• Electrically equipped models: The coil elements can be
lifted slightly from the top to gain access underneath. Do
not force the coils beyond the feel of resistance. To do so
can damage the element.
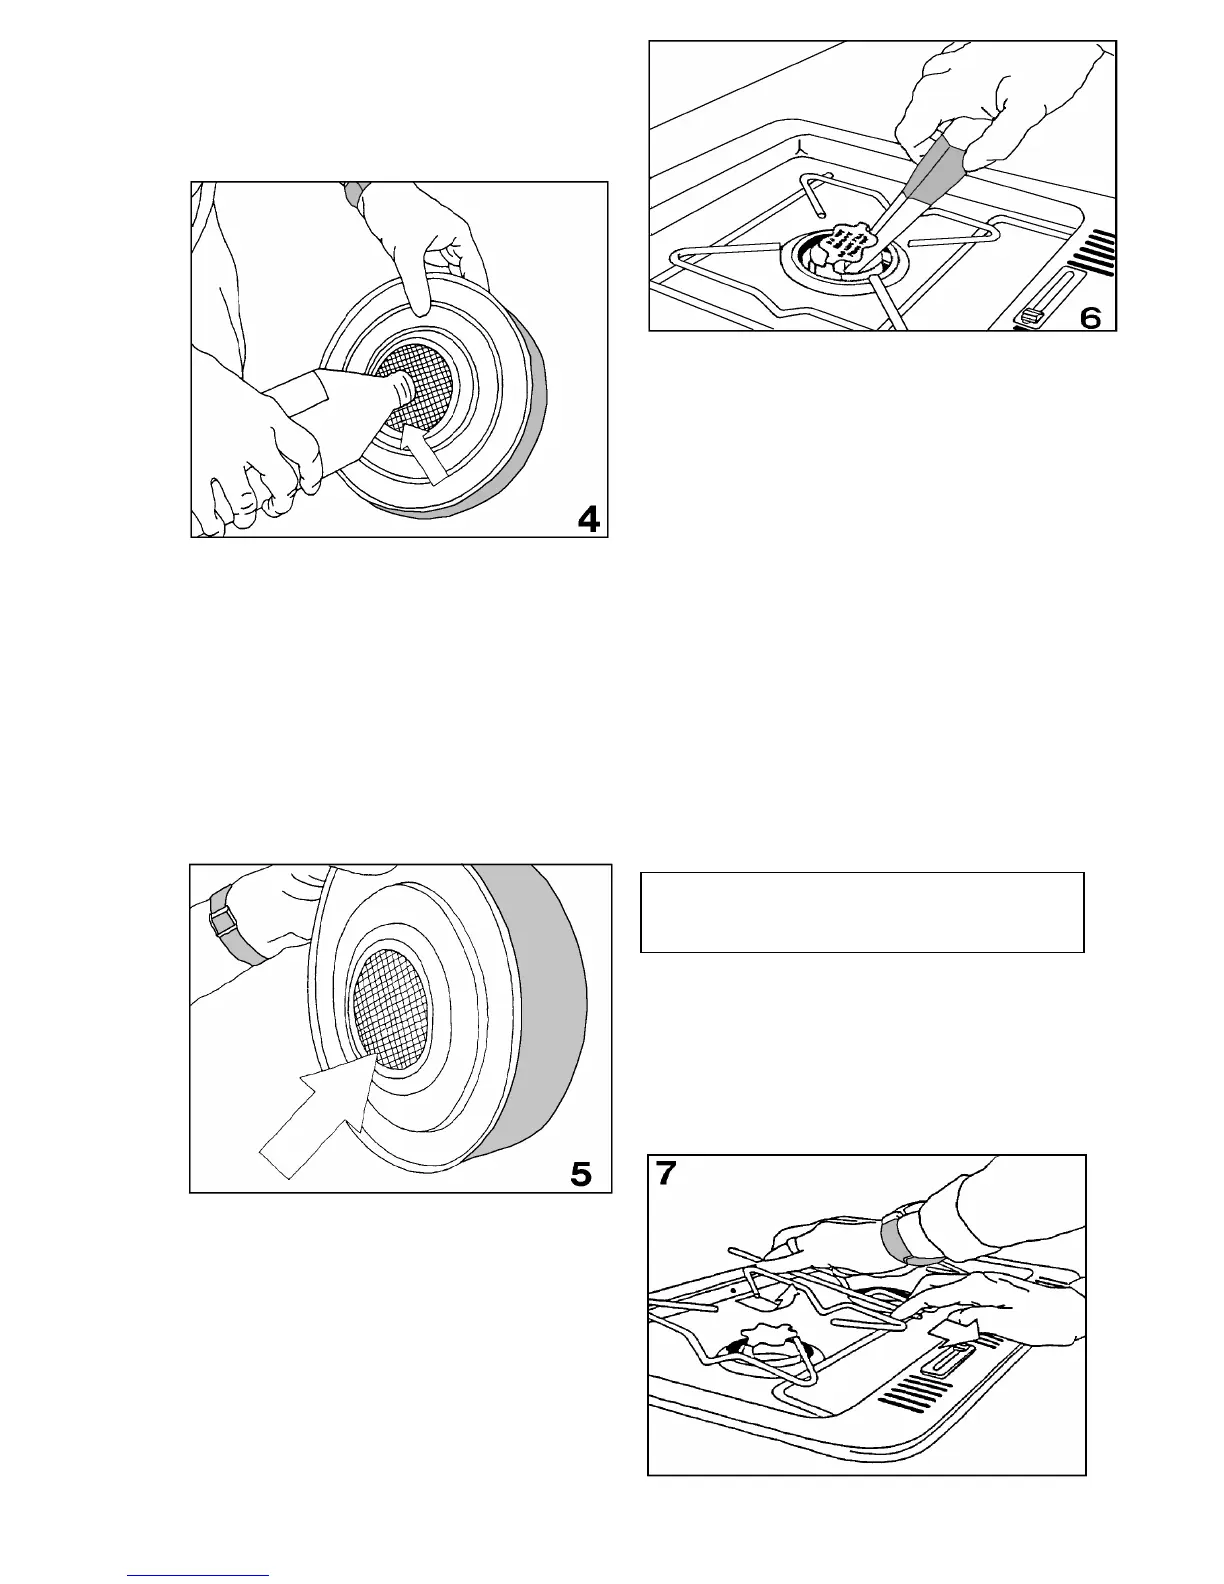
• All other models: Remove the grate. Note the hole at the
back of the cooktop into which the grate retainer fits. To
remove the grate, slide the retainer out of the hole and lift
grate. (Picture 7)
 Loading...