6
ing the power switch to ON (refer to Figure 18). The “1”
position provides dim illumination while the “2” position
provides brighter illumination. Typically the dimmer setting
is used under dark skies and the brighter setting is used
under light-polluted skies or in daylight. Position your eye
at a comfortable distance from the rear of the unit. Look
through the rear of the nder scope with both eyes open
to see the illuminated red dot. The target object should
appear in the eld of view somewhere near the red dot.
4. You’ll want to center the target object on the red dot. To do
so, without moving the telescope, use the nder scope’s
vertical and horizontal adjustment knobs (shown in Figure
18) to position the red dot on the object.
5. When the red dot is centered on the distant object, check
to make sure the object is still centered in the telescope’s
eyepiece. If it isn’t, re-center it then adjust the finder
scope’s alignment again. When the object is centered in
the telescope eyepiece and on the nder scope’s red dot,
the nder scope is properly aligned with the telescope.
The red dot nder scope’s alignment should be checked
before every observing session.
At the end of your observing session, be sure to slide the
power switch on the red dot nder scope to OFF to preserve
battery life.
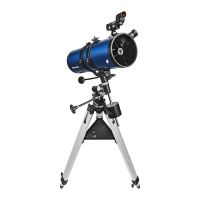
Figure 11.
The assembled equatorial mount, showing
placement of the slow-motion cables.
R.A. slow-motion cable
Dec. slow-motion
cable
Latitude
adjustment
bolt
Latitude lock
knob
Figure 9. Thread the counter-
weight shaft into the declination
housing.
Figure 10. The
counterweight, installed.
Lock knob
Figure 12. Line up the slow-motion cable thumbscrew with the
groove in the gear shaft, then tighten.
Figure 13. The fully assembled equatorial mount and tripod.
Slow-motion
cable
Thumbscrew
Gear shaft
Groove

 Loading...
