Do you have a question about the Orro Switch and is the answer not in the manual?
Essential safety precautions for handling electrical wiring during Orro switch installation.
Lists all components provided in the Orro installation package.
Details the tools necessary for installing the Orro smart switch.
Steps to identify bulb types, calculate total load, and ensure compatibility with Orro's limits.
Safely turn off the circuit breaker for the light switch you are replacing.
Steps to remove the existing faceplate and unscrew the old switch from the wall box.
Take a clear photo of the current wire connections for reference during the installation process.
Guide to identifying and labeling Neutral, Ground, Load, and Line wires using provided stickers.
Strip wires to the correct length and straighten ends for proper connection to the Orro switch.
Steps for connecting neutral and ground wires using provided connectors and extension wires.
How to connect the identified wall wires to the corresponding ports on the Orro Switch.
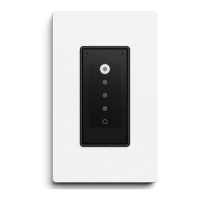
Fit the Orro switch into the box and secure it with mounting screws for a flush wall fit.
Turn power back on and verify the Orro switch screen illuminates.
Instructions for attaching the faceplate mount and snapping the faceplate into place.
Download the Orro app and follow on-screen instructions to finish setup and configure features.
Solutions for common issues where the Orro switch does not power on after installation.
Contact details and support hours for immediate assistance with Orro installation or functionality.
| Connectivity | Wi-Fi |
|---|---|
| Compatibility | Amazon Alexa, Google Assistant |
| Type | Smart Switch |
| Control | App, Voice |
| Power | 120V AC |
| Protocols | Wi-Fi |
| Maximum Load | 10A |
| Voltage | 110-240V |