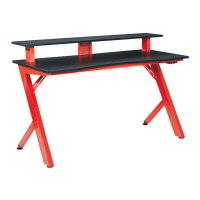
Do you have a question about the OSP Home Furnishings AREA 51 and is the answer not in the manual?
| Product Type | Gaming Chair |
|---|---|
| Style | Modern |
| Features | Adjustable Height, Swivel, Lumbar Support |
| Material | Faux Leather |
| Color | Black |
Critical pre-assembly guidance for unpacking, component identification, and safe handling.
Essential safety rules for product use, including warnings against misuse and suffocation.
Defines the product's intended purpose and restrictions for indoor residential use only.
Visual identification and quantity of all physical parts included in the package.
Detailed listing of all fasteners, tools, and connection hardware required for assembly.
Attaching feet (K) and front foot supports (P) to the leg components (A).
Connecting legs (A) to the frame (B) without fully tightening bolts.
Fully tightening all bolts and nuts to secure the leg and frame assembly.
Mounting brackets (I, J) onto the desktop (C) using screws (2).
Attaching the assembled frame (B) to the desktop (C) using bolts (6).
Connecting the USB charger (M) and USB power adapter (N).
Attaching shelf supports (E, F) to the shelf (D) using bolts (3).
Connecting the LED light tube (H) to the shelf assembly.
Securing the shelf unit (F) to the desk using bolts (5) and screws (2).
Connecting the LED light tube to its power adapter.
Fastening wiring and components using screws (1) and brackets (O).
 Loading...