8
NOTICE
OSSTEM recommends Class B sterilizers as stated in EN13060.
CAUTION
Do not autoclave the product with other instruments even when it is in a pouch. This is to prevent
possible discoloration and damage to the product from chemical residue on other instruments.
Keep the product in suitable atmospheric pressure, temperature, humidity, ventilation, and sunlight.
The air should be free from dust, salt and sulphur.
Immediately after use, the handpiece should be cleaned, lubricated and sterilized. If blood remains
on the external or internal surfaces it can become clotted and cause rust.
Do not heat or cool the product too quickly. Rapid change in temperature could cause damage to the
product.
If the sterilizer chamber temperature may exceed 135°C during the dry cycle then delete the dry
cycle.
Autoclave sterilization is recommended for the product. The validity of other sterilization methods is
not confirmed.
Do not touch the product immediately after autoclaving as it will be very hot and must remain in a
sterile condition.
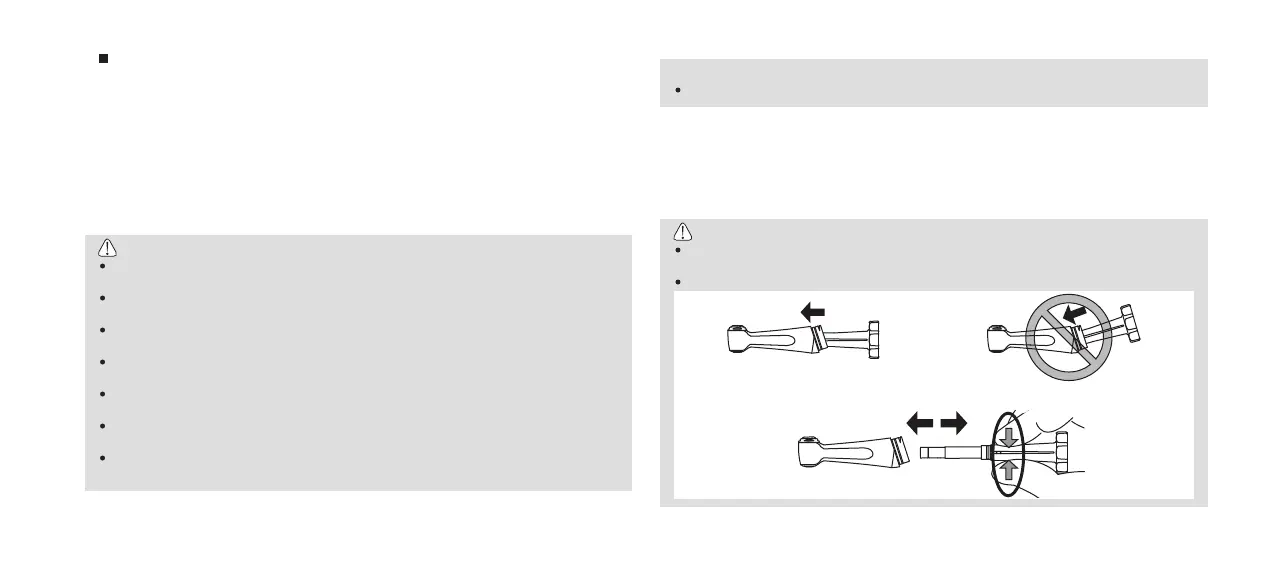
CAUTION
Be sure to insert the wrench straight into the handpiece head. Do not insert the wrench as shown in
Fig. A-2.
When pulling out the drive shaft, tightly hold the wrench as directed in Fig. B.
NSK Care3 Plus
When using NSK Care3 Plus automatic handpiece cleaning and lubrication system, refer to the Care3
System instructions.
5-3 Sterilization
Sterilize the product by autoclave sterilization. Remove the bur after each patient and sterilize as noted
below.
1) Insert an autoclave pouch. Seal the pouch.
2) Autoclavable under the conditions below.
Autoclave for more than 20 min. at 121°C, or 15 min. at 132°C, or 3 min. at 134°C.
3) The handpiece should remain in the autoclave pouch until required for
use.
6. Replacing the Cartridge
1) Detach the shank by turning it counter clockwise and remove the head from the shank. (Fig. 13)
2) Insert the wrench firmly into the rear of the handpiece head until it stops, as shown in Fig. A-1.
3) Tightly hold the wrench as directed in Fig.B then pull out the drive shaft straight in the direction of the
arrow. (Fig. B)
Hold tight!Hold tight!
2-A1-A
B