65
L- is specifically designed for Unity
®
vacuum pumps, while other
configurations are more suitable in other scenarios, L- suits well
with Iceross Seal-In liners without elevated vacuum since it has a bypass
port and a Release button to let air in.
Consult with Össur Customer Service if in any doubt with product
selection.
CAUTION !
Never use an autoexpulsion(check) valve without a functional release
valve when combined with Iceross Seal-In
®
or other solutions where liner
is sealed against the inside wall of a socket. Some means of allowing air
back in the socket must be in place. Never operate this product if a
change in its operation is observed. In such cases the user should
consult the clinical specialist.
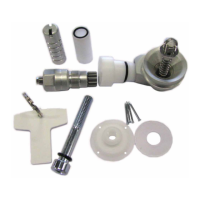
Icelock is a single patient device.
DAILY CARE
Proper product care is important for maintaining product lifetime and
ensure correct function. Make sure not to let aggressive cleaners,
solvents, acids, salt water, perspiration or any other harmful substance
come in contact with Icelock Series components.
PATIENT CONTROLS
Icelock series components equipped with a release button require
the patient to press the release button when doffing the prosthesis in
case of an internal seal, like Iceross Seal-In products. Compressing the
release button upon donning will also facilitate faster and more complete
engagement and is strongly recommended when using Iceross Seal-In
liners. Capability to follow this process is essential.
STORAGE
Icelock L- Series can be stored as long as it is not corroded and seals
are soft and pliable. Cool, dark place is preferred for long term storage.
FABRICATION
Icelock L- Series can either be set up on a test socket for temporary
test fit purposes, or laminated into a definitive socket.
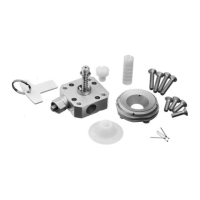
Test Socket Procedure
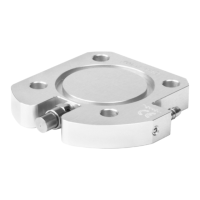
. Using a designated -component PU adhesive putty, bond the
L- (Figure ) assembly to desired location on test socket
(Figure ).
. Wrap test socket and adapter firmly with glass reinforced casting
tape, enabling test fitting of the prosthesis (Figure ).
. Drill through housing dummy into cast using a sharp mm drill bit.
Take care to align drill with centerline (Figure ).
. Remove housing dummy and replace with Housing, there is one seal
on each end of Housing (Figure ).
. Complete assembly applying Loctite to -hole screws and torque
to Nm (Figure ).
Definitive Socket Procedure
. Drape a layer of -mm PETG or equivalent rigid thermoplastic sheet
over cast positive (Figure ).
. Buff distal area. Using a designated -component PU adhesive putty,
 Loading...