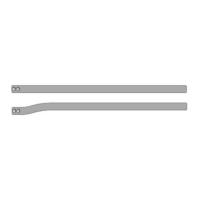
Shaping the bars
> Required tools: 711S5 bending irons, 711S3 horizontal bending irons,
711S2 bending pusher set.
1) Use the 711S5 bending irons for bending.
2) Use the 711S3 horizontal bending irons for horizontal contouring.
3) Use a bending radius over 10mm (see fig.1).
4) Remove grooves and burrs by grinding.
5) Optional: For better adhesion of the reinforcement, roughen this area
on the bar, at most up to 20mm from the insertion zone. NOTICE! To
avoid a risk of breakage, do not modify the insertion zone on the
bar.
6) During assembly of the bar, secure the screws in the insertion zone with
Loctite241.
Improving corrosion protection
Polish or sinter the side bar for improved corrosion protection. Ottobock
recommends the 618T40* sintering powder for surface coating.
1) For surface coating, do not heat the bar longer than 5minutes at max.
150°C.
2) For gluing and the screw connection, remove the bar's sinter coating in
the insertion zone or in the area of the joint.
Gluing in bars
Required materials: 636W28* special adhesive, degreasing cleaner
The bars must be glued in the insertion zones to ensure stability.
1) Clean the connecting surfaces with a degreasing cleaner.
2) Apply the special adhesive to the connecting surfaces.
3) Insert the bars.
4) Secure with the enclosed screws.
5) Allow to cure for at least 4hours.
INFORMATION: Final bonding strength will be reached after
16hours.
6 Cleaning
Promptly clean the product after contact with:
• Water containing salt, chlorine or soap, perspiration, urine or splashed
water (e.g.after rain) and soiling.
1) Rinse the product with clear fresh water.
2) Dry the product with a cloth or allow it to air dry. Avoid exposure to direct
heat (e.g. from an oven or radiator).
13
 Loading...