The Otto DIY robot is an interactive, open-source robot designed for anyone to build and customize. It's an educational tool that introduces users to robotics, 3D printing, and basic programming, making it accessible for beginners while offering depth for more advanced users. The robot's design emphasizes ease of assembly and disassembly, requiring only a simple screwdriver for construction.
Function Description
The Otto robot is an interactive device capable of several fundamental robotic functions. Its core capabilities include:
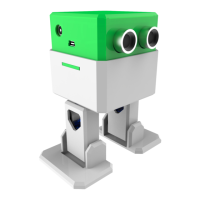
- Movement: Otto can walk and dance, demonstrating basic locomotion and expressive movements. This is achieved through four micro servo motors that control its legs and feet, allowing for a range of dynamic actions.
- Environmental Interaction: Equipped with an ultrasound sensor, Otto can detect and avoid obstacles in its path. This feature enables the robot to navigate its surroundings autonomously, reacting to changes in its environment.
- Auditory Feedback: The robot includes a buzzer that produces beeps and 8-bit music. This provides auditory cues for various actions or states, enhancing its interactive nature and allowing for expressive soundscapes.
- Programmability: At its heart, Otto is an Arduino-based robot, specifically utilizing an Arduino NANO and an Arduino NANO shield. This makes it "easy to program," allowing users to upload custom code to control its behaviors, movements, and interactions. The open-source nature of the platform encourages experimentation and learning in programming.
Usage Features
The Otto DIY robot is designed with user-friendliness and customizability in mind, making it suitable for a wide range of users from hobbyists to educators.
- Quick Assembly: The manual suggests that users can build their own Otto in as little as two hours. The assembly process is broken down into clear, step-by-step instructions, utilizing 3D printed parts and readily available electronic components. The "quick snap assembly" feature further simplifies the construction.
- Modular Design: The robot is constructed from several 3D printed parts, including a head, body, two legs, a right foot, and a left foot. This modularity not only aids in assembly but also supports customization and repair. Users can print replacement parts or design their own modifications.
- Open-Source and Expandable: Otto is an "expandable and customizable" platform. Its open-source nature means that schematics, code, and 3D printable files are generally available, allowing users to "remix" and "modify" the robot. This encourages a community of builders to share their creations and enhancements. The platform supports the integration of additional 3D printed parts and sensors, enabling users to extend Otto's capabilities beyond its basic functions.
- Programming Interface: The use of an Arduino NANO provides a familiar and accessible programming environment for many. Users can connect Otto to a computer via a mini USB cable for programming and power. This allows for direct control over the robot's logic and behavior, from simple movements to complex interactive sequences.
- Power Options: Otto can be powered by four AA batteries for untethered operation. Additionally, it features an "external auxiliary POWER port 6-12V" for alternative power sources, and the USB connection also provides power during programming.
- Interactive Learning: The process of building and programming Otto serves as a hands-on learning experience in STEM fields. Users gain practical knowledge in electronics, mechanics, and coding. The robot's ability to "walk and dance," "detect & avoid obstacles," and produce "beeps & 8bit music" provides immediate and engaging feedback on their programming efforts.
- Community Engagement: The manual encourages users to "post your creations online" and use the hashtag "#OttoDIY" to "share!" This fosters a community of Otto builders, allowing for collaboration, inspiration, and support among users. The "wanted Otto builders" message further emphasizes the community aspect and the continuous development of the Otto platform.
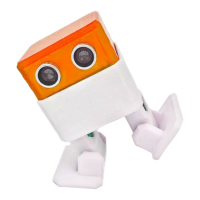
- Expressive Capabilities: Beyond mere functionality, Otto is designed to be expressive. The "robot beeps that represent moods" suggest that its auditory feedback can be programmed to convey different states or emotions, adding a layer of personality to the robot. Customization options, such as different 3D printed body designs (e.g., the "customize" example showing a robot with a more intricate, perhaps "Iron Man"-inspired design), allow users to personalize their robot's appearance and character.
Maintenance Features
While the manual doesn't explicitly detail a "maintenance" section, several aspects of Otto's design inherently contribute to its maintainability and longevity:
- Modular Construction: The robot's modular design, composed of separate 3D printed parts for the head, body, legs, and feet, simplifies troubleshooting and repair. If a specific part breaks or needs to be upgraded, it can often be replaced individually without needing to dismantle the entire robot.
- Standard Components: Otto utilizes common and widely available electronic components such as micro servo motors, an ultrasound sensor, a buzzer, and an Arduino NANO. This ensures that replacement parts are easy to source, contributing to the robot's long-term usability.
- Easy Disassembly: The instruction to "easy to build and disassemble with a simple screwdriver" implies that taking the robot apart for inspection, repair, or modification is straightforward. This is crucial for maintenance, allowing users to access internal components like wiring and circuit boards.
- Open-Source Documentation: As an open-source project, Otto typically benefits from extensive online documentation, including schematics, wiring diagrams, and programming guides. This wealth of information empowers users to diagnose issues, understand how different components interact, and perform repairs or modifications effectively.
- Pre-Assembly Testing: The manual explicitly states, "connect and power with USB and test movements before close and using AA batteries." This step is a critical maintenance practice, allowing users to verify the functionality of the electronic components and wiring before fully assembling the robot. This helps in identifying and resolving potential issues early in the build process.
- Battery Management: The robot uses AA batteries, which are easily replaceable. The note "*AA batteries not included" and "*AA batteries last up to 2 hours" provides important information for users to manage power and plan for battery replacement. The warning "before using batteries test with USB first" is another good practice for preventing potential issues related to power or wiring.
- Customization for Durability: The ability to 3D print parts allows users to experiment with different materials or designs that might offer increased durability or specific functionalities, tailoring the robot to their usage environment and needs.
In summary, the Otto DIY robot is a highly engaging and educational platform that combines ease of assembly with extensive customization and programming possibilities. Its design fosters a hands-on approach to learning robotics, supported by a modular structure, standard components, and an active open-source community, all contributing to its overall usability and maintainability.