EN
INSTALLATION
It is important that the installation instructions below are followed for successful installation of this Quilo
TM
Portable Air Conditioner. Please call Customer Support if you have any difficulties or queries regarding these
installation procedures.
1
5 6
2 3 4
x1
x1 x1
x1 x2 x1
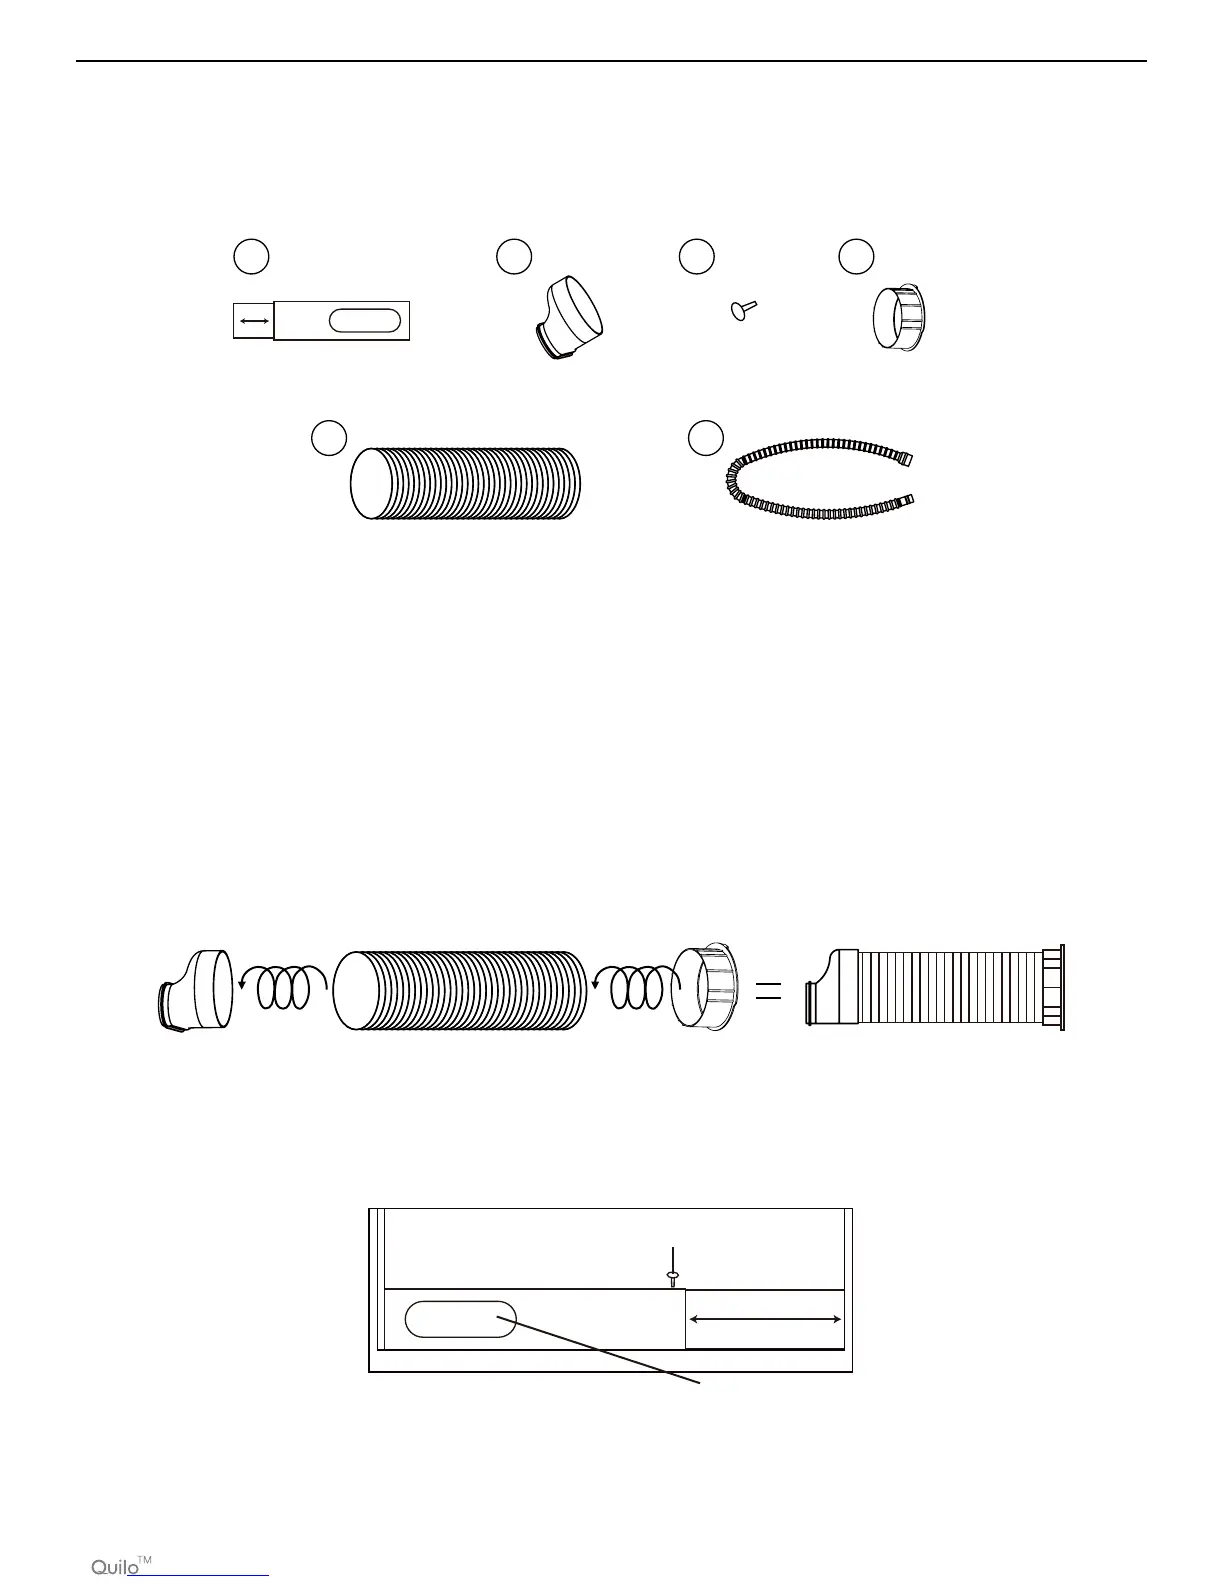
Installation Kit:
Installation Steps:
Install the exhaust hose with window bracket panel adapter and hose connector on both sides. Ensure
proper fit on both ends.
1.
2. Adjust the window bracket as per width or height of your window and insert the plastic pins to fix at the
desired position. There is a hole where the exhaust hose will be inserted later.
Make sure this hole is not blocked.
Plastic Pin
26.6", 36.2" to 52"
(67.5cm, 92cm to 132cm)
Hole for Window Bracket
Panel Adapter & Exhaust Hose
1.
Window Bracket Kit
(1 Set) 4.
Hose Connector
(1 Piece)
2.
Window Bracket Panel Adapter
(1 Piece) 5.
Exhaust Hose
(1 Piece)
3.
Plastic Pin
(2 Pieces) 6.
Drain Tube (refer to Continuous
Draining for Dehumidifier Mode)
(1 Piece)