THE DIAGRAMS AND INSTRUCTIONS IN THIS BROCHURE ARE FOR ILLUSTRATION PURPOSES ONLY AND ARE NOT MEANT TO REPLACE A LICENSED PROFESSIONAL. ANY CONSTRUCTION OR USE OF
THE PRODUCT MUST BE IN ACCORDANCE WITH ALL LOCAL ZONING AND/OR BUILDING CODES. THE CONSUMER ASSUMES ALL RISKS AND LIABILITY ASSOCIATED WITH THE CONSTRUCTION OR USE
OF THIS PRODUCT. THE CONSUMER OR CONTRACTOR SHOULD TAKE ALL NECESSARY STEPS TO ENSURE THE SAFETY OF EVERYONE INVOLVED IN THE PROJECT, INCLUDING, BUT NOT LIMITED TO,
WEARING THE APPROPRIATE SAFETY EQUIPMENT. EXCEPT AS CONTAINED IN THE WRITTEN LIMITED WARRANTY, THE WARRANTOR DOES NOT PROVIDE ANY OTHER WARRANTY, EITHER EXPRESS
OR IMPLIED, AND SHALL NOT BE LIABLE FOR ANY DAMAGES, INCLUDING CONSEQUENTIAL DAMAGES. FOR DETAILS ON SAFE HANDLING AND WARRANTY INFORMATION, GO TO UFPI.COM / PTINFO.
©2017 Universal Forest Products, Inc. Outdoor Essentials is a registered trademark of Universal Forest Products, Inc.
Assembled in the USA with imported fasteners. All rights reserved.
2801 East Beltline NE, Grand Rapids, MI 49525 | 800.598.9663 | 9333_4/17
OutdoorEssentialProducts.com
PICNIC TABLE ASSEMBLY INSTRUCTIONS, CONT.
Place the outside edges of the seats (B) flush with the ends of the
seat crossmembers and align the ends of the seats with the ends
of the table top. To avoid splitting, predrill screw holes using a
1/8" drill bit. Attach the seats to the crossmembers using four (4)
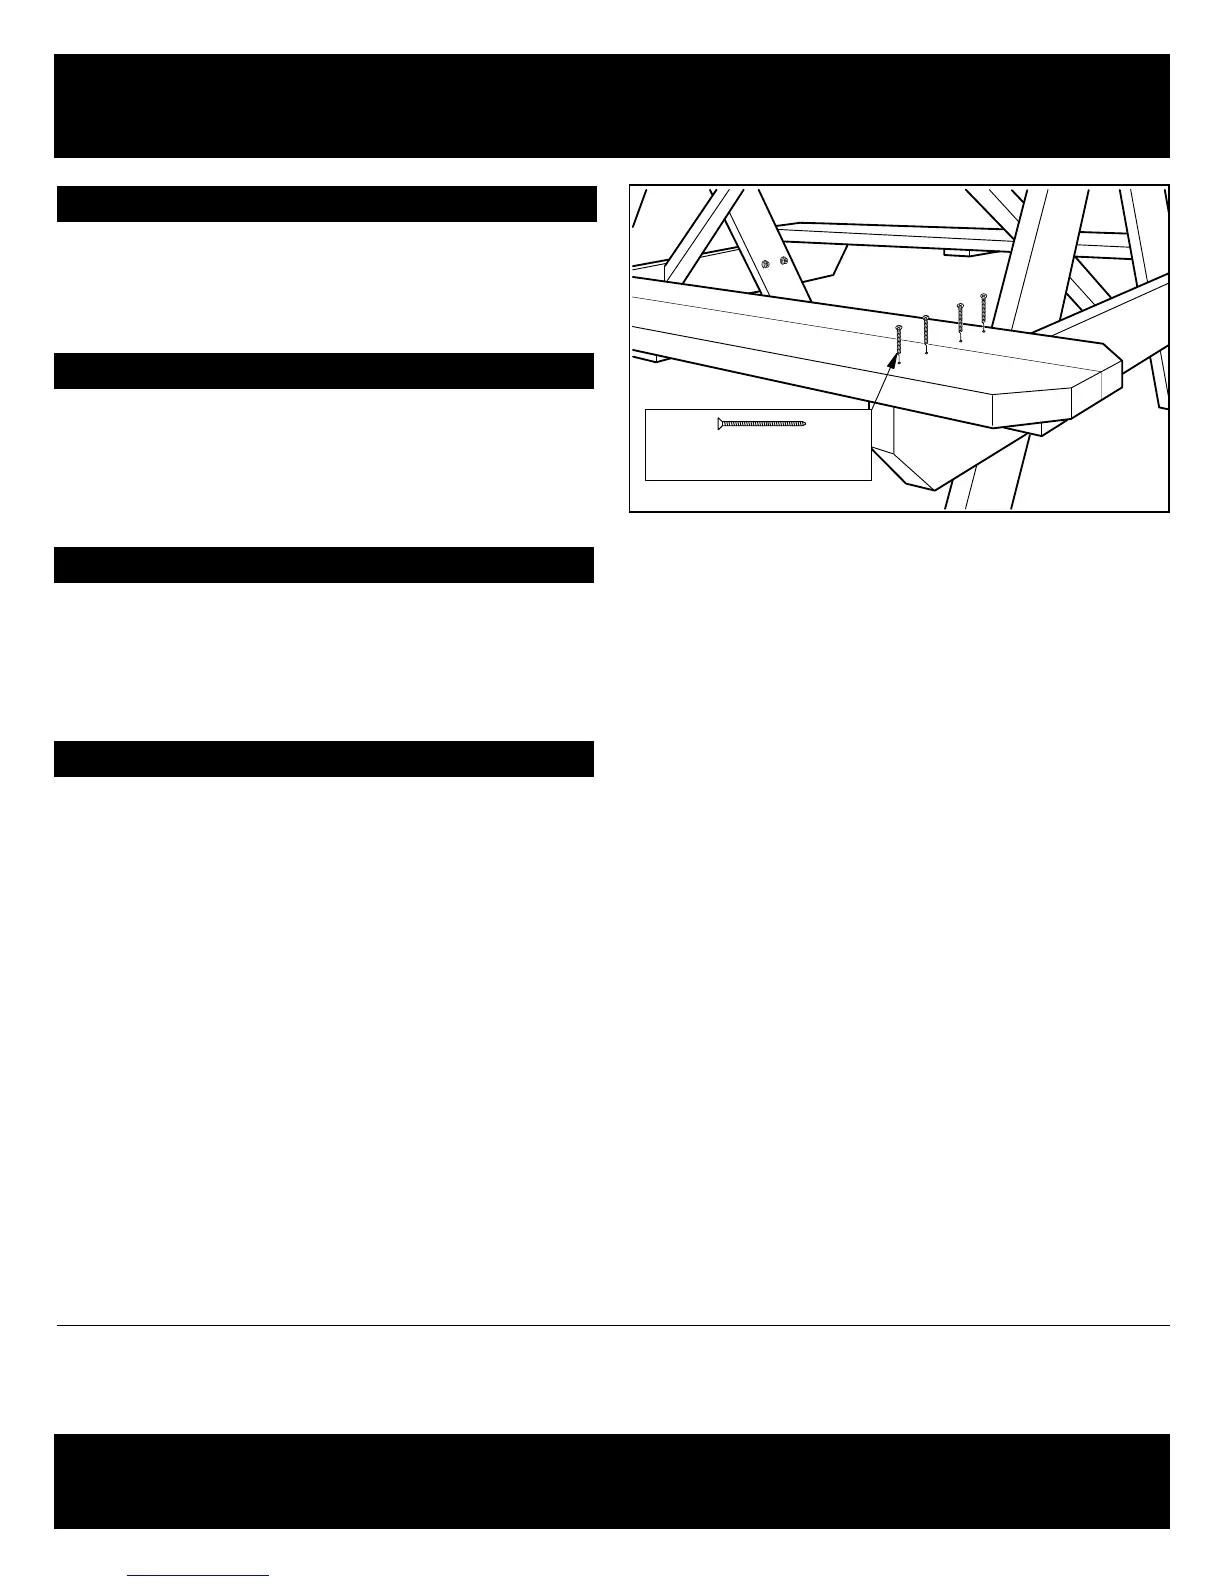
2-1/2" wood screws at each end of both seats (fig. 4).
Ensure all wing nuts and screws are fully secured and tightened.
Step 4
Step 5
2-1/2" Wood screw / Pre-drilled holes
2-1/2" wood screw
Lowe’sTable3.ai
fig. 4
Predrill and attach diagonal braces (C) using the 2-1/2" wood
screws (fig. 3). Before attaching diagonal brace, make sure the
legs are perpendicular to the table top. This will ensure that the
table top is level and the seat benches can be attached correctly.
Turn the table right side up.
Step 3
Step 2, cont.
Attach using four (4) - 2-1/2" wood screws through the predrilled
holes (fig. 2). Repeat step to attach other leg frame assembly.
Once the leg assemblies are attached, tighten 3-1/2" carriage
bolts using a wrench.
 Loading...