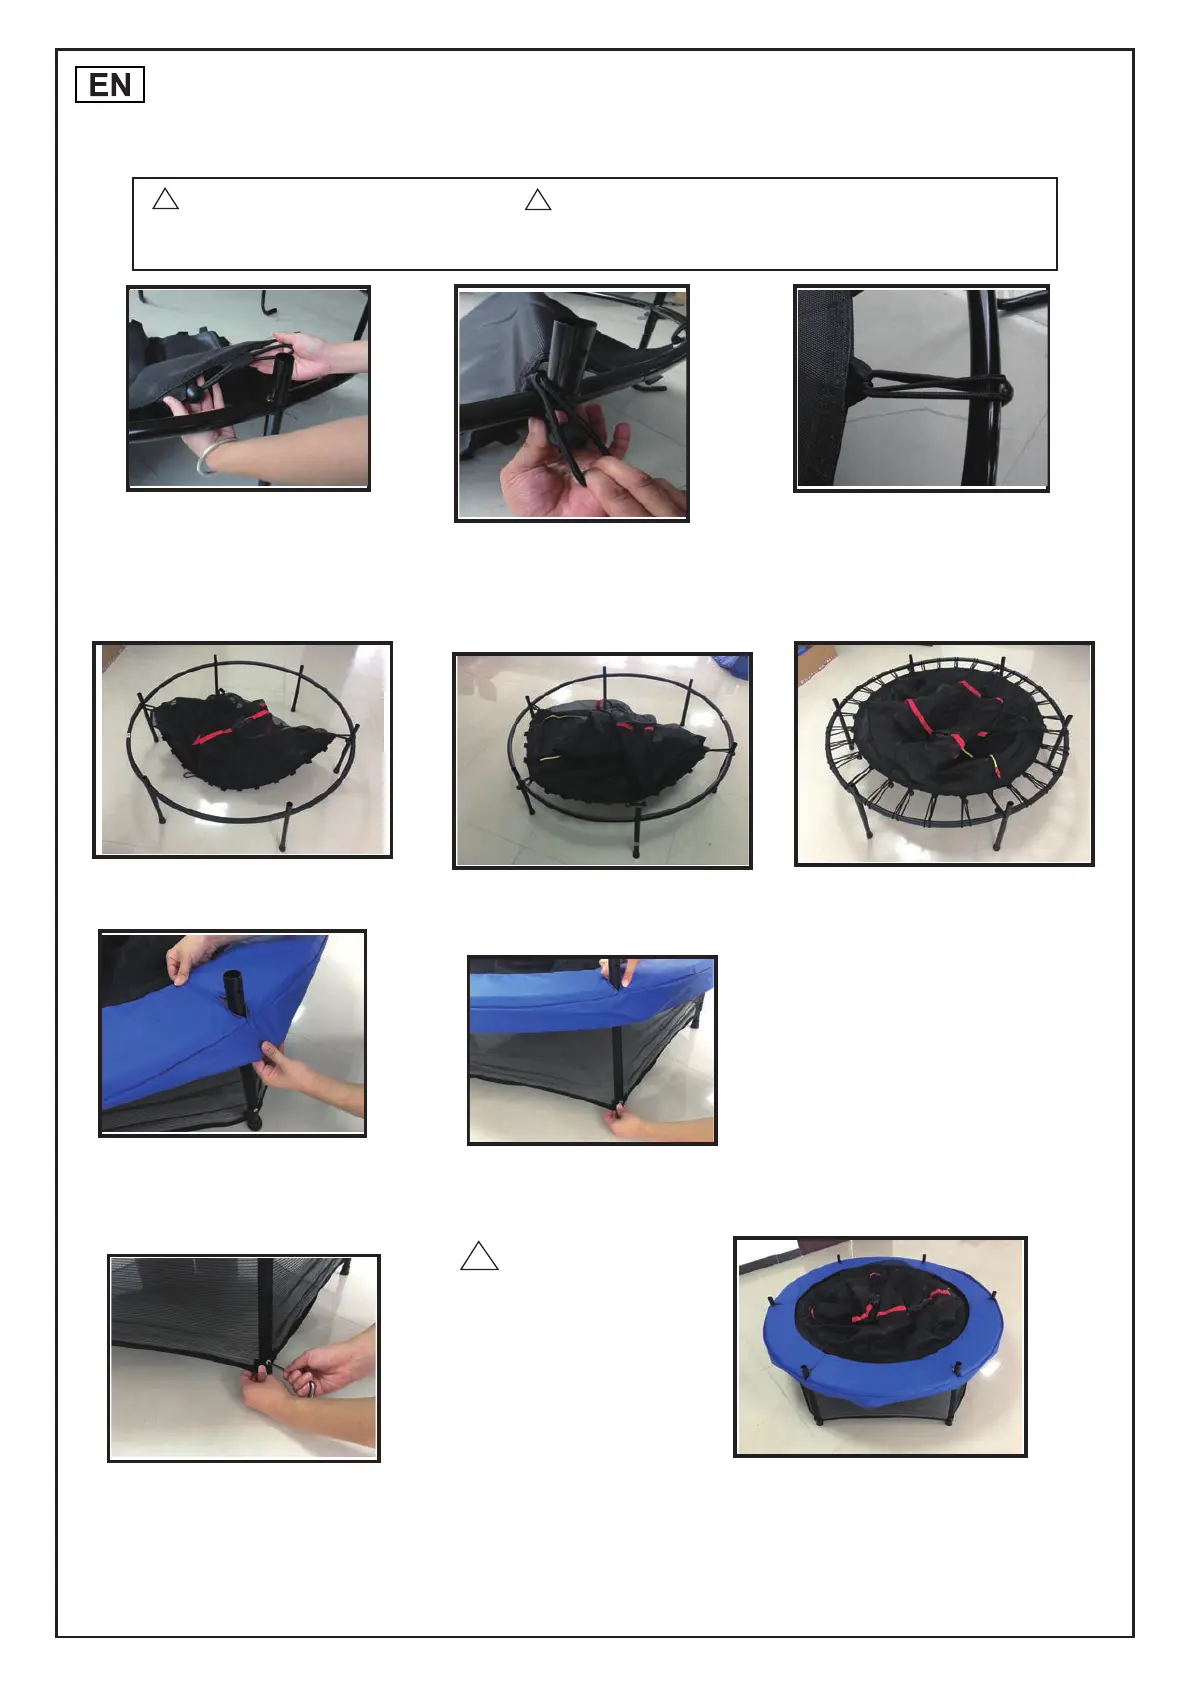
. emarf eht fo retnec eht ni tam pmuj eht tuo yaL
Then slide a suspension cord from left to right
through the nylon loop as shown.
(When securing the cords always position your
left hand under, and right hand over, the frame.)
Use your right hand to stretch the ‘loop’ end
of the cord OVER the top rail and your left
hand to pull the ‘knob’ end of the cord UNDER
the top rail, then pass the knob through the
loop.
TRAMPOLINE & ENCLOSURE ASSEMBLY
Refer to PARTS LIST for identification of parts.
SLOWLY release the loop end of the cord
so that it captures the knob, locking the
suspension cord in place, as shown.
Use care when releasing the loop end
around the knob, so that it does not slip off
or pinch your fingers!
From the 1st attached cord, count around the
jump mat to the 16th loop and repeat steps 1-3
attaching the 2nd cord directly across from the 1st.
2
Next, count back around the jump mat 8 loops
and repeat steps 1-3 attaching the 3rd cord
about half way between the 1st & 2nd cords.
1
2
3
4
5
6
7
8
Then, from the 3rd attached cord, count
around the jump mat 16 loops and repeat
steps 1-3 to attach the 4th cord. Numbers
on the picture above show the approximate
positions of the first 8 suspension cords.
Continue connecting the remaining cords
as shown in steps 1-3, but always connect
a cord, and then switch to the opposite
side of the trampoline to connect the
next cord. Attaching the cords in this
manner is important, as it will ensure
even-tension around the entire jump mat.
Lay the pad cover, over the suspension cords.
Carefully position each of the 6 openings in the
pad cover over their corresponding enclosure
pole sockets, as shown.
Carefully work the lower mesh skirt (attached to the pad cover)
down, around the entire perimeter of the trampoline, on the outside of the legs.
Align the grommet attached to the bottom of the lower mesh skirt with the
hole near the base of the leg and secure with screw. DO NOT OVER-TIGHTEN.
Repeat Step 13 with the remaining 5 grommets in the
lower mesh skirt and their corresponding legs.
6
1
3
2
NEVER AL LOW A CHILD
TO USE OR JUMP ON THE
TRAMPOLINE WITHOUT
THE ENC LOSURE
PROPER LY ASSEMBLED
AND INS TALLED
!
WARNING:
7
8
9
10
11
12
13
14
15
16
1
2
Enclosu re pole
socket
WARNING:
CHOKING HAZARD - Small Parts
Not for children under 3 yrs.
!
WARNING:
ADULT ASSEMBLY REQUIRED
Contains small parts, sharp points and sharp edges.
!
 Loading...