10400907 ©2019 Overland Storage Page 1 of 3
*10400907*
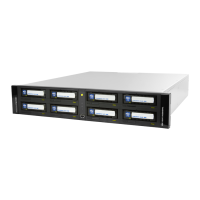
RDX
®
QuikStation 4 & 8 Appliances
Replacement Instructions
This document describes how to remove and replace an RDX
QuikStation from Overland-Tandberg.
WARNING: To reduce the risk of electric shock or damage to
equipment, always remove any power cords while working with
the unit.
WARNUNG: Um das Risiko eines elektrischen Schlags oder
Schäden am Gerät zu vermeiden, ziehen Sie stets den
Netzstecker, bevor Sie an der Einheit arbeiten.
AVERTISSEMENT: Pour réduire le risque de choc électrique
ou endommagement de l'équipement, retirez toujours les
cordons électriques en travaillant avec l'appareil.
CAUTION: While working with the library, observe standard
Electrostatic Discharge (ESD) precautions to prevent damage
to micro-circuitry or static-sensitive devices.l
Prepare the Unit
Power Off and Remove Cords and Cables
1. Power off the QuikStation.
2. Unplug the power cords (1).
3. Label and remove all the following:
• Any attached USB devices
• Ethernet cables
• VGA cable (if attached)
• Serial cable (if attached)
Remove All Media
Eject and label all the RDX cartridges so they can be inserted
into the same drives on the new unit.
1. Using the supplied RDX Ejection Pin (or straighten
paper clip), insert it in the hole above a drive with media.
2. Press inward until the cartridge ejects.
3. Label the cartridge with the drive number and set it
aside.
4. Repeat Steps 1–3 for all the remaining cartridges.
1 - AC Power plugs (on PSUs)
2 - Power Supply Reset
3 - Serial connector
4 - Ethernet port - IPMI Interface
5 - USB 2.0 Ports (2)
6 - USB 3.0 Ports (2)
7 - 10 Gigabit Ethernet port (eth0)
8 - 10 Gigabit Ethernet port (eth1)
9 - VGA connector
154623798
1 - AC Power Plug
2 - 1 Gb IPMI Port
3 - USB 2.0 Port (USB1)
4 - USB 2.0 Port (USB0)
5 - 1 Gb Ethernet Ports (eth2)
6 - 1 Gb Ethernet Ports (eth0)
7 - 1 Gb Ethernet Ports (eth3)
8 - 1 Gb Ethernet Ports (eth1)
9 - VGA/Display Port
129567 843