OWC MERCURY PRO OPTICAL
INTRODUCTION
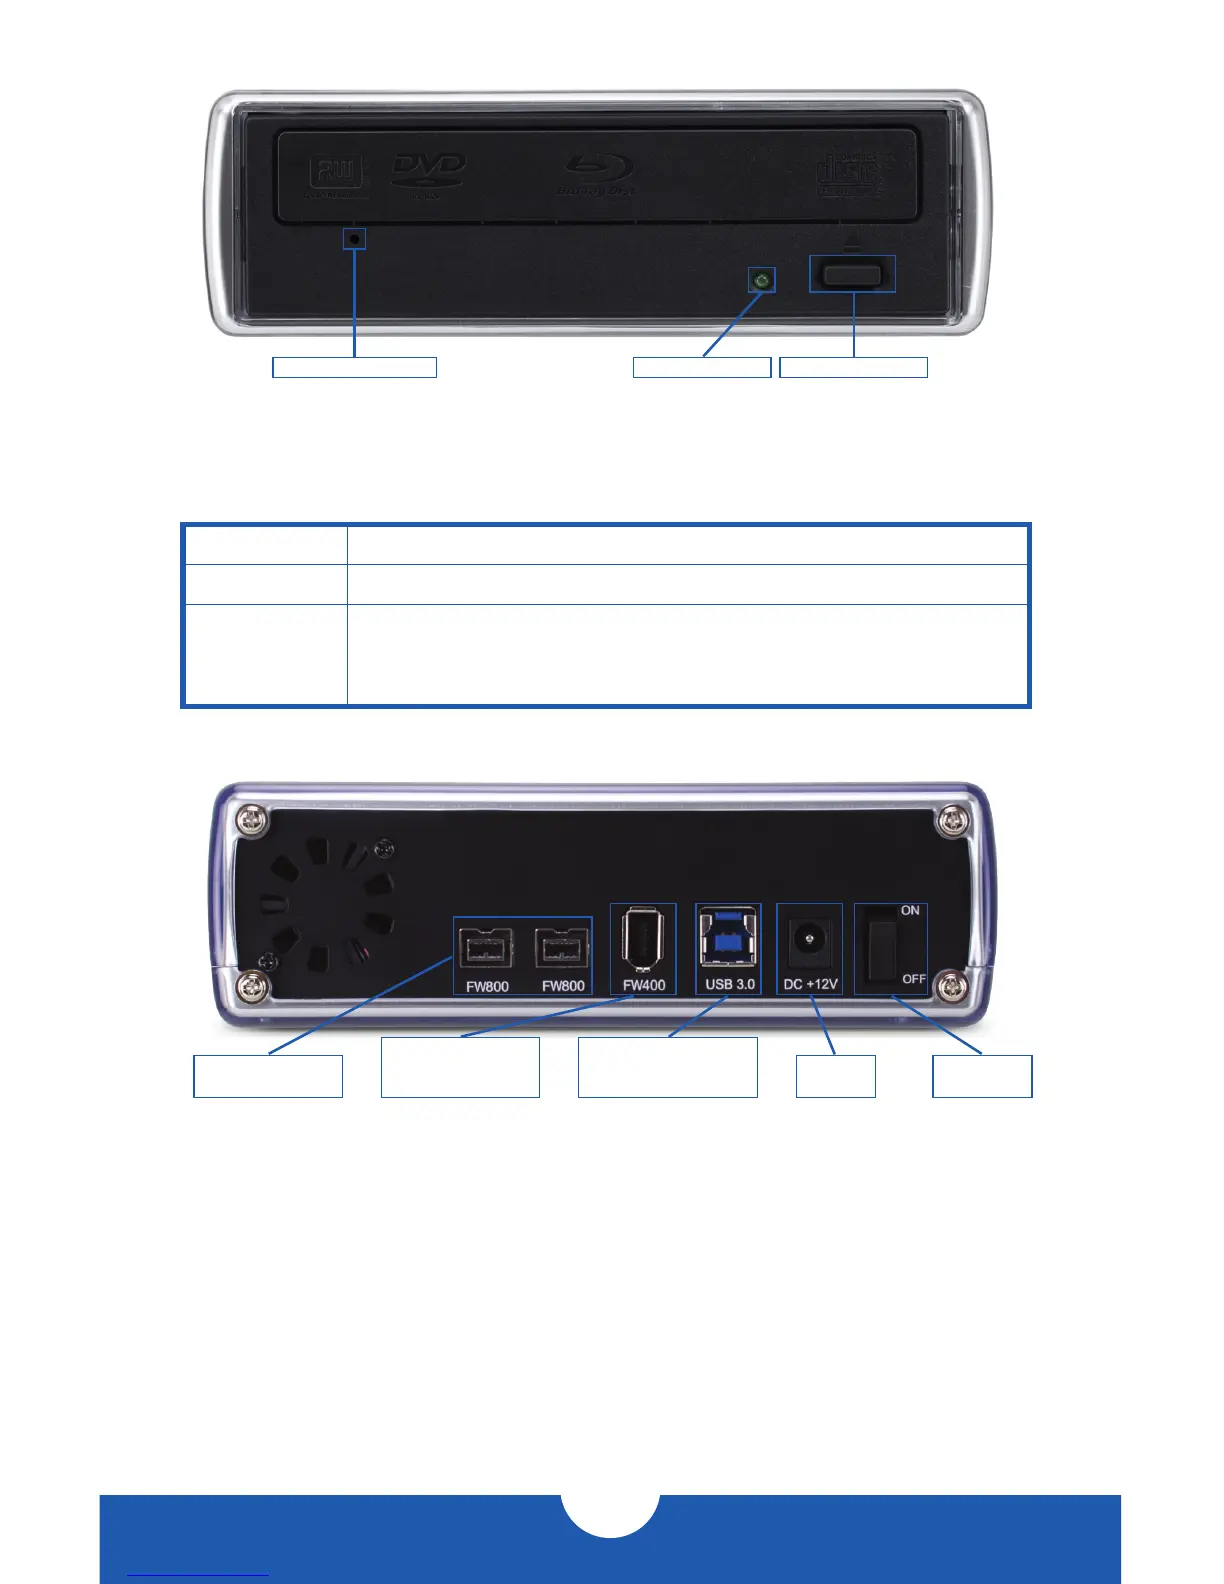
1.4 FRONT VIEW
NOTE: The look and placement of features may change based on optical drive mechanism.
1.4.1 Front Features
Activity LED LED flashes with disc activity.
Eject button Press to open the disc tray.
Manual eject
hole
If the disc tray cannot be opened by the eject button or through
software eject commands, insert a straightened paper clip into
the manual eject hole and press to open the disc tray manually.
2
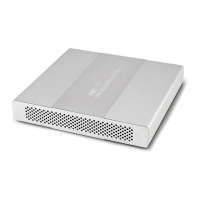
1.5 REAR VIEW
1.5.1 Connection
Plug the power supply into the DC power port on the OWC Mercury Pro Optical and
into a power outlet. Connect the interface cable of your choice (USB 3.0, FireWire 800, or
FireWire 400) between the computer and the Mercury Pro, then turn on the Mercury Pro
using the power on/off switch.
NOTE:
•Only one interface (USB 3.0, FireWire 800, or FireWire 400) at a time can be used. When
more than one interface cable is connected, the fastest interface has priority.
•Always eject or unmount the disc from your computer before powering off the drive.
Manual eject hole Activity LED Eject button
FireWire 800 (1394b)
9-pin ports
FireWire 400 (1394a)
6-pin port
(cable NOT included)
USB 3.0 standard-B port
(backwards compatible
with USB 2.0)
DC power
port
Power on/off
switch