2
Formatting the SSD
Once you have booted into Recovery, use the Disk Utility to format the SSD. While the process of formatting your drive is simple in all
cases, the appearance and steps within Disk Utility can vary based on the OS version. We have set up examples for each version. Please
note: the drive labels or information in this document may differ from your drive, but the processes won’t change.
• If the Recovery method selected targets macOS 10.13-10.15, please continue with the steps below.
• If the Recovery method selected targets OS X 10.11 or macOS 10.12, please skip ahead to page 5.
• If the Recovery method selected targets OS X 10.7-10.10, please skip ahead to page 8.
• If you have already formatted the drive and are ready to review OS and data migration options, skip to page 11.
Formatting Steps: 10.13-10.15
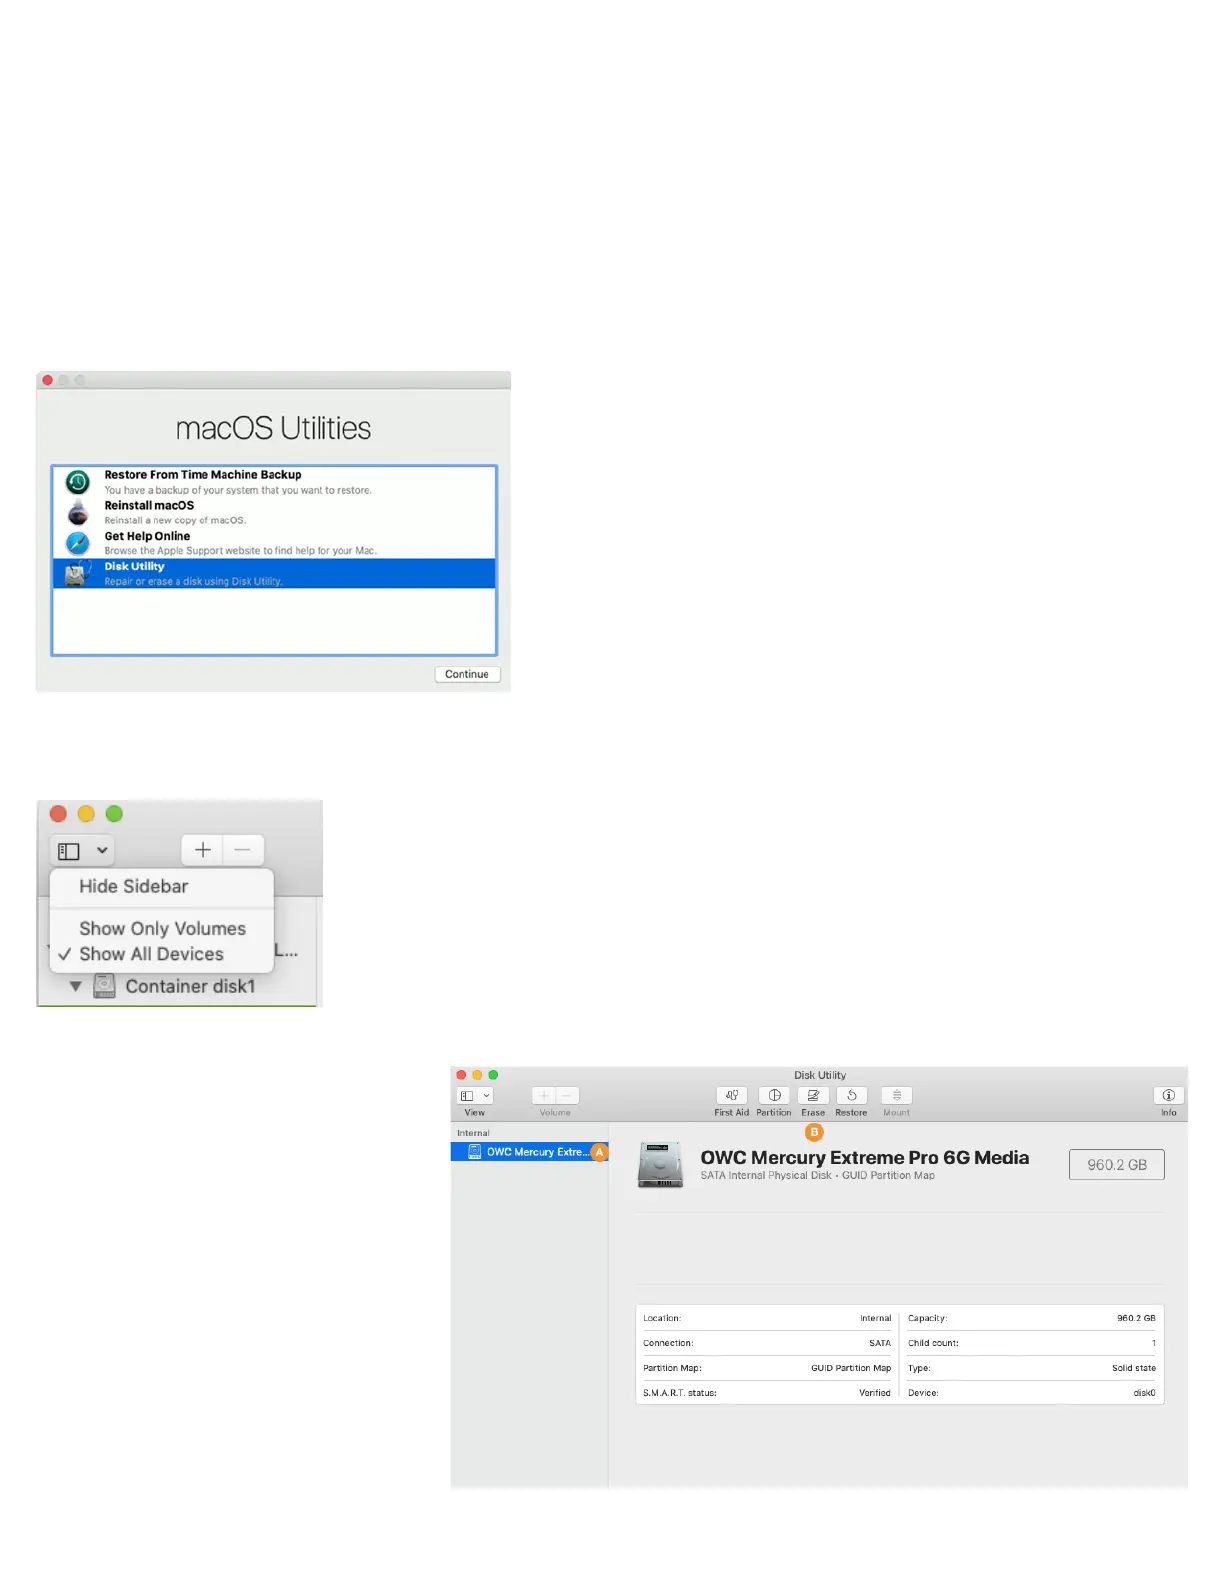
Step 1 – from the macOS Utilities window, select the Disk Utility option and click Continue.
Step 2 – to ensure that all internal devices and volumes are shown from the start, open the View menu widget near the top-left corner of
the Disk Utility window and choose ‘Show All Devices’.
Step 3 – in the sidebar area at left, select the
icon or label for the physical disk (item A at
right) Note: some SSDs may also include a
factory-formatted volume, listed beneath
the physical disk item; this factory volume
— or any others on the drive — will be
permanently erased.
Step 4 – click the ‘Erase’ button (item at right)
to continue.
 Loading...