ASSEMBLY INSTRUCTIONS
MODEL W700, 89”x 38” Ultralight 1P Backpacking Tent
IMPORTANT: WE ADVISE YOU TO ASSEMBLE THE TENT ONCE BEFORE
GOING CAMPING TO BECOME FAMILIAR WITH THE ASSEMBLY OF THE TENT.
NOTE:
PLEASE LOOK AT THE REPLACEMENT PARTS DIAGRAM TO SEE HOW
YOUR FRAME IS ASSEMBLED.
TO PROLONG THE LIFE OF THE TENT FLOOR, SELECT A LEVEL, CLEAN AREA
FOR THE CAMPSITE. TO PREVENT DAMAGE TO THE ZIPPER, UNZIP THE
DOORS TO ALLOW AIR TO ENTER THE TENT.
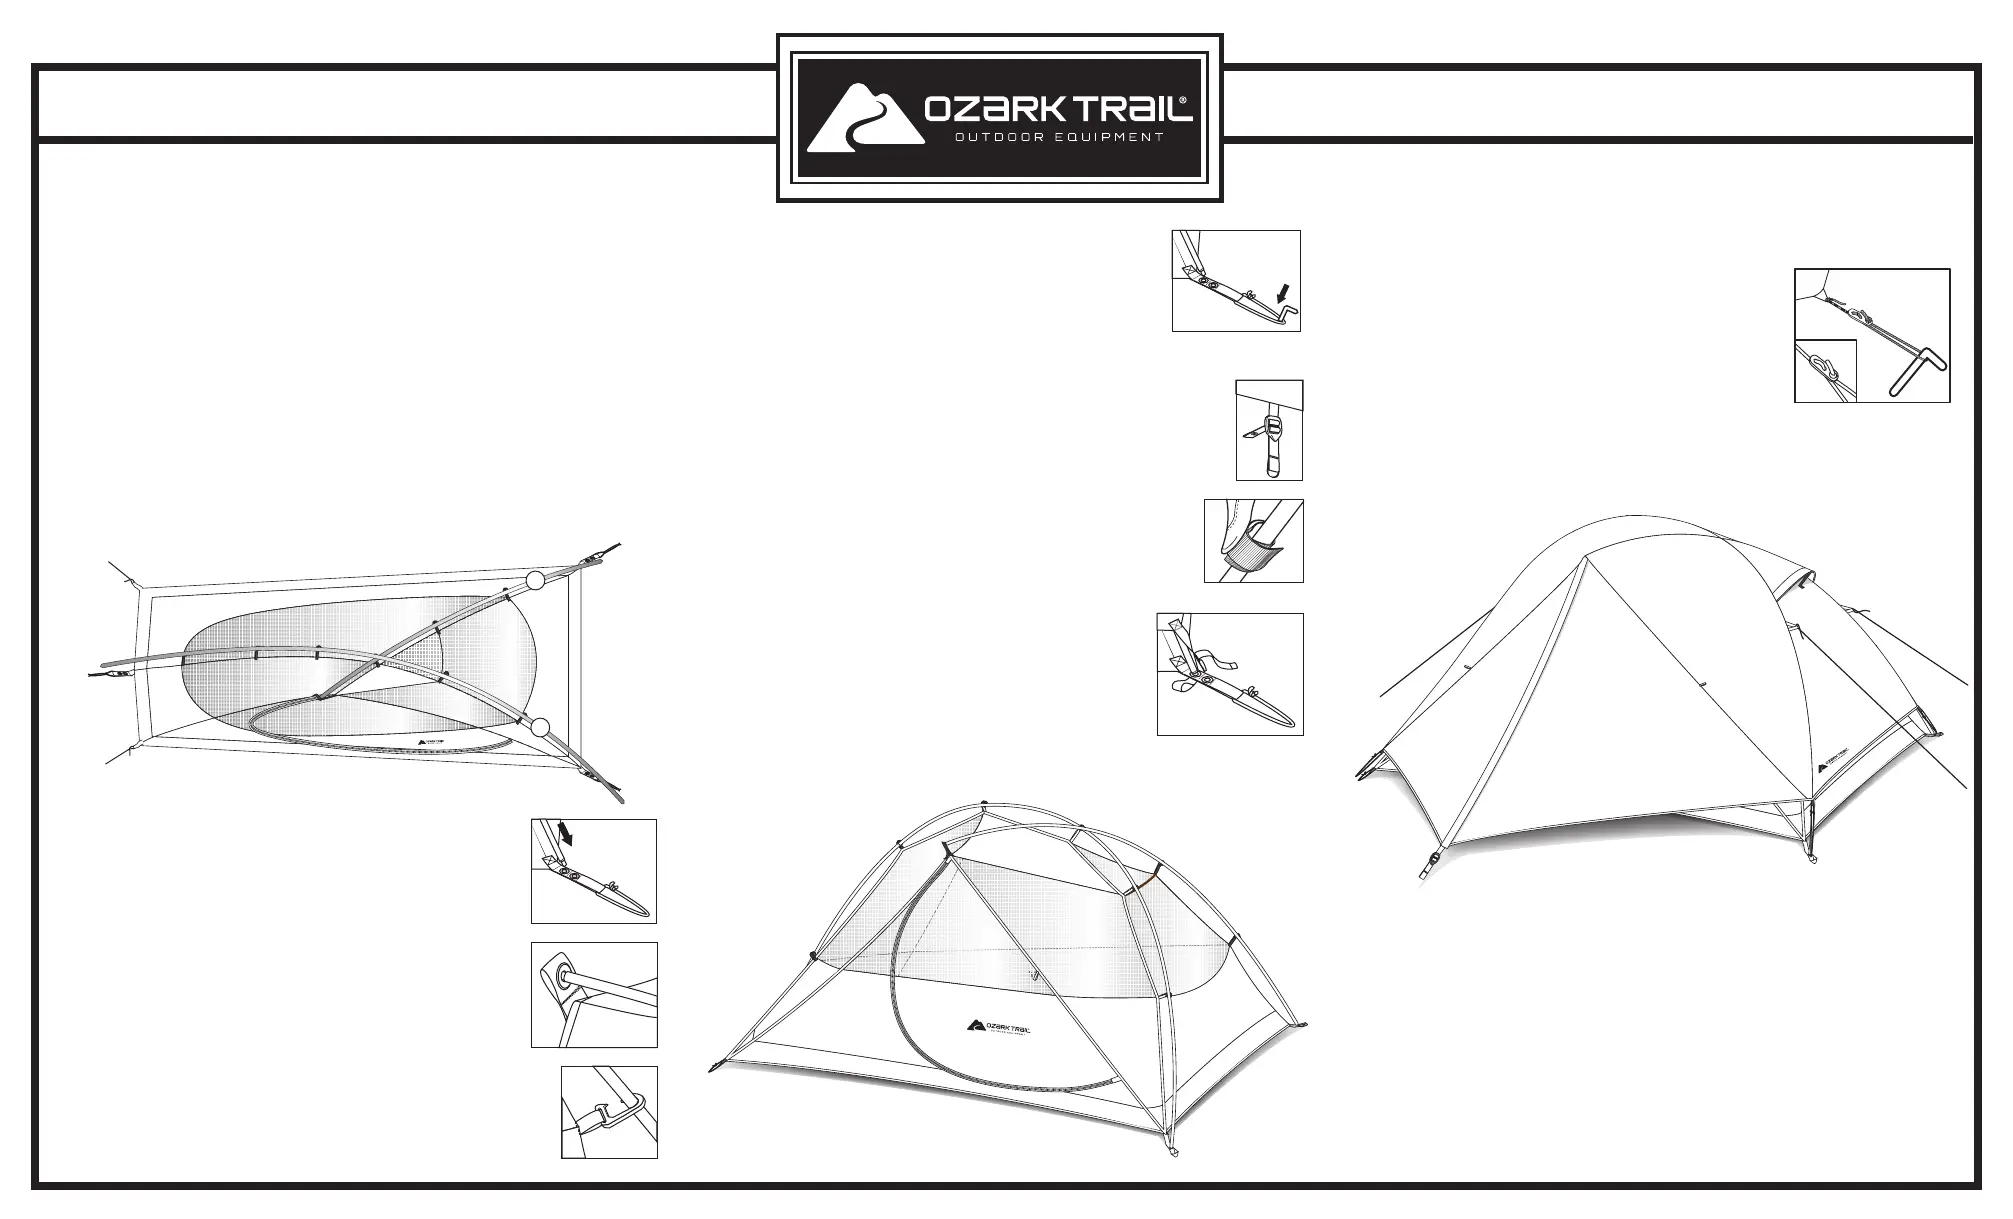
STEP 1: Spread tent out flat, floor side down.
Top View
NOTE: Make sure tent is clean and dry before storing. To take down
tent, follow steps above in the reverse order. Place
stakes into stake bag and
poles into pole bag, which are provided. The tent
should be folded into equal
parts toward the center of the tent to distribute the bulk. Fold fly and lay on top
of tent. Start a small tight roll, the width of
the carry bag, with the pole bag
placed at one end. Roll the tent tightly allowing air to escape. Once rolled, tie
a string or rope around tent to hold into place. Place tent, frame and stakes into
carry bag.
STEP 3: Lay the pole assembly on the tent with the silver (B) and orange (A)
poles aligned with the color coded corner webbing.
STEP 2: Extend the hubbed frame pole assembly by pulling
out each section and placing ends into the connectors.
STEP 4:
Insert the pole tips into the grommets at the corners
of the tent for each pole. Flex the orange pole into an arch
and insert the tip into the grommet at the foot of the tent.
STEP 5: Attach the grommet over the door to the tip
of the silver pole.
Tent should appear as shown.
STEP 8: Unfold the fly and place it over the tent. Use the
color-coded webbing to align the fly with the inner tent.
STEP 6: Starting at the top of the tent and working
downward, attach all the clips to the poles.
STEP 7: Stake down the tent by inserting stakes through
the stake loops at each corner of the tent. Hammer the
stakes into the ground at a 45° angle. Pull the tent out even
and taut. If it is windy, the tent can be staked down as
part of STEP 1.
The tent should appear as shown.
STEP 9: Fasten the hook and loop fasteners sewn to the fly
around the tent poles.
STEP 10: Attach the fly to the tent by hooking the
grommets over the pole tips.
STEP 11: Stake down the front of the vestibule by inserting a stake through
the webbing loop. Make sure to pull the vestibule out even and taut.
STEP 12: Guy ropes have been provided for added
stability. Extend each of the guy ropes and make a loop
at the opposite end by using the slider (as shown).
Place the loop over a tent stake and stake to the ground.
Adjust the slider to make guy rope tight.
A
B
 Loading...