ONLINE MANUAL
Scan this QR Code with your
mobile device to take you to
the online manual.
KNOW YOUR PRODUCT SETUP & PREPARATION
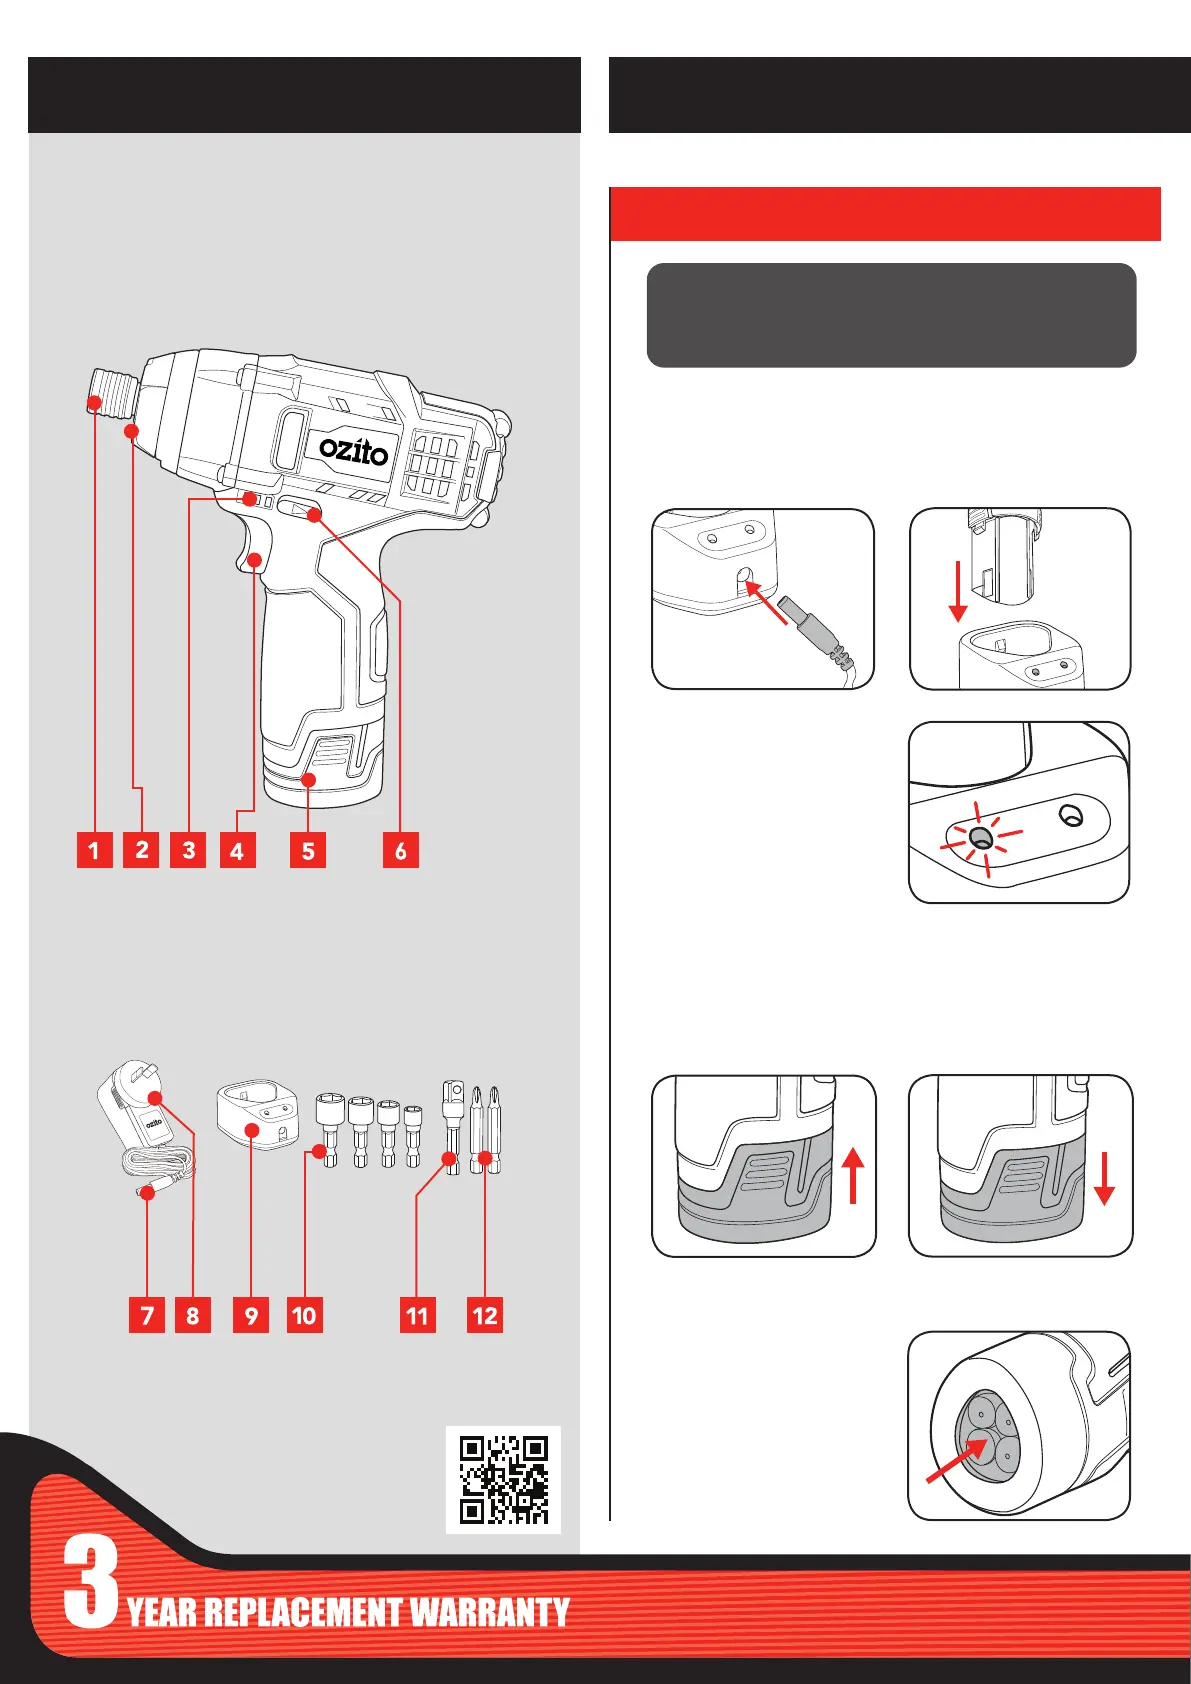
1. BATTERY
1 Drive Bit Retaining Ring
2 LED Light
3 Battery Charge Indicator
4 Variable Speed Trigger
5 Battery 12V
6 Forward/ Reverse Lever
CORDLESS IMPACT DRIVER
Installing and Removing
Slide the battery into the drill
base until it clicks into place.
1. Plug charging jack into
charging cradle. The green
light will illuminate when
connected.
Charging
Squeeze the sides of the battery
and pull away from drill.
7 Charging Jack
8 Charging Adaptor
9 Charging Cradle
10 Socket x 4
11 Socket Adaptor
12 Driver Bit x 2
Note: It will take 4-5 charging cycles before the battery reaches
optimum charge and run time.
2. Insert the battery into
charging cradle. Both lights
will illuminate when properly
connected & charging.
3. The green light only will
illuminate when the battery
reaches full charge.
ACCESSORIES
WARNING! THE POWER SUPPLY FOR THIS CHARGER
SHOULD BE PROTECTED BY A RESIDUAL CURRENT
DEVICE (RATED AT 30MA OR LESS). A RESIDUAL CURRENT
DEVICE REDUCES THE RISK OF ELECTRIC SHOCK.
Inbuilt Torch
To turn the battery torch on,
press in the bottom of the
battery. To turn off, press again.
 Loading...