ONLINE MANUAL
Scan this QR Code with your
mobile device to take you to
the online manual.
The planer has a precision machined groove in the front shoe for
planing along the corner of your workpiece.
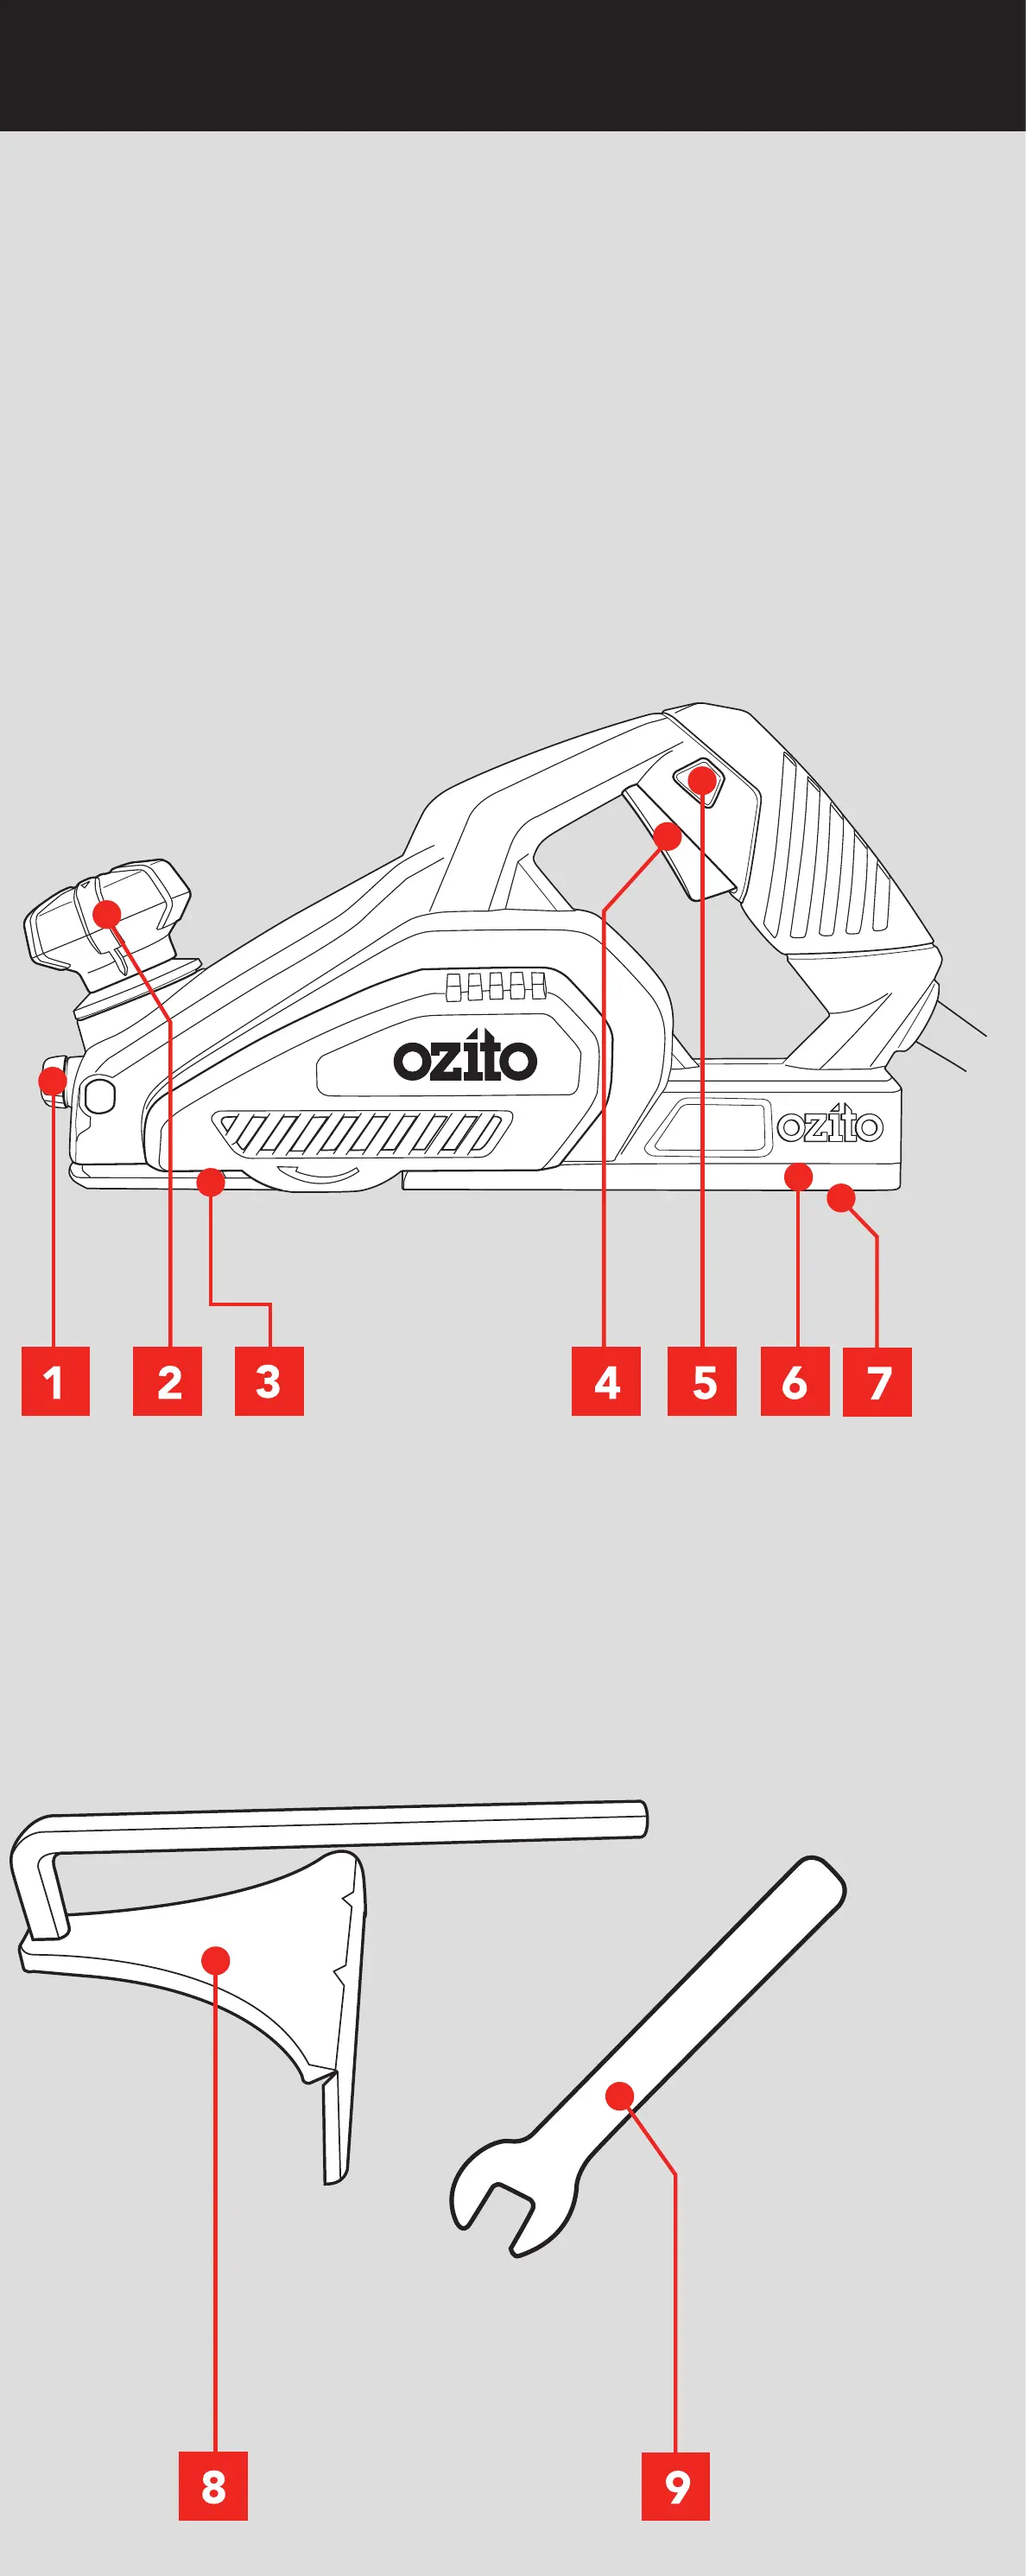
1. Fence Securing Knob
2. Depth Adjustment Knob
3. Front Shoe
4. On/Off Switch
5. Lock Off Button
6. Rear Shoe
7. Base Park Shoe
PLANER
KNOW YOUR PRODUCT
PLR-2000
1. ADJUSTING PLANING DEPTH 2. ON/OFF SWITCH 3. REBATING 4.
CHAMFERING
5. BLADES
1. Increase cutting depth.
2. Place groove precisely
on the corner of the
workpiece.
1. Set required depth on
planer.
1. Press and hold lock off
switch.
2. Press on/off switch (a),
then release lock off
button (b).
3. Release on/off switch to
turn off.
5. Adjust guide fence for required
rebate.
1. Loosen fence
securing knob.
3. Plane along workpiece
using the fence as a guide.
4. Mark out area for rebate.
3. The numbers on
the depth adjustment
correspond to the
planing depth (mm).
Always test on a
scrap workpiece rst.
2. Decrease cutting
depth.
8. Guide Fence
9. Spanner
ACCESSORIES
SETUP & PREPARATION
OPERATION
The tool is recommended for use with a residual current device
with a rated residual current of 30mA or less.
Changing Blades
Before you make any adjustments, make sure the power cord has
been disconnected from the electricity supply.
The blades that come tted to the tool are 82mm HSS blades. The
drum is tted with two separate blades; both must be reversed or
replaced at the same time. Never replace only one blade.
1. Loosen the 3 hex head
screws using the spanner
provided.
3. Install new blades.
Note: Blades are reversible. If changing blades for the rst time,
turn over the blades to expose a fresh cutting edge.
2. Push the used blade out
through the slot in the motor
housing using a screwdriver.
Keep ngers away from
blade.
4. Tighten the 3 hex head
screws.
Before you make any adjustments, make sure the power cord
is disconnected from the electricity supply
4. Wait until blade stops completely before putting planer down.
Planing depth can be adjusted between 0 and 1mm.
Fitting of the Guide Fence
2. Insert guide fence to the
required depth.
3. Tighten fence
securing knob.
Making a Rebate Cut
Note: It will be necessary to make a number of cuts to complete
most rebates.
3. Plane along the edge of
your workpiece.
5. Repeat the process for the second blade.
 Loading...