EasyManua.ls Logo

PAC RPK4-GM2301 User Manual

PAC RPK4-GM2301
6 pages
To Next Page IconTo Next Page
Page #1 background imageLoading...
Page #1 background image
Complete Radio Replacement Kit with
Vehicle Information Retention for
Select 11-Bit GMLAN Vehicles
RPK4-GM2301
Pacific Accessory Corporation
Rev. 072517
Page 1
© 2017 AAMP Global. All rights reserved. PAC is a Power Brand of AAMP Global.
PAC-audio.com
Parts List
The RPK4-GM2301 includes everything you need for a professional installation of an aftermarket radio in your 11-Bit GM
Vehicle.
This kit contains:
1. Dash kit
1a. (x1) Double DIN mounting panel
1b. (x1) Single DIN radio ISO mount trim ring
1c. (x1) LCD adapter bracket (for single DIN applications)
1d. (x1) Pocket (for single DIN applications)
1e. (x8) Radio mounting screws
1f. (x1) USB cover (for when USBDMA1 or USBDMA6 is not used with our kit)
1g. (x2) Radio mounting brackets (one left and one right)
2. Radio replacement interface module
3. Radio connection harnesses
4. PAC-LCD
Overview
The RPK4-GM2301 is a complete radio replacement kit with vehicle information retention for select 11-Bit GMLAN Vehicles. This kit utilizes a
user friendly LCD display with onboard buttons to view and adjust vehicle information and settings. The included radio replacement interface
will retain factory steering wheel controls (SWC) and allows you to program two radio functions to each SWC button by using short press long
press dual command functionality. The interface also provides data bus driven outputs such as retained accessory power (RAP), illumination,
vehicle speed sensor (VSS), reverse trigger and parking brake.
Table of Contents: Page:
1. Factory Radio Removal --------------------------------------------------------- 2
2. Radio Replacement Installation and Wiring Instructions --------------- 3
3.
Steering Wheel Control Programming --------------------------------- 3-4
4. Dash Kit Assembly --------------------------------------------------------------- 5
5. Using the PAC-LCD -------------------------------------------------------------- 6
1. If a double DIN radio is being installed with this kit, enough wire has been supplied to mount the LCD in the glove box or center console area.
2. The interface comes pre-programmed for all of the vehicle’s factory SWC functions and does not require programming, unless you wish to
re-assign the SWC functions, or utilize short press long press dual command functionality. The SWC can always be restored to default settings
by pressing and releasing the program button on the side of the interface once and waiting 7 seconds for the LED to ash 3 times.
3. The LED will ash whenever a SWC button is pressed.
4. The Interface has the ability to retain the warning chimes and audible turn signal clicks through its onboard piezo. This feature is on by default.
This can be disabled using the supplied PAC-LCD. For more info on disabling the chimes through the module see page 6.
Important Notes
1a.
3.
1d.
1c.
2.
1b.
4.
1e.
1f.
1g.
Question and Answer IconNeed help?

Do you have a question about the PAC RPK4-GM2301 and is the answer not in the manual?

PAC RPK4-GM2301 Specifications

General IconGeneral
Input Voltage12V DC
OnStar RetentionYes
Chime RetentionYes
Reverse Camera InputYes
Compatible VehicleGM Vehicles
Steering Wheel Control RetentionYes
Amplifier RetentionYes
USB RetentionYes
Auxiliary Input RetentionYes

Summary

Overview of RPK4-GM2301 Kit

Parts List and Kit Contents

Important Notes and Tips

LCD Mounting Wire Length

Wire length supplied for mounting LCD in glove box or console.

SWC Programming Defaults

Interface pre-programmed for SWC; restoration to default settings.

SWC Button LED Indicator

LED flashes when a SWC button is pressed.

Chime Retention and Disabling

Module retains chimes; can be disabled via PAC-LCD.

Factory Radio Removal Instructions

Illustration and Schematic

Interface Configuration and Wiring

Radio Select Switch Setup

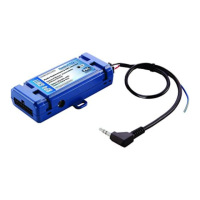
Adjusting the rotary switch to the correct radio setting before connecting.

Aftermarket Radio Connections

Chart detailing vehicle and SWC connector wiring for aftermarket radios.

Default SWC Programming

Pre-programmed SWC functions for volume, seek, band, and source.

Optional SWC Programming

Instructions for reassigning SWC functions or using dual command.

Steering Wheel Control Re-calibration

Re-calibration Procedure

Steps to re-calibrate SWC values when operation is erratic or non-existent.

Button Programming Order

Sequence for re-calibrating specific SWC buttons.

Dash Kit Assembly Configurations

Double DIN Installation

Steps for assembling the dash kit for a double DIN radio installation.

Single DIN with Pocket

Steps for assembling the dash kit for a single DIN radio with a pocket.

Single DIN with LCD Adapter

Steps for assembling the dash kit for a single DIN radio with LCD adapter.

Using the PAC-LCD for Settings

Vehicle Information and Settings

Cycling through vehicle info and adjusting settings like chimes, locks, and lights.

Setup Menu Navigation

Accessing and navigating the setup menu for chimes, volume, and turn signals.

Testing and Verification

Steps to test radio, SWC, and PAC-LCD functionality after installation.

Technical Support and Updates

Contact info for support and details on firmware updates.

Related product manuals