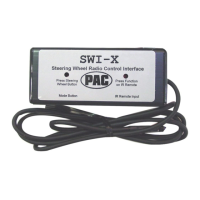
SWI-X
Universal Steering Wheel Control Interface
Installation Instructions
Before You Start
A. Is this product compatible with the vehicle?
• See Appendix A - Known Incompatible Vehicles (page 5)
and Appendix E - Identification and Connection Chart (pages
6-7) to see if your vehicle is listed. If not, check www.pac-audio.
com for an updated list of compatible vehicles.
B. Is this product compatible with the head unit?
• Ensure that the new head unit is capable of being operated with a remote control, and that it responds to the
remote control provided with it.
• The head unit must accept a remote control with the common carrier frequency range of 38 – 40Khz in order to
work with the SWI-X.
Note: Certain head units will not work with the SWI-X. See Appendix B - Known Incompatible Aftermarket Head
Units (page 5).
C. Prepare for the installation.
• If possible, install the SWI-X while you are installing the new head unit. Keep in mind you may need to plug in the
factory stereo to locate certain wires; therefore do not complete the head unit installation until the SWI-X is working
properly.
• Plan a general installation location for both the SWI-X LED and the control body. Keep in mind that the supplied
wire harness is two feet long, and the IR harness is four feet long.
• Use a multimeter or approved measuring device for checking vehicle circuits.
Wiring Connections
Step 1.
Connect the BLACK
wire to ground (-).
Verification: Wire
or location registers
a constant (-) when
probed.
Step 2.
Connect the RED wire
to switched +12V.
Verification: Wire reg-
isters +12V when the
ignition key is turned
to the ACC or ON posi-
tions.
Step 3.
Connect the appropriate interface wire (WHITE, YELLOW, ORANGE or
GREEN).
• Refer to the Appendix E - Identification and Connection Chart (pages
6-7). Locate the vehicle and note the SWC wire color in the “Interface Wire
Color” column.
• Note the vehicle wire color and location information in the “Identification”
column.
Note: You will only connect ONE of these wires. Cut and insulate the un-
used wires.
• Connect the wire as indicated.
SWI-X

 Loading...