INSTALLATION INSTRUCTIONS 3
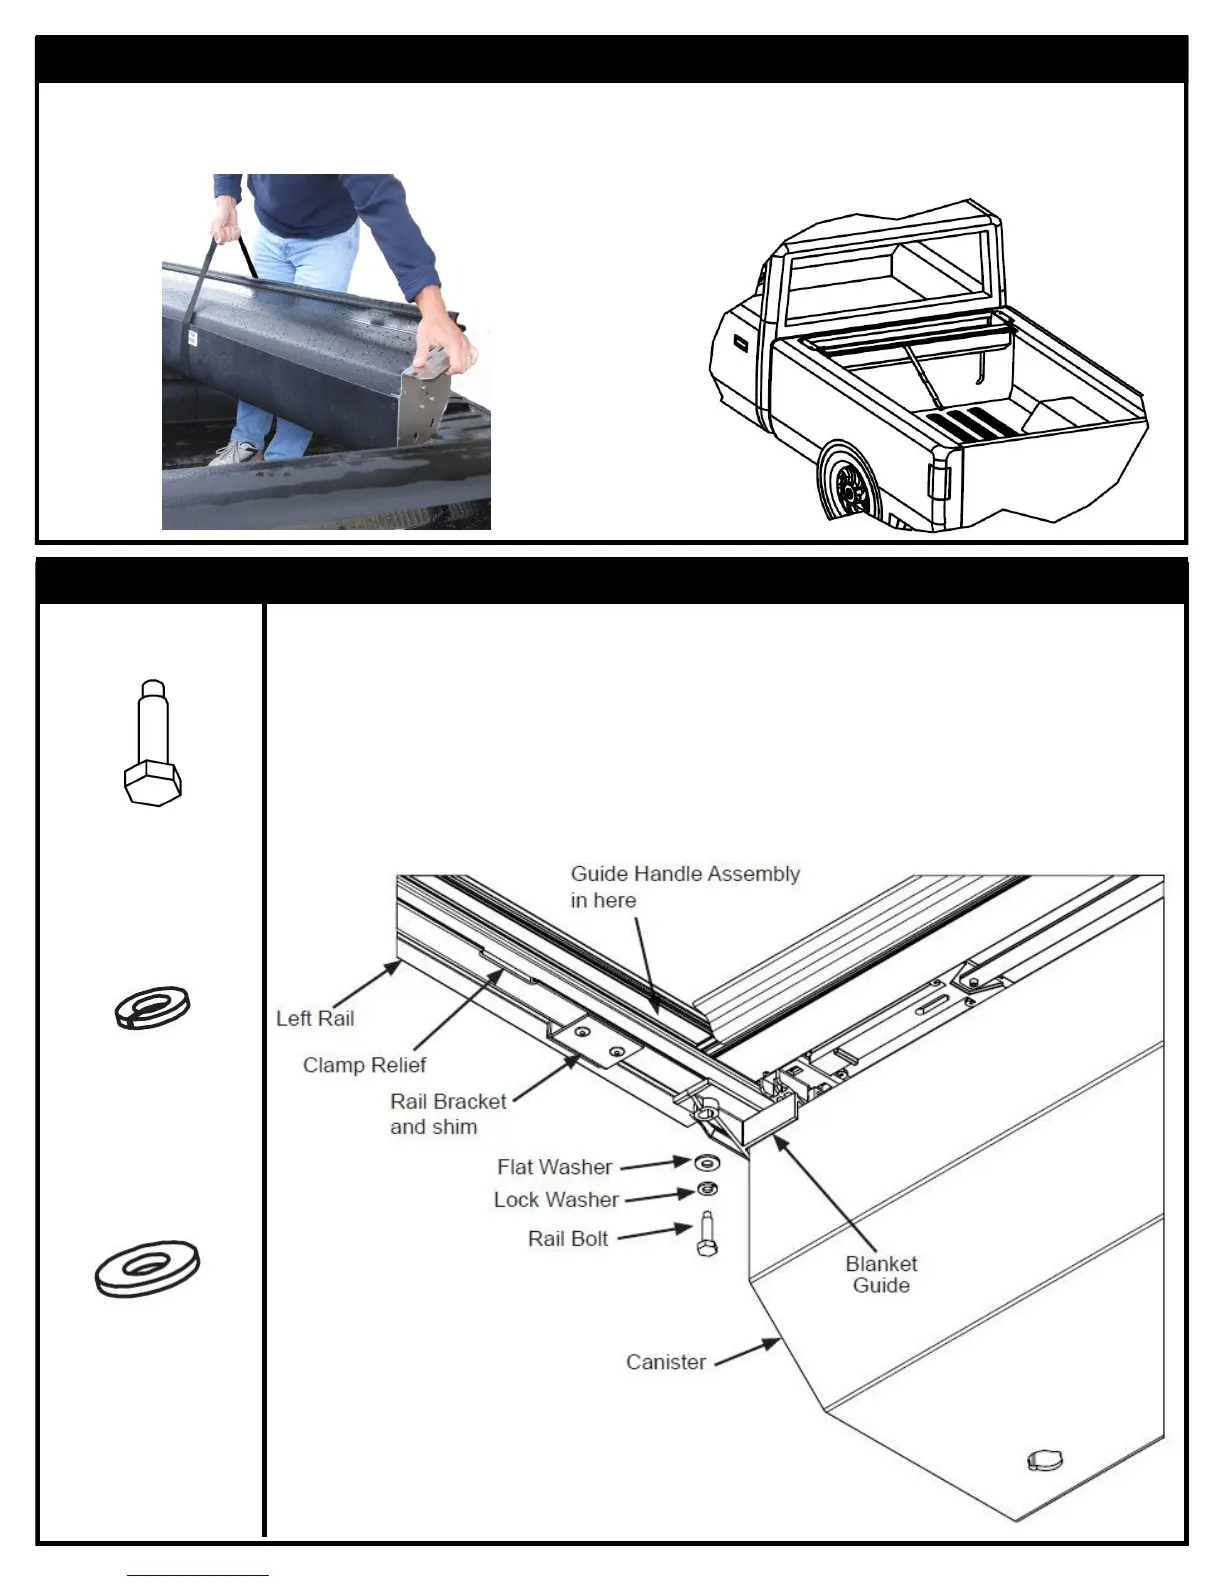
Place the Canister in the truck bed just behind the cab
and center it from side to side. Ensuring that the canister
is centered in the bed will help assemble the rails to the
canister in the next step.
STEP 2: POSITIONING THE CANISTER
Use the Pull-strap and one canister ange to li and steady the
unit. Wrap the Pull-strap around the canister of the canister a
couple of mes and double it up in your hand.
STEP 3: INSTALLING RAILS
HARDWARE USED:
1/4-20 x 1”
RAILBOLT x2
Remove the protecve paper from the foam on the underside of the Rail Flanges. This is for packag-
ing purposes only. The rails shipped with plasc shims pre-installed to the Rail Brackets for proper
spacing. Ensure those shims are in place.
Next idenfy the le and right side rails. The plasc rail endcap should be towards the tailgate
while the rail ange and foam, shims and brackets towards the outside of the truck bed. Install the
rails by rst guiding Handle Assembly into the open channel of the rail and then sliding the rail
against the blanket guide on the canister. Aach the rail to the canister using the rail bolt, lock
washer and at washer through the blanket guide and into the boom of the rail.
FIG. 3A
1/4” LOCK WASHER x2
1/4” FLAT WASHER x2



 To Next Page