7
Figure 3
Figure 4
Figure 5
Assembly (cont’d)
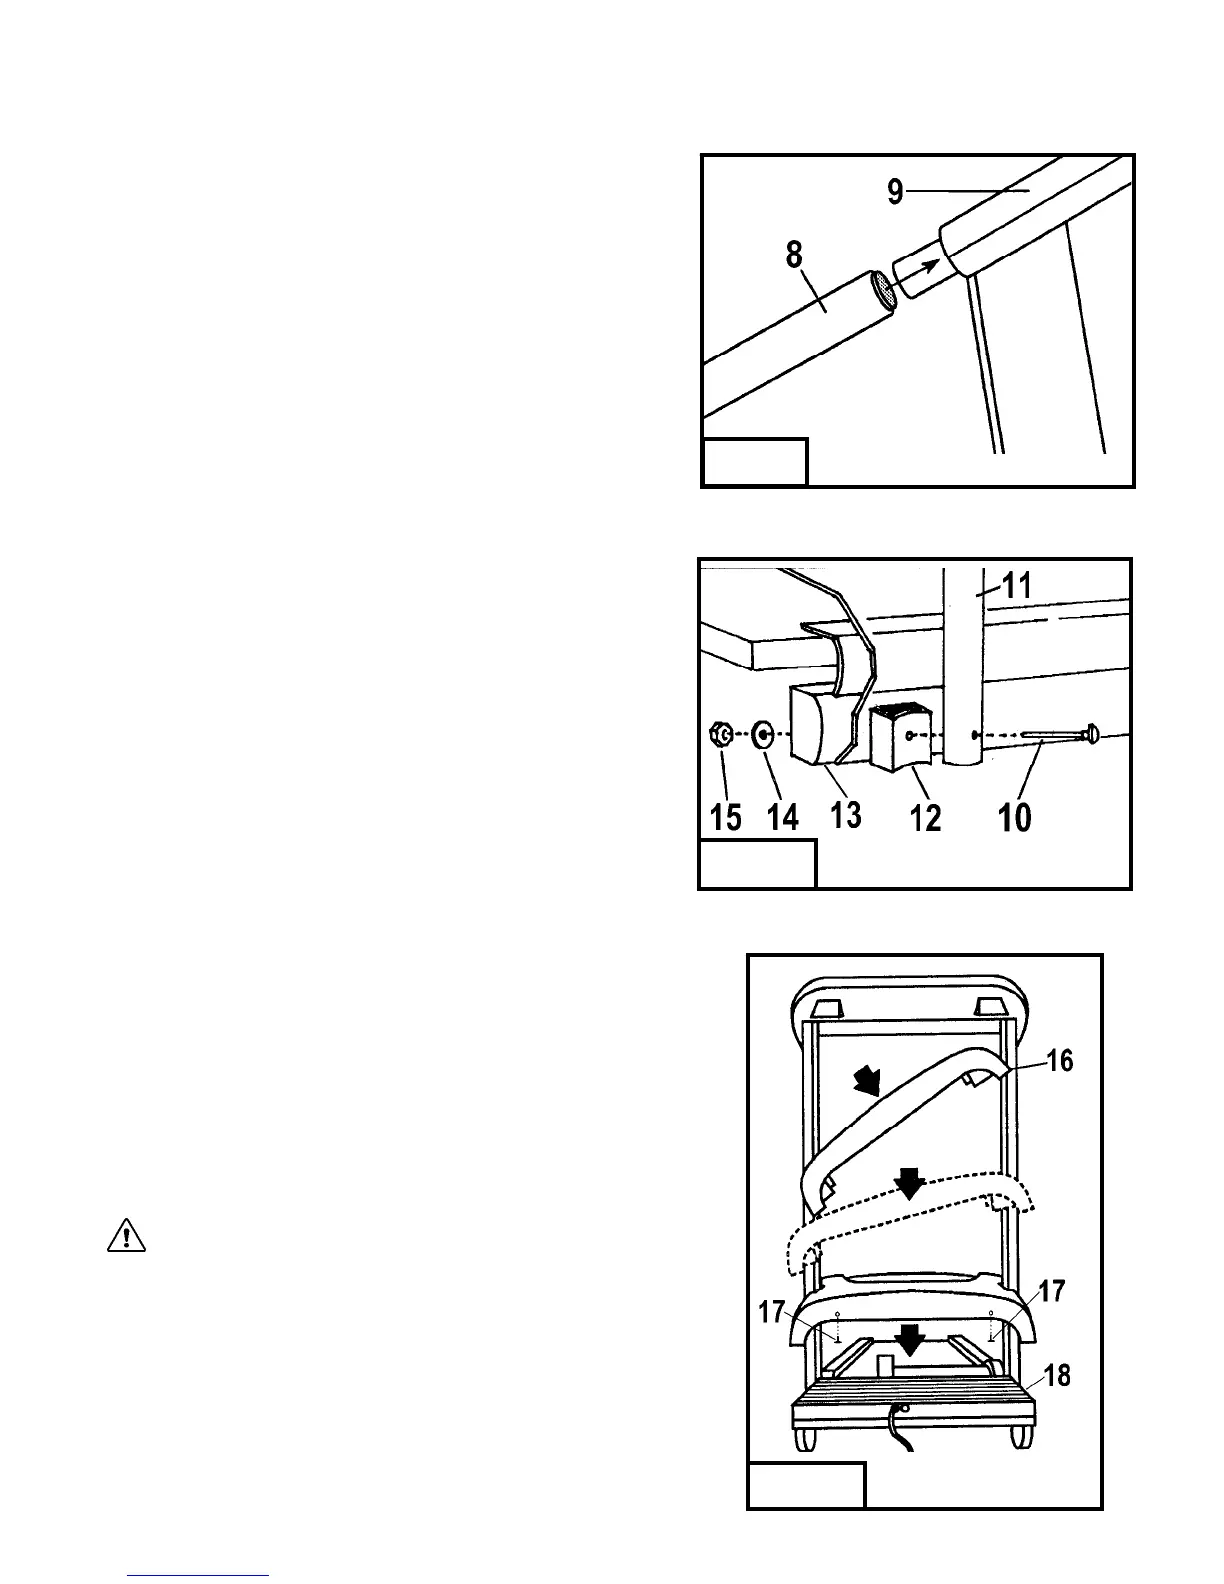
Step Three: (see figure 3)
Take one of the side rails (8) and slide the end with the grip over the end of the
steel tube protruding from the control panel (9). Make sure the side rail grip
touches the control panel.
Step Four: (see figure 4)
Insert one of the 4” carriage bolts (10) through the side rail (11), the side rail
bracket (12) (the foam on the bracket should be at the top, facing the frame)
and finally through the frame (13). Install a 1” fender washer (14) and a ¼-20
kep nut (15) to the bolt and hand tighten. Install the other side rail following
the same procedure. Tighten both side rails with a 7/16” wrench.
Step Five: (see figure 5)
To install the motor cover, stand in front of the treadmill. Pick up the motor cover
(16) so it is level. Holding the motor cover level and waist high, tilt it 45 degrees by
lowering your left hand. Then slide it between the handlebars and lower the motor
cover until it is level. Lower the cover all the way, keeping it level. Screw the two
#8x1/2” black sheet metal screws (17) into the front of the motor cover. Press down
on each side of the motor cover where it meets the silver plastic deck shrouds to lock
the Velcro pads (18) into place.
CAUTION: Do not raise or lower motor cover without it being level.