ENGLISH
4
Profile
®
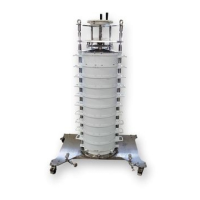
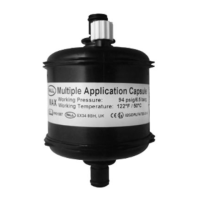
Coreless Filter Elements
Operating and Installation Procedures
(e) Carefully fit the upper core (2) into the
bore of the Profile Coreless filter element
(4) ensuring it correctly seats on the
lower core. To aid installation lubricate
the O-ring seal (6) with a lubricant that is
compatible with the process fluid. Enter
the upper core (2) over the spigot of the
lower core, until the knife-edge of the
upper core seats of the filter element
media.
(f) Screw the retaining nut (3) onto the
spigot of the lower core. Tighten
enough to ensure that the two
knife-edges penetrate well into the
filter element media.
5. INTRODUCING PROCESS FLUID
Place the filter housing on-stream in
accordance with the operator’s own
laid down procedures.
6. EUROPEAN DIRECTIVE 94/9/EC
(ATEX) ‘EQUIPMENT FOR USE IN
POTENTIALLY EXPLOSIVE
ATMOSPHERES’
Pall filter cartridges comply with the ATEX
directive when installed in a compliant Pall
filter housing or assembly, but are not
themselves required to be labelled with
the ATEX marking. Under the terms of the
directive, filter cartridges are not considered
equipment capable of autonomous function,
but may be thought of as components
essential to the operation of the equipment.
As such, the conformity of filter cartridges
has been assessed as an integral part
of the overall assembly.
7. REPLACING PROFILE CORELESS
FILTER ELEMENT
Appropriate personal protection should be
used in-line with the user’s own Health and
Safety procedures, taking into consideration
any potential contaminants or fluids present
on the filter as a result of use
7.1 The Profile Coreless filter element
should be replaced when the
specifications for the process and
element is reached. Refer to Pall for
details of filter element differential
pressure and temperature
specifications.
7.2 Shut down filter housing in accordance
with the operator’s own laid down
procedures.
7.3 Unscrew retaining nut (3) from spigot
and remove the upper core (2) from
the lower core (1).
7.4 Remove the filter element (4) from the
lower core (1). Discard in accordance
with local Health and Safety Procedures.
Clean and examine the core assembly.
7.5 If necessary, remove core assembly as
detailed in paragraph 4.3. It is
recommended that the O-ring seals (5
and 6) are renewed before re-assembly.
7.6 Install new Profile Coreless filter element
in accordance with paragraph 4.2.
7.7 Commission the filter housing in
accordance with the operator’s own
laid down procedures.
7.8 Removal of the Core Assembly
(if required):
If the core assembly has to be removed
due to damage to the knife-edge
or O-ring seal, proceed as follows:
(a) Remove filter element (4) by unscrewing
retaining nut (3) and lifting the upper
core (2) to remove it. Then grasp the
upper edge of the filter element (4)
and lift it clear of the lower core (1).
IMPORTANT:
NO GASKETS ARE REQUIRED FOR SEALING
OF THE PROFILE CORELESS FILTER
ELEMENT TO THE CORE ASSEMBLY.
WARNING:
BEFORE PROCEEDING ANY FURTHER,
ENSURE NO RESIDUAL PRESSURE EXISTS
IN THE HOUSING, AS INDICATED BY
PRESSURE GAUGES OR SENSING DEVICES
INSTALLED IN THE SYSTEM. OPENING THE
HOUSING WHILE UNDER PRESSURE COULD
RESULT IN PERSONAL INJURY AND/OR
DAMAGE TO EQUIPMENT.
 Loading...