www.lutron.com/supportCustomer Assistance - 1.844.LUTRON1 (U.S.A./Canada) or +44.(0)20.7680.4481 (Europe)
P/N 041563 Rev. F
11/2019
Configuration Instructions
Thermostat and Fan Coil
Unit (FCU) Controller
English
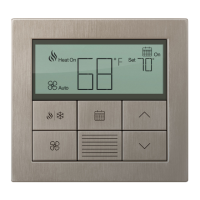
The Palladiom thermostat and HVAC Controllers must be wired and configured as per the Palladiom QS Thermostat Install at www.lutron.com, then follow the instructions on this document.
Note: If an HVAC Controller will be connected directly to the thermostat, verify it has been installed and powered as per its instruction sheet, before proceeding to HVAC Controller Selection Mode. If no HVAC
controller will be connected directly to the thermostat, skip all programming sections. This configuration will be completed by a certified Lutron dealer via the myRoom software.
Note: For SMC53 and SMC55 installation instructions, refer to www.lutron.com
Note: To run the FCU controller without the thermostat attached (detached mode) please follow instructions in the Lutron App Note #713 (P/N 048713) at www.lutron.com
A. HVAC Controller Selection Mode
(only available with thermostat version 4.12 or later)
1. HVAC controller selection mode. The thermostat will automatically enter into HVAC controller selection mode if an HVAC controller has
not been previously selected.
2. Select the HVAC controller connected to the thermostat. Using the table below, press } or { buttons to select the correct HVAC
controller being used and press u.
3. Set the Modbus address.* Using the table above, press
or
to select the desired Modbus address and press u.
* For more information, see the instructions included with the HVAC controller.
4. Exit HVAC controller selection mode. When “End” is shown, press and hold u until the backlight flashes (3seconds). The thermostat will
proceed to the next relevant menu or to normal operation when finished.
Note: "E1" will show on the display if the thermostat is not able to communicate with the HVAC controller.
B. Configuring the SMC53 / SMC55 (if applicable)
1. Enter basic configuration mode. If the Palladiom thermostat version 4.12 and later is being used in combination with
SMC53 version 1013 and later or SMC55 version 5012 and later, then the thermostat will automatically enter
the Basic Configuration Mode for an FCU controller being configured for the first time.
If the above is not true, then hold the °C | °F and
buttons for 3 seconds. Once the display begins to flash, release both buttons and
immediately hold °C | °F for 3 seconds in order to enter the Basic Configuration Mode.
2. Set the Basic Configuration. Once in the Basic Configuration Mode, tap the } or { buttons to display the desired configuration
number as shown in the table to the below. Only the supported options are displayed.
3. Save parameter values and exit basic configuration mode. Hold the u button for 3 seconds to save this configuration. The display will flash, then normal operation will begin.
4. Adjust advanced configuration parameters (optional). See the Advanced SMC Controller Configuration Instructions on next page.
Re-enter Configuration Mode (optional)
If any changes are needed after the configuration has been completed, follow the steps below.
1. Cycle power to the thermostat.
2. Within 15 minutes of power cycling the unit, hold °C | °F and
buttons for 3 seconds.
3. Release the buttons and immediately hold:
3a. } for Controller Selection Mode.
3b. °C | °F for Basic Configuration Mode.
3c. for Advanced Configuration Mode.
Determine Firmware Version (optional)
(only available with thermostat version 4.12 or later)
1. To determine the Firmware Version of the thermostat, hold } and { buttons for 3 seconds and the firmware version of the thermostat will be shown.
2. If thermostat is used in combination with SMC53 / SMC55 then within 10 seconds of completing step 1 either:
2a. Press the } button for the Firmware Version of the FCU Controller.
2b. Press the °C | °F button for the Basic Configuration number of the FCU Controller.
Parameter value
Set
Press to
change
parameter
value
Press to select
current value
and proceed to
next parameter
HVAC controller option Modbus address
Values based on
HVAC controller
SMC53 / SM C55
01 01
Mitsubishi A1M 02
01-31
(set by DIP switches 1-5)*
Cool Automation
CoolPlug
03 99
LG PDRYCB500 04
01-08
(set by DIP switches 1-4)*
Set
Set
Hold °C | °F
and buttons
for 3seconds,
then °C | °F for
3seconds to
enter mode.
* For Floating Point Valves, choose On / Off Relays, then see the Palladiom Thermostat and FCU Controller Configuration Instructions (P/N 041563) at www.lutron.com. Also, see Application Note #630 (P/N048630) at www.lutron.com
** Simultaneous 0 – 10 V- and relay controls available in SMC55-HOSP version 5010 or later and SMC5500050407 version 5008 or later.
Basic Configuration Table
System Configuration
(Pipe Configuration)
Valve / Element Control
(Valve Type)
Fan Control
(Fan Type)
2-pipe/Single Thermal Type
(2-pipe mode)
Basic Configuration Number
Basic Configuration Supported Models
SMC53x SMC55x
As-Is Use current configuration on the controller 00
• 4-pipe
• 2-pipe cooling with resistive
heating element
Two On / Off relays*
H / M / L Relays — 01
0–10 V- Signal — 02
Two 0–10 V- signals or one relay
and one 0–10 V-
H / M / L Relays — 03
0–10 V- Signal — 04
• 2-pipe heating only
• 2-pipe cooling only
• 2-pipe with a changeover sensor
One On / Off relay*
H / M / L Relays
Changeover Sensor 05
Heat-only 06
Cool-only 07
0–10 V- Signal
Changeover Sensor 08
Heat-only 09
Cool-only 10
One 0–10 V- signal
H / M / L Relays
Changeover Sensor 11
Heat-only 12
Cool-only 13
0–10 V- Signal
Changeover Sensor 14
Heat-only 15
Cool-only 16