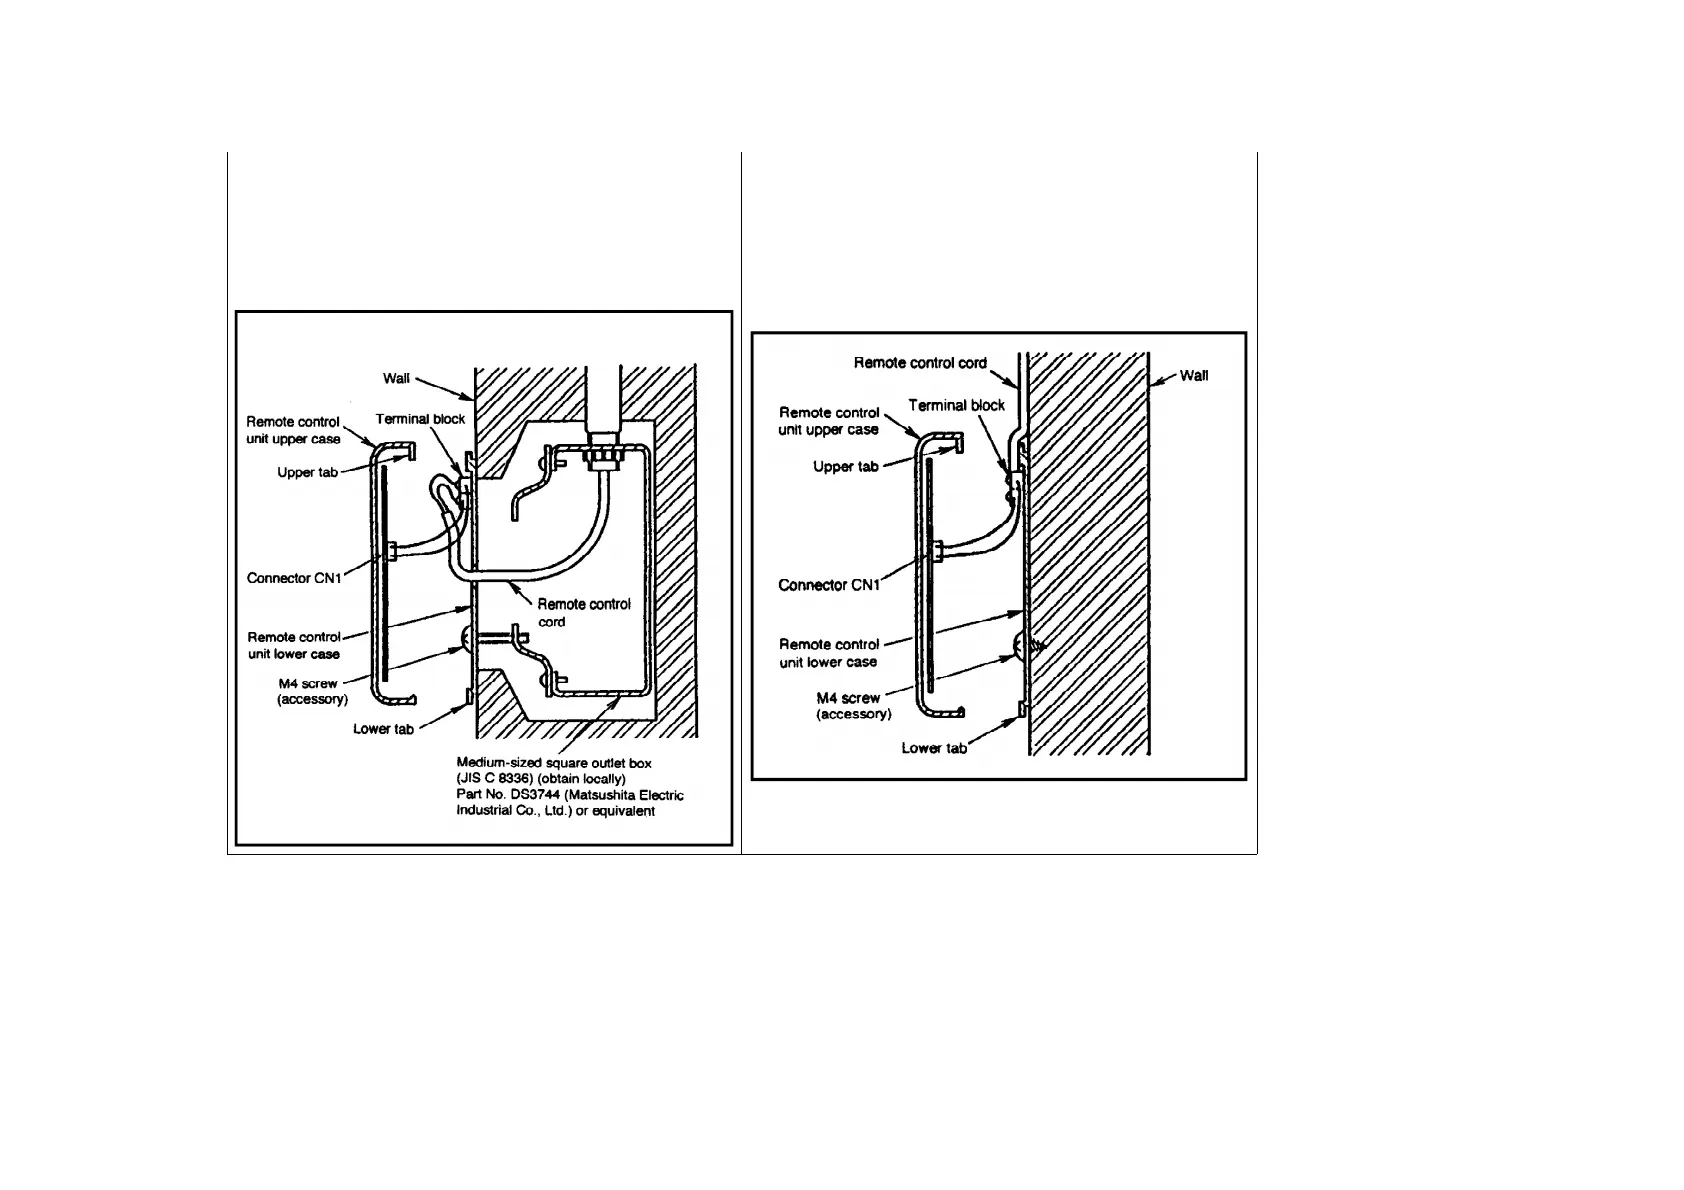
1. Embed an outlet box (JIS C 8336) into the wall, and then secure the
remote control unit base plate to the outlet box with the two accessory M4
screws. Make sure that the base plate is flat against the wall at this time,
with no bending (looseness).
2. Pass the remote control cord into the box and then install the remote
control unit.
1. Secure the remote control unit base plate to the wall with the two
accessory 4 mm screws.
2. The feeding-out direction for the remote control unit cord can be either
up or to the left or right. (Refer to the illustration above.) After determining
the feeding-out direction, use pliers to make a notch in the cover.
3. Route the remote control cord as shown in the illustration above. Pull
the cord firmly around the outside of the base plate at this time.
27.7.3. Setting
Control using two remote control unit
- Up to two remote control units can be installed for a single indoor unit, and either remote control
unit can be used to operate the indoor unit.
251