108
Figure 3 Figure 4
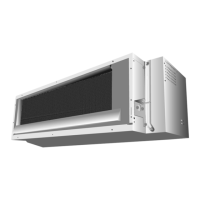
19.1.1.3 To remove discharge grille
Figure 5
19.1.1.4 To remove control board
Figure 6
CN-RMT
CN-FM
CN-STM1
CN-MSENS
CN-TH
CN-DISP
7. Detach the CN-DISP
connector then remove
the indicator complete.
10. Detach 3 or 4 connectors as labeled from
the electronic controller. Then pull out
main controller gently
9. Pull out the main
electronic controller and
power electronic
controller halfway.
8. Remove screw to
remove terminal board
complete.
6. Detach the Earth wire
11. Pull out to remove the drain hose
from the discharge grille
12. Then pull the discharge grille
downward gently to dismantle it
13. Remove 4 screws holding the
control board then pull out the
control board.