24
10. Installation Instruction
10.1 Select the Best Location
10.1.1 Indoor Unit
• There should not be any heat source or steam near
the unit.
• There should not be any obstacles blocking the air
circulation.
• A place where air circulation in the room is good.
• A place where drainage can be easily done.
• A place where noise prevention is taken into consideration.
• Do not install the unit near the door way.
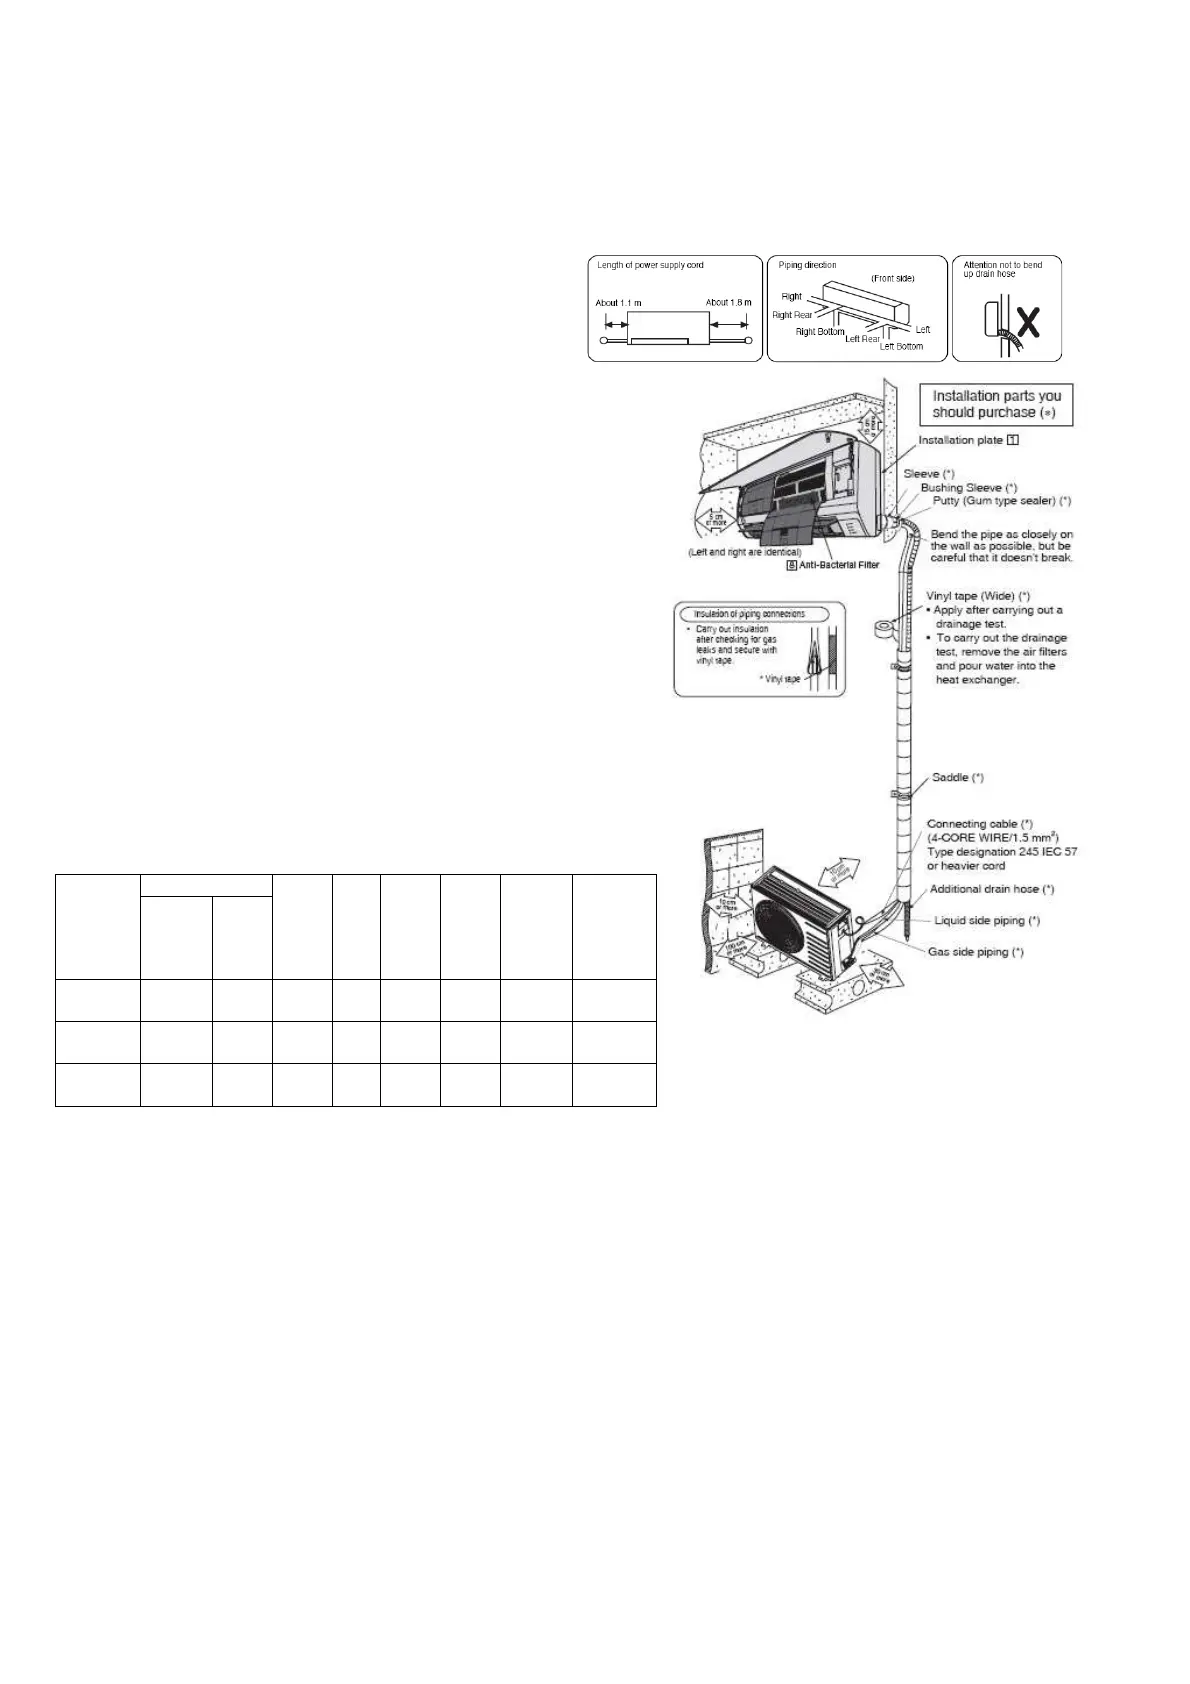
• Ensure the spaces indicated by arrows from the wall, ceiling,
fence or other obstacles.
• Recommended installation height for indoor unit shall be at
least 2.5m.
10.1.2 Outdoor Unit
• If an awning is built over the unit to prevent direct sunlight or
rain, be careful that heat radiation from the condenser is not
obstructed.
• There should not be any animal or plant which could be
affected by hot air discharged.
• Keep the spaces indicated by arrows from wall, ceiling, fence
or other obstacles.
• Do not place any obstacles which may cause a short circuit of
the discharged air.
• If piping length is over the rated length, additional refrigerant
should be added as shown in the table below:
Example: If the unit is installed at a 10m distance, the quantity of
additional refrigerant should be 60 g. …… (10-7) m x 20g/m = 60 g
Piping size Model
Gas
mm
(inch)
Liquid
mm
(inch)
Rated
(m)
Max
Elev-
ation
(m)
Min
Piping
(m)
Max
Piping
(m)
Additio-
nal
Refriger
ant
(g/m)
Piping
length for
add
gas(m)
RE9NKX
9.52
(3/8”)
6.35
(1/4")
5 5 3 15 20 7
RE12NKX
9.52
(3/8”)
6.35
(1/4”)
5 5 3 15 20 7
RE15NKX
12.7
(1/2”)
6.35
(1/4”)
5 5 3 15 20 7
*This illustration is for explanation purposes only.
The indoor unit will actually face a different way.




 To Next Page