CZ-01RT11P
Remote controller
4PW12543-1
Installation manual
3
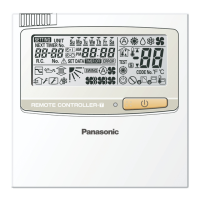
5. Field settings
(If optional accessories are mounted on the indoor
unit, the indoor unit setting may have to be changed.
Refer to the instruction manual for each optional
accessory.)
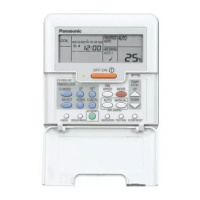
(Refer to figure 7)
Procedure
(Refer to figure 7)
1When in the normal mode, press the “ “
button for a minimum of four seconds, and the
FIELD SET MODE is entered.
2 Select the desired MODE NO. with the “ ”
button.
3 During group control, when setting by each
indoor unit (mode No. 20, 21, 22 and 23 have
been selected), push the “ ” button and
select the INDOOR UNIT NO. to be set. (This
operation is unnecessary when setting by
group.)
4 Push the “ ” upper button and select
FIRST CODE NO.
5 Push the “ ” lower button and select the
SECOND CODE NO.
6 Push the “ ” button once and the present
settings are SET.
7
Push the “ ” button to return to the NOR-
MAL MODE.
Example
(see next page)
If during group setting and the time to clean the air fil-
ter is set to FILTER CONTAMINATION - HEAVY, SET
MODE NO. to “10”, FIRST CODE NO. to “0”, and
SECOND CODE NO. to “02”.
“
88
” is displayed for about one minute when the
power supply is turned on. During this time the
remote controller can not be operated.
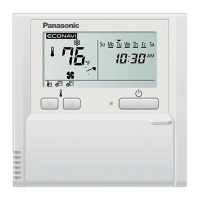
a Unit NO
b First Code NO
c Second Code NO
d Mode NO
e Field set mode
NOTE 1.
Setting is carried out in the group
mode, however, if the mode number
inside the parentheses is selected,
indoor units can also be set individually.
2. The SECOND CODE number is set to
“01” when shipped from the factory.
3. Do not make any settings not given in
the table.
4. Not displayed if the indoor unit is not
equipped with that function.
5.
When returning to the normal mode,
“
88
” may be displayed in the LCD in
order for the remote controller to initial-
ize itself.
2B_IM_4PW12543-1.book Page 3 Wednesday, July 10, 2002 1:06 PM
 Loading...