EasyManua.ls Logo

Panasonic Diga DMR-EX79 User Manual

Panasonic Diga DMR-EX79
84 pages
To Next Page IconTo Next Page
Page #1 background imageLoading...
Page #1 background image
until
2009/04/06
Operating Instructions
DVD Recorder
Model No. DMR-EX79
Dear customer
Thank you for purchasing this product. For optimum
performance and safety, please read these
instructions carefully.
Before connecting, operating or adjusting this
product, please read the instructions completely.
Please keep this manual for future reference.
Region number supported by this
unit
Region numbers are allocated to DVD Recorders
and DVD-Video according to where they are sold.
The region number of this unit is “4”.
The unit will play DVD-Video marked with labels
containing “4” or ALL”.
Example:
This DVD recorder is for viewing and recording
free to view channels only, not pay TV or
encrypted channels.
TV Guide system of this DVD recorder does not
support analogue broadcasts.
Trademark of the DVB Digital Video
Broadcasting Project
Declaration of Conformity (22nd October 2008)
No. 5966
About descriptions in these operating
instructions
Pages to be referred to are indicated as “> ±±”.
2 ALL
3
5
2
4 ALL
3
4
2
GN
RQT9306-L
Quick Start
Guide
Basic
operations
DMREX79GN-RQT9306-L_eng.book 1 ページ 2009年3月24日 火曜日 午後2時38分

Table of Contents

Question and Answer IconNeed help?

Do you have a question about the Panasonic Diga DMR-EX79 and is the answer not in the manual?

Panasonic Diga DMR-EX79 Specifications

General IconGeneral
BrandPanasonic
ModelDiga DMR-EX79
CategoryDVD Recorder
LanguageEnglish

Summary

Included accessories

The remote control information

Batteries

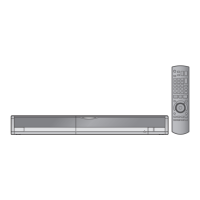
Details on inserting and using batteries for the remote control, including precautions.

Use

Guidance on pointing the remote control towards the unit for proper operation.

Safety precautions

HDD (Hard disk drive) handling care

Setup precautions

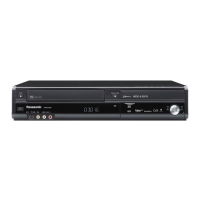
Instructions for placing the unit to prevent HDD damage from vibration or heat.

When moving the unit

Procedure for safely moving the unit to avoid HDD damage, including power-off steps.

Unit care

STEP 1 Connection

Connecting a television

Guides for connecting to a TV via RF coaxial, audio/video cables.

Connecting to a TV with an HDMI cable

Steps for connecting to a TV using an HDMI cable for high-quality digital audio/video.

STEP 2 Channel reception settings and TV aspect settings

Initial TV Setup and Auto Tuning

Includes TV setup, AV input matching, and DVB Auto Setup for channels.

Power Save and TV Aspect Settings

Configuring Power Save mode and adjusting the TV aspect ratio for optimal viewing.

Watching analogue and digital broadcasts

Digital channel information

Displays information about the current program, signal quality, and broadcast details.

Recording television programmes

Recording modes and approximate recording times

Explanation of recording modes (XP, SP, LP, EP) and their approximate recording times.

Timer recording

Using the TV Guide system to make timer recordings

Detailed steps for using the TV Guide to schedule timer recordings for digital broadcasts.

Operation during play

Basic Playback Controls

Covers Stop, Pause, Search, Skip, and starting playback from selected titles.

Advanced Playback Features

Includes Quick View, Frame-by-frame, Time Slip, Manual Skip, Chapter Creation, and Audio Change.

Selecting recorded programmes (titles) to play—DIRECT NAVIGATOR

To sort the titles for easy searching

Using the Sort function to organize titles for quicker access.

To edit the group of titles HDD

Options for creating, releasing, or changing group names for recorded titles.

Convenient functions

FUNCTION MENU Display

Accessing main functions quickly via the FUNCTION MENU.

To pause the TV programme you are watching—Pause Live TV

Temporarily pausing live TV and resuming playback from the HDD.

Linked operations with the TV (VIERA Link “HDAVI Control™™”)

What is VIERA Link "HDAVI Control"?

Explanation of the VIERA Link feature for integrated TV and receiver operations.

Editing titles/chapters

Chapter Creation

Setting automatic chapter creation based on time intervals or programme breaks.

Creating, editing and playing playlists

Creating playlists

Steps to arrange chapters into playlists for playback order.

Copying titles or playlists

Approximate copying times (Max. speed)

Table showing estimated copying times for various discs and speeds.

Copying using the copying list-Advanced Copy

Register titles and playlists for copy

Adding titles and playlists to the copying list for advanced copying.

COPY Navigator/Copying list icons and functions

To edit the copying list

Options to delete all items, add new items, delete selected items, or move items in the list.

Copying SD Video from a video equipment

Copying still pictures

To register on a folder by folder basis

Registering entire folders containing still pictures for copying.

To register individual still pictures

Registering single still picture files for copying.

Copying music to HDD

Copying music from a CD

Steps to copy music from a CD to the HDD, utilizing the Gracenote® database.

Copying music from a USB memory or CD-R/CD-RW/DVD-R/DVD-R DL

How to copy MP3/WMA files from USB or discs to the HDD.

Using on-screen menus/Status message

Disc menu—Setting the disc content

Adjusting Soundtrack, Subtitle, Angle, and Menus for disc playback.

Picture menu—Change the picture quality

Adjusting picture quality settings like Playback NR and Progressive.

HDD and disc management

Setting the protection

Applying write protection or deletion protection to discs.

Providing a name for a disc

Assigning custom names to discs for easier identification.

Deleting all the contents—Format

Enabling discs to be played on other equipment—Finalise

Creating Top Menu—Create Top Menu

Changing the unit's settings

Tuning

Editing Favourites, adding DVB channels, and manual tuning.

Changing the unit's settings

Signal Condition

Checking digital broadcast signal quality and strength for aerial adjustment.

Disc

Settings for Playback

Configuring playback settings like Ratings, Soundtrack, Subtitle, and Menus.

Settings for Recording

Adjusting recording settings like EP mode, Aspect, High Speed Copy, and recording times.

Changing the unit's settings

Sound

Adjusting Dynamic Range Compression, Bilingual Audio, Digital Audio Output, and Audio Modes.

Connection

TV System

Selecting the TV system (PAL/NTSC) for recording and playback.

HDMI Settings

Configuring HDMI Video Format, Aspect for 4:3 Video, Digital Audio Output, and VIERA Link.

Changing the unit's settings

Others

Settings for Remote Control, Clock, Power Save, Auto Standby, DivX Registration, and System Update.

Other Settings

Television operation

Configuring remote control buttons for TV operations like power, input, and volume.

Additional connections

Connecting a television with S VIDEO terminals

Steps for connecting a TV using S-Video cables for improved picture quality.

Connecting with an HDMI compatible television and receiver

Additional connections

Connecting a television and VCR

Guides for connecting a TV and VCR using Scart or AV terminals.

Frequently asked questions

Set up

Answers common questions about aerials, HD broadcasts, and surround sound.

Disc

Questions about playing CDs, DVDs from other countries, and disc compatibility.

Messages

On the unit's display

Troubleshooting guide

Power

Troubleshooting steps for issues when the unit does not turn on or switches to standby.

Displays

Solutions for dim displays, flashing '0:00', or time discrepancies.

Sound

Play

Playback Start and Stop Issues

Resolving problems with playback failing to start, stopping unexpectedly, or pausing.

Playback Content Compatibility

Addressing issues with DVD-Video playback, soundtrack, subtitles, angles, and ratings.

Specifications

Panasonic Warranty

Related product manuals