ENGLISH-7
Lens calibration
Perform lens calibration after attaching the lens.
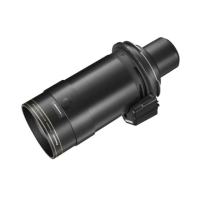
The illustrations in this procedure depict
use of the ET-D3LEW10 as an example.
1)
Press the <MENU> button.
2)
Use the ▲ and ▼ buttons to
select [PROJECTOR SETUP],
and press the <ENTER>
button.
z
The [PROJECTOR SETUP] screen
appears.
3)
Use the ▲ and ▼ buttons to
select [LENS], and press the
<ENTER> button.
z
The [LENS] screen appears.
4)
Use the ▲ and ▼ buttons to
select [LENS CALIBRATION],
and press the <ENTER>
button.
z
The [LENS CALIBRATION] screen
appears.
5)
Use the ▲ and ▼ buttons to
select [SHIFT/FOCUS/ZOOM],
and press the <ENTER>
button.
z
The conrmation screen appears.
6)
Use the
and
buttons to
select [OK], and press the
<ENTER> button.
z
Lens calibration starts.
z
The projection lens moves to the
home position after adjustment range
calibration is complete.
1/2
PROJECTOR SETUP
PROJECTOR ID
ALL
PROJECTION METHOD
LENS
OPERATION SETTING
NORMAL
LIGHT OUTPUT
100.0%
BRIGHTNESS CONTROL
AUTO
STANDBY MODE
NORMAL
NO SIGNAL SHUT-OFF
DISABLE
NO SIGNAL LIGHTS-OUT
DISABLE
INITIAL STARTUP
LAST MEMORY
STARTUP INPUT SELECT
LAST USED
DATE AND TIME
SUB MENU
MENU SELECT
ENTER
SUB MENU
MENU SELECT
ENTER
LENS
LENS TYPE
ET-D3LEW10
LENS INFORMATION SETTING
LENS MEMORY
LENS HOME POSITION
ACTIVE FOCUS OPTIMIZER
LENS CALIBRATION
EXECUTE
MENU SELECT
ENTER
LENS CALIBRATION : ET-D3LEW10
SHIFT/FOCUS/ZOOM
SHIFT/FOCUS
ZOOM
LENS CALIBRATION : ET-D3LEW10
OK
Proceed LENS CALIBRATION,
and return to HOME POSITION.
EXECUTE
CHANGE
ENTER
CANCEL
Note
z
If lens calibration is not performed, the available zoom range will be narrowed.
Preparation (continued)