Replacing the lamp unit, air filter, and electrostatic filter (continued)
* After removing the air filter unit, remove any large build
ups of dirt or dust in the air filter unit bay and the air
intake port on the projector.
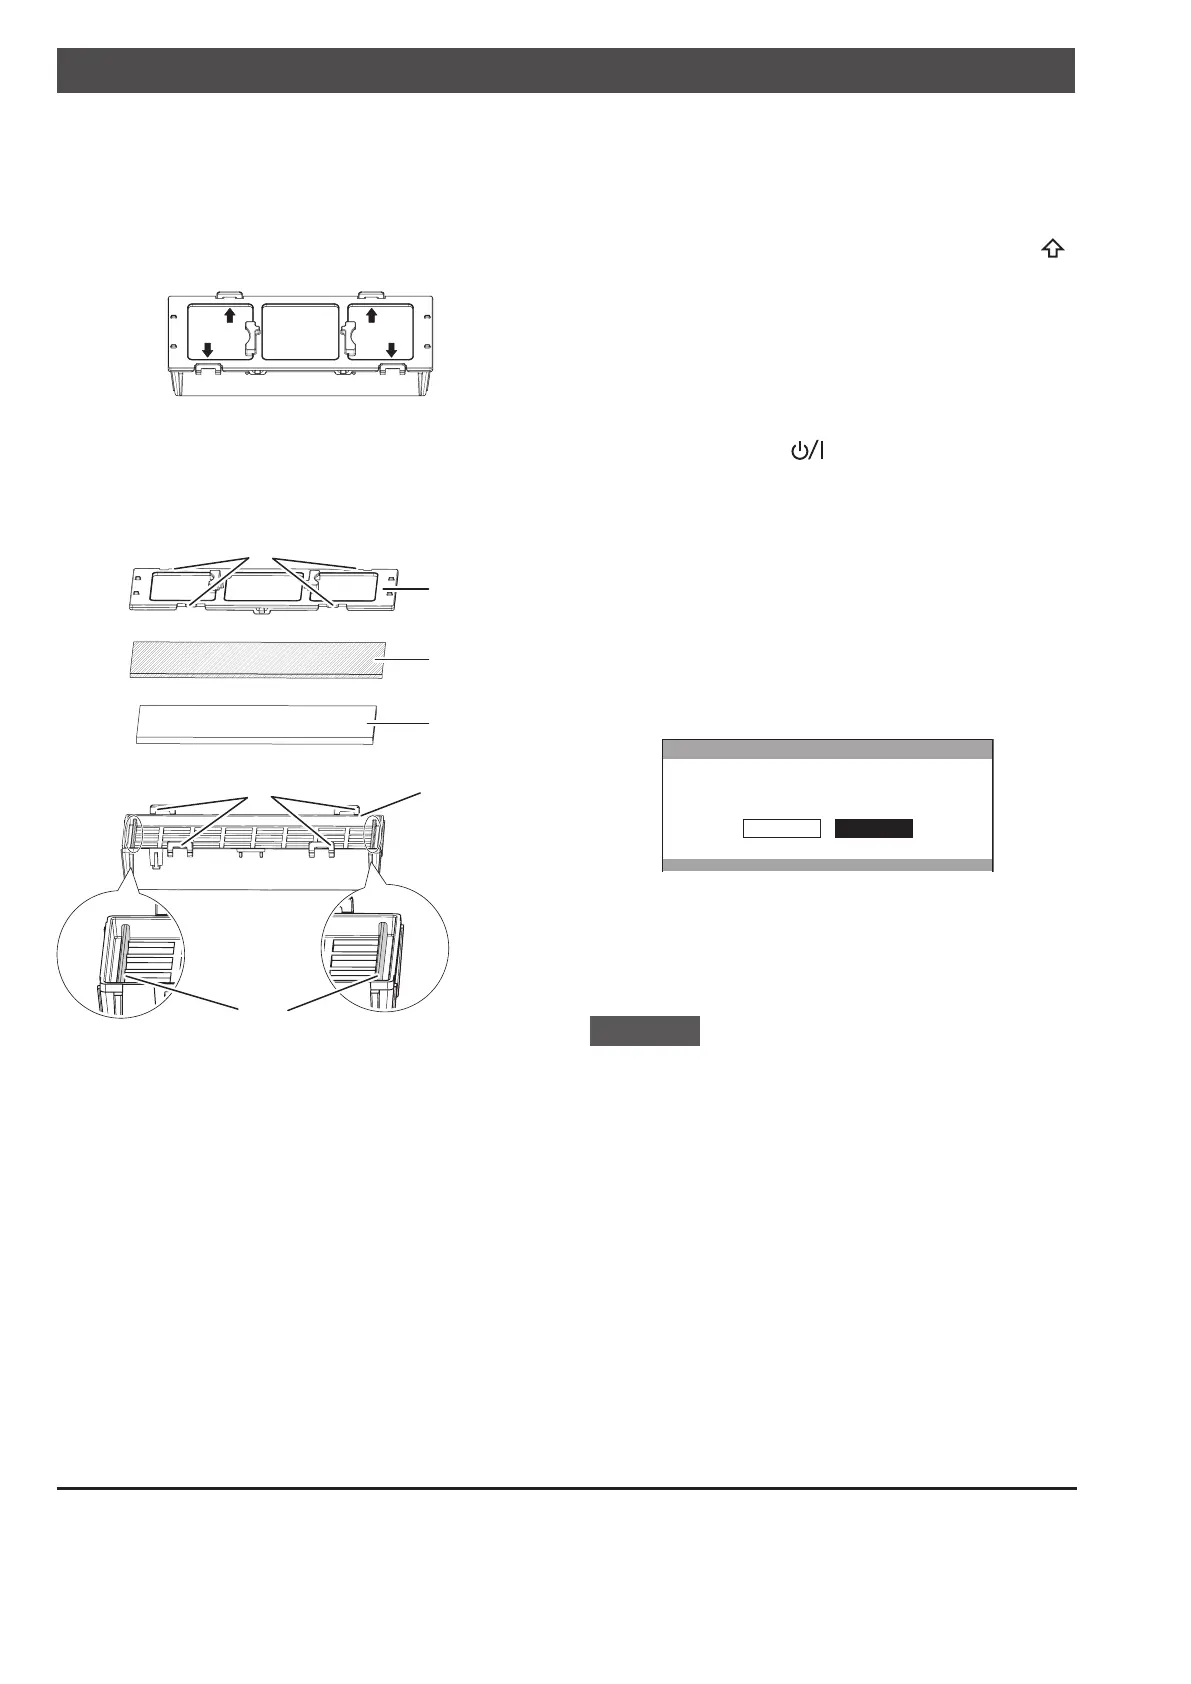
Press the protrusions of air filter unit removed from 13)
the projector in the direction of the black arrow and
remove the air filter frame.
Replace the air filter/electrostatic filter.14)
Replace the air filter and electrostatic filter in the air
•
filter unit with new ones.
Ensure you attach the electrostatic filter and air filter
*
in the correct order.
Air filter case
Air filter (black)
Electrostatic filter
(white)
Protrusions
Ribs
Air filter frame
Catches
Assemble the air filter unit.15)
First insert the electrostatic filter (white) into the
•
center of the case ensuring that its edges do not ride
on top of the ribs, and then insert the air filter (black)
so that its four corners are within the case before
attaching the air filter frame.
Take care so that the air filter does not get caught
*
between the air filter frame and the case.
Align the catches and protrusions on the air filter
*
case and air filter frame when asse
mbling the
air filter unit. When attaching the air filter frame,
ensure that the 4 catches are properly aligned with
the protrusions on the air filter case and they have
clicked into place.
Attach the air filter unit to the projector.16)
Attach the air filter unit to the projector using the
•
reverse of the procedure in 12).
Insert the air filter unit into the projector in the
*
direction of the arrow engraved into the air filter (
UP
)
frame until it clicks into place.
Attach the air filter cover, and firmly tighten the 17)
air filter cover fixing screw (one) with a Philips
screwdriver.
Insert the power plug into a power outlet, and press 18)
the <ON> side of the <MAIN POWER> switch to
turn on the power.
Press the power <19)
> button on the projector or
on the remote control to start video projection.
Press the <MENU> button to display the menu 20)
screen, and select [OPTION]
*1
or [PROJECTOR
SETUP]
*1
with ▲▼ buttons.
*1 Menu names differ depending on the model.
Please select the relevant menu.
Press the <ENTER> button, and select [LAMP 21)
RUNTIME] with the ▲▼ buttons.
Hold the <ENTER> button down for 3 seconds.22)
The [LAMP RUNTIME] screen is displayed.
•
LAMP RUNTIME
LAMP RUNTIME RESET.
CANCELOK
Select [OK] with the 23) ◀▶ buttons and then press
the <ENTER> button.
LAMP RUNTIME is reset to “0”, and the projector
•
powers off. After a short while, the projector enters
standby mode.
Attention
The air filter unit must always be installed in the projector.
•
Failure to do so will result in malfunctions due to foreign
materials, such as dust, entering the projector.
Do not use water to wash the air filter unit as this
•
decreases its ability to absorb dust.
Always replace the air filter and electrostatic filter
•
whenever replacing the lamp unit.
Install t
he lamp unit and the lamp cover securely.
•
© Panasonic Connect Co., Ltd. 2022
Web Site : https://panasonic.net/cns/projector/
Panasonic Connect Co., Ltd.
TI0911AM3042 -PS
Printed in China
 Loading...