8
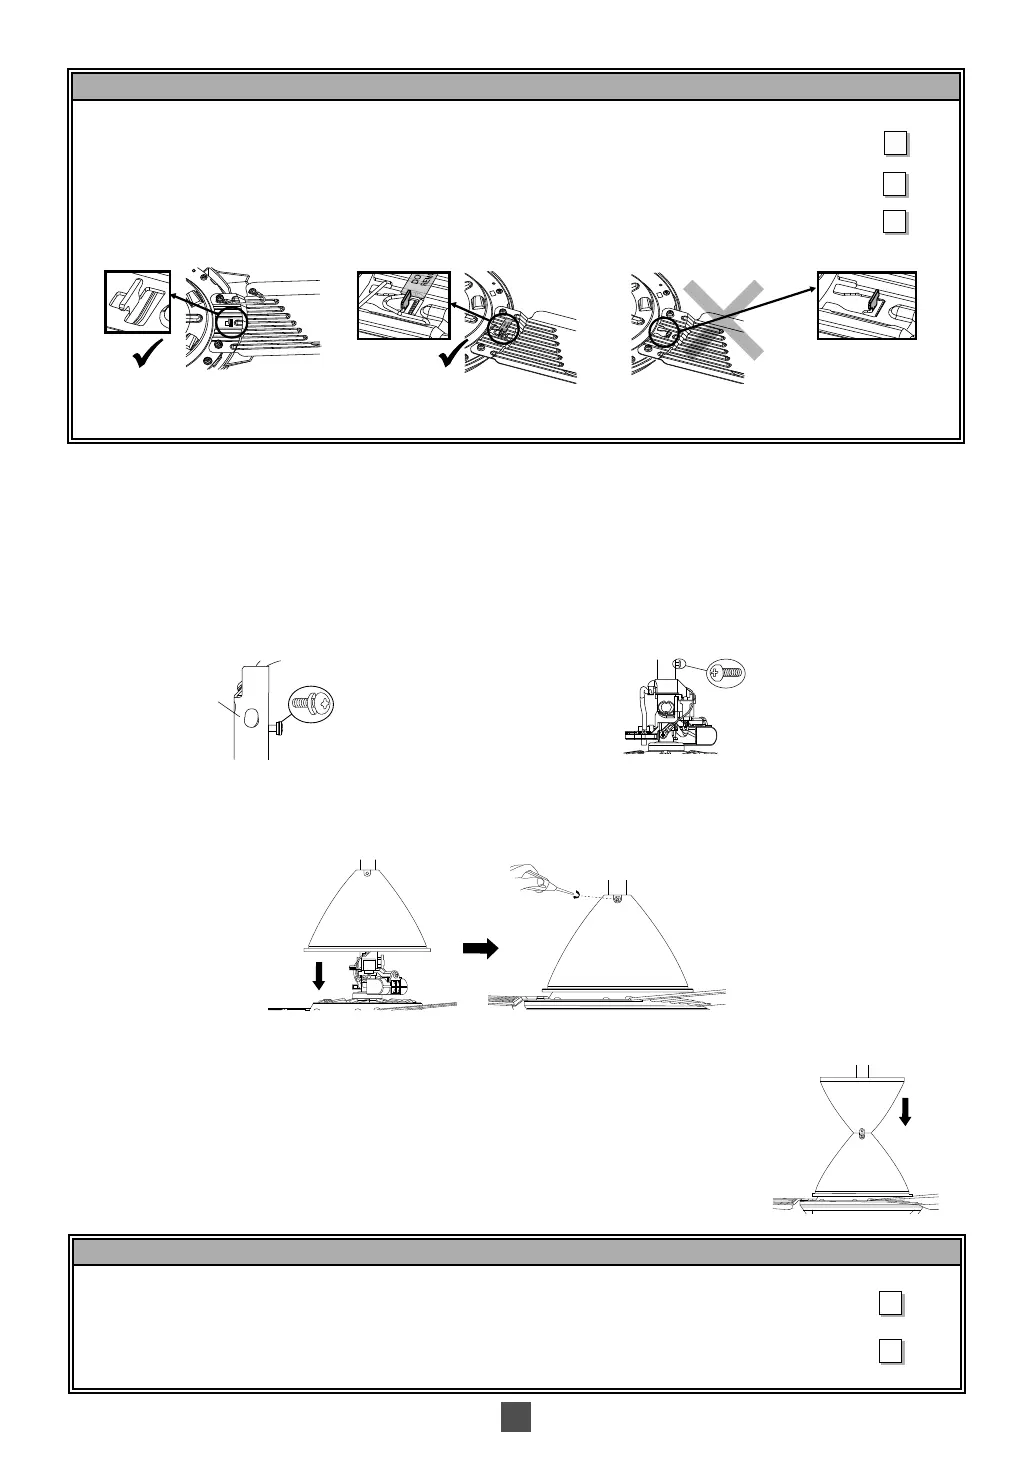
Pemeriksaan Selepas Pemasangan / Check Point After Installation /
Ⴒᯮᐋፇᔏ↰ᑍ
Tandakan / Check /
ᑍ
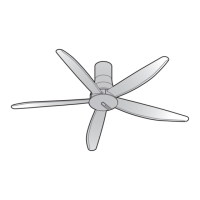
1. Skru Bilah (6 batang) untuk mengikat Pemasangan Bilah diskrukan dengan ketat. / The Blade Screws (6 pieces) for securing the Blade
Assembly are tightly screwed. /
၊འቦᖱℶᡊၯፇᖱℶ⅛ᨃළ
6
ጃෆླྀ∯ᵏ
ණ
2. Untuk Model F-M15B0, Wayar Keselamatan mesti diketatkan bersama dengan Skru Bilah. / For Model F-M15B0, Safety Wire must tighten
together with Blade Screw. /
Ჯዣ!F-M15B0!Ꮦᯜඩီ᪠ሢ၊ᖱℶ⅛ᨃᝈ⁶ᨃ∯ᵏණ
3. Untuk Model F-M15A0 dan F-M12A0, Penyangkut Keselamatan Bilah mesti dipasang pada kedudukan Bilah. / For Model F-M15A0 & F-M12A0,
Blade Safety Hanger must fi x at the position on Blade. /
Ჯዣ!F-M15A0 ྭ F-M12A0!ᏖᯜඩᖱℶႲၺ⌂ᆳီ᪠Ⴒᯮႝᖱℶᄅ᮲མණ
C)
Memasang Sengkuap / Install Canopy /
Ⴒᯮ᮳ᵸ
1
Tanggalkan Skru Dawai Keselamatan dan tanggalkan Skru Sengkuap Bawah pada Pemasangan Paip.
Simpan Skru Sengkuap Bawah untuk pemasangan di langkah 2.
Simpan skru dawai Keselamatan untuk pemasangan di Bahagian D langkah 4.
Remove Safety Wire Screw and remove Lower Canopy Screw at Pipe Assembly.
Keep the Lower Canopy Screw for installation at step 2.
Keep the Safety wire screw for installation at Section D step 4.
ዞབ⁶ᨃ⅛ᨃዞབႝᾚᴻᡊၯፇབ᮳ᵸ⅛ᨃණ
Ⴎབ᮳ᵸ⅛ᨃ၊ዣᆷ␥!
2
!ፇႲᯮණ
Ⴎ⁶ᨃ⅛ᨃ၊ዣ!
D
!ᢳྟᆷ␥!
4
!ፇႲᯮණ
2
Tarik turun Sengkuap Bawah sehingga ia terhenti dan pasang pada Paip dengan kuat dengan menskrukannya seperti
yang ditunjukkan.
Pull down Lower Canopy until it stop and fi x to Pipe fi rmly by screwing them as shown.
Ⴋዂၘዄབབ᮳ᵸፊჵབ᮳ᵸ᛬ඩᦻᐋᝈ྆ឳᵏჵᾚᴻණ
3
Masukkan
Sengkuap
Atas pada paip dan tarik ke bawah sehingga ia terhenti di bahagian atas
Sengkuap
Bawah.
Jangan ketatkan
Sengkuap
Atas dengan skru pada peringkat ini.
Insert the Upper Canopy to the pipe and pull it down until it stop at the top of Lower Canopy.
Do not tighten the Upper Canopy with screw at this stage.
ᝈམ᮳ᥐཋᾚᴻඩᦻ႕ᝈམ᮳ዄབፊჵ᛬ႝབ᮳ፇᣍᢳණ
ႝᢣᑚྂᓴ၊⅛ᨃ∯ᵏམ᮳ණ
Pemeriksaan Selepas Pemasangan / Check Point After Installation /
Ⴒᯮᐋፇᔏ↰ᑍ
Tandakan / Check /
ᑍ
1. Mas
ukka
n Sengkuap Atas ke dalam Pemasangan Paip. Jangan ketatkan skru!
Insert the Upper Canopy to Pipe Assembly. Do not tight the screw!
ᝈམ᮳ᵸᤠཋᾚᴻᡊၯණྠྤ∯ᵏ⅛ᨃන
2.
Sen
gkuap Bawah dipasang Skru dengan selamat.
The Lower Canopy is securely Screwed.
བ᮳ᵸླྀ∯ᵏණ
Skru Wayar Keselamatan (dengan sesendal) /
Safety Wire Screw (with washer) /
⁶ị⅛ᨃළᛑᲔᜤෆ
Skru Sengkuap Bawah /
Lower Canopy Screw
བ᮳ᵸ⅛ᨃ
Paip /
Pipe /
ᾚᴻ
Model F-M15B0 /
Model F-M15B0 /
F-M15B0
!Ꮦᯜ
Model F-M15A0 & F-M12A0 /
Model F-M15A0 & F-M12A0 /
F-M15A0!& F-M12A0
!Ꮦᯜ
F-M15A0_BMENCS.indd 8F-M15A0_BMENCS.indd 8 1/27/2015 8:53:42 AM1/27/2015 8:53:42 AM