4
I/O CIRCUIT DIAGRAMS
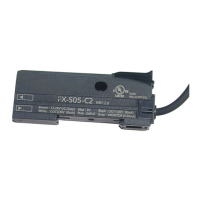
<FX-505-C2>
Load
+
-
12 to 24V DC
%
Load
Load WR
Main circuit
(Brown) +V
(Pink) External input
(Black) Sensing output 1
(White) Sensing output 2
(Blue) 0V
(Gray) Monitor current output (4 to 20mA)
<FX-505P-C2>
Load
+
-
12 to 24V DC
%
Load
Load WR
(Brown) +V
(Pink) External input
(Black) Sensing output 1
(White) Sensing output 2
Main circuit
(Blue) 0V
(Gray) Monitor current output (4 to 20mA)
Note: Make sure to insulate the ends of the unused lead wires.
5
OPERATION PROCEDURE
Ɣ The sensing output can be switched to sensing output 1 or sensing output 2
by holding down the mode key.
Ɣ The changed settings are not stored if turning the power OFF while setting.
7KHUHIRUHFRQ¿UPWKHVHWWLQJVE\SUHVVLQJWKH6(7NH\EHIRUHWXUQLQJWKH
power OFF.
Ɣ When turning ON the power, RUN mode is displayed and the digital display
shows the threshold value (green) and the incident light intensity (red).
• Displays threshold value (green) and incident light intensity (red).
• 7HDFKLQJWKUHVKROGYDOXH¿QHDGMXVWPHQW DQGNH\ORFN IXQFWLRQ
can be set.
• For setting method of each function, refer to “
TEACHING
MODE,” “
THRESHOLD VALUE FINE ADJUSTMENT FUNC-
TION,” or “
KEY LOCK FUNCTION
.”
• Select either Light-ON or Dark-ON.
• For the setting, refer to
“
SENSING OUTPUT OPERATION
MODE
.”
• The default setting is “ ” (Light-ON).
• An item set in CUSTOM mode (Response time setting, Emission
power setting and Hysteresis setting) is displayed.
• For details, refer to “
CUSTOM MODE
.”
• The default setting is “
” (response time setting).
• Advanced setting can be done.
• For the setting, refer to “
PRO MODE
.”
<RUN mode>
<Sensing output operation mode>
<CUSTOM mode>
<PRO mode>
<RUN mode>
INSTRUCTION MANUAL
'LJLWDO)LEHU6HQVRU$PSOL¿HU FX-505Ƒ-C2
MJE-FX505C2C No.0068-85V
Thank you very much for purchasing Panasonic products.
Please read this Instruction Manual carefully and thoroughly for the correct and
optimum use of this product.
.LQGO\NHHSWKLVPDQXDOLQDFRQYHQLHQWSODFHIRUTXLFNUHIHUHQFH
WARNING
Ɣ Never use this product as a sensing device for personnel protection.
Ɣ In case of using sensing devices for personnel protection, use products which
meet laws and standards, such as OSHA, ANSI or IEC etc., for personnel
protection applicable in each region or country.
1
INTENDED PRODUCTS FOR CE MARKING
Ɣ This product complies with the following standards / regulations.
(8'LUHFWLYH!
EMC Directive
<Standards in US / Canada>
ANSI/UL 60947-5-2, CAN/CSA C22.2 No.14
5HJXODWLRQVLQ.RUHD!
S1-G-1-2009, S2-W-5-2009
Ɣ Caution about UL recognition
,QFDVHUHTXLULQJFRQIRUPLW\RI8/OLVWLQJPDUNRU&8/OLVWLQJPDUN86HFODVV
2 power supply unit.
Ɣ &RQWDFWIRU&(
Panasonic Marketing Europe GmbH Panasonic Testing Center
Winsbergring 15, 22525 Hamburg,Germany
2
PART DESCRIPTION
Digital display
(Green / Red)
UP key
• Teaching
• Threshold value
¿QHDGMXVWPHQW
• Select setting items
MODE key
• Select Modes
• Cancel during setting
• Select sensing output 1/2
by pressing long
SET key
• Teaching
• Confirm setting
contents
DOWN key
• Teaching
• 7KUHVKROGYDOXH¿QH
DGMXVWPHQW
• Select setting items
Sensing output 2
selection indicator
(Yellow)
Sensing output 1
selection indicator
(Yellow)
Sensing output 1
operation indicator
(Orange)
Sensing output 2
operation indicator
(Orange)
MODE indicator: PRO (Yellow)
MODE indicator: L / D (Yellow)
MODE indicator: CUST (Yellow)
Pressing down SET key + MODE key for 3 sec : Set key lock or Release key lock
3
MOUNTING
How to connect
1.
Fit the rear part of the mounting sec-
WLRQRIWKHDPSOL¿HURQD',1UDLO
2.
Press down the rear part of the
mounting section of the unit on the
DIN rail and fit the front part of the
mounting section to the DIN rail.
+RZWRUHPRYH
1.
Push the controller forward.
2.
/LIWXSWKHIURQWSDUWRIWKHDPSOL¿HU
to remove it.
2.
Lift up
1. Push forward
2.
Press down
1.
Fit
35mm width DIN rail
+RZWRFRQQHFWWKH¿EHUFDEOH
%HVXUHWR¿W WKH DWWDFKPHQW WR WKH ¿EHUV ¿UVW EHIRUH LQVHUWLQJ WKH ¿EHUVWRWKH
DPSOL¿HU)RUGHWDLOVUHIHUWRWKHLQVWUXFWLRQPDQXDOHQFORVHGZLWKWKH¿EHUV
1.
Snap the fiber lock lever down till it
stops completely.
2.
,QVHUWWKH¿EHUFDEOHVVORZO\LQWRWKH
inlets until they stops. (Note)
3.
Return the fiber lock lever to the
original position till it stops.
Fiber lock lever
Fiber for
receiver
1.
Snap
3. Return
2. Insert
Fiber for emitter
1RWH :LWKWKHFRD[LDOUHÀHFWLYHW\SH¿EHUVXFKDV
FD-G4 or FD-FM2LQVHUWWKHVLQJOHFRUH¿EHUFDEOHLQWRWKH
EHDPHPLWWLQJLQOHW³3´DQGWKHPXOWLFRUH¿EHUFDEOHLQWRWKHEHDPUHFHLYLQJLQOHW
If they are inserted in reverse, the sensing performance will deteriorate.
<Reference>