This document provides a quick start guide for the Panasonic KX-TGP500 IP Cordless Phone System and the KX-TPA50 Cordless Handset, part of the DOT (Digital Office Technology) suite. It covers initial setup, basic call features, phonebook management, and troubleshooting.
Function Description:
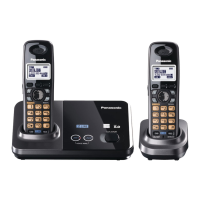
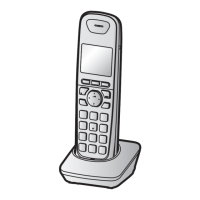
The Panasonic KX-TGP500 IP Cordless Phone System is designed for digital office environments, offering a flexible and scalable communication solution. It integrates with IP services, allowing for advanced call features and network connectivity. The system supports multiple cordless handsets (up to 6 per base unit), enabling internal call transfers and shared access to phone lines. The KX-TPA50 Cordless Handset serves as the user interface for making and receiving calls, managing contacts, and accessing system features.
Important Technical Specifications:
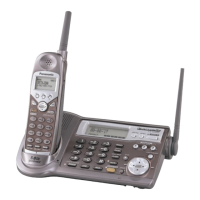
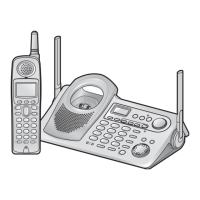
- Base Unit Model: Panasonic KX-TGP500
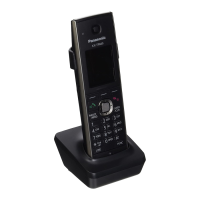
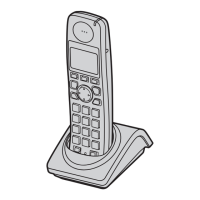
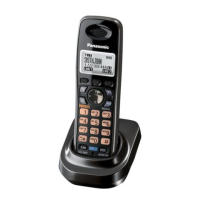
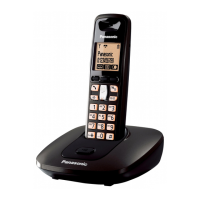
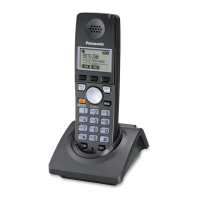
- Handset Model: Panasonic KX-TPA50
- Handset Batteries: Ni-MH AAA (R03) size (Alkaline, Manganese, or Ni-Cd batteries are not supported).
- Power Supply (Base Unit): DC8.5V AC adapter (220-240 V AC, 50/60 Hz).
- Connectivity: Ethernet cable for router connection.
- Maximum Handsets: Up to 6 cordless phones can be connected to each Base Unit.
- Call Features: IP Phone feature, Virtual Receptionist (if applicable), Voice2Email, Call Forward (Always, No Answer, Busy), Call Hold/Resume, Call Waiting, Conference Call (max 3 parties including host), Internal Call Transfer (Blind & Supervised), External Call Transfer (Blind & Supervised).
- Phonebook Capacity: Supports importing contact lists from Microsoft Outlook (TSV file format).
Usage Features:
Mentoring:
The service includes a complimentary one-hour over-the-phone mentoring session after installation to help users maximize the service's potential. This session covers IP Phone features, applications for managing service and call settings, Virtual Receptionist (if applicable), and Voice2Email. An optional two-hour on-site session is available in metro areas for a fee of $165.
Getting Started:
- Set up Base Unit: Connect the Ethernet cable to the base unit and the DOT router. Connect the AC adapter to the base unit and a power socket. The status indicator will cycle through red, amber, and green, eventually settling on solid amber when setup is complete.
- Set up Cordless Phone: Connect the AC adapter to the charger and power socket. Insert the Ni-MH AAA batteries into the handset, ensuring correct polarities. Place the handset in the charger for 6 hours to complete the initial charging cycle.
- Activate DOT Service: Navigate to Menu > IP Service > Call Features > Settings > Authentication on the handset. Enter the User ID and Password (found in the DOT Configuration Summary for device type TGP500) and save. The status indicator on the base unit will flash red, amber, then turn solid green upon successful activation.
- Pair a Phone to the Base Unit: Press MENU on the handset, then #. Press and hold the ALL button on the side of the Base Unit for at least 4 seconds until its status indicator flashes red. Select OK on the handset and enter the Base Unit PIN (0000). Select OK. A long beep confirms connection, and the handset will display a number next to the battery level.
- Add a Name/Number to Each Cordless Phone: Go to Menu > Initial Settings > Handset name on the handset. Enter the desired name and press OK.
- Set up Phones for Calls:
- Incoming Calls: Menu > IP Service > Call Features > Settings > Incoming Call. Select LINE to view available numbers. Assign desired lines by selecting Yes.
- Outgoing Calls: Menu > IP Service > Call Features > Settings > Outgoing Call > Default. Select LINE 1-4 or LINE 5-8 to view numbers. Assign desired lines by selecting Yes.
Using Your Phonebook:
- Save a Contact: Menu > Phonebook > Add. Enter name and number, then Save.
- Save/Edit from Missed Calls: Select CID, scroll to contact, Menu > Add Phonebook. Edit details and Save.
- Save/Edit from Redial List: Press REDIAL, scroll to contact, Menu > Add Phonebook. Edit details and Save.
- Import Phonebook (from Microsoft Outlook):
- Export Outlook contacts as a Tab Separated Values (Windows) file (.tsv). Map First Name, Last Name, and Business Phone.
- Open the .tsv file in Microsoft Excel. Ensure phone numbers are formatted as text to prevent leading zeros from disappearing. Save the file as Unicode Text (.txt).
- On the phone, go to Menu > IP Service > Network Settings > Embedded Web and select On.
- Find the Base Unit IP Address (IP Settings under IP Service).
- Access the Base Unit's web interface via a browser using the IP address. Login with Username: Admin, Password: Telstra.
- Navigate to the "Telephone" tab, then "Import Phonebook" (left column).
- Select the desired handset, browse for the saved .txt phonebook file, and click Import. The handset will display "Receiving" and beep when complete.
- Verify import by checking the phonebook on the handset (Menu > Phonebook).
Using Your MessageBank:
- Set up: Dial 101 and follow the prompts to configure greetings.
- Listen to Messages: Dial 101 or Menu > New Voice Mail. The standby display will show "New Voice Mail" when new messages are waiting.
Basic Call Features:
- View Call History: Press REDIAL for outgoing calls, CID for missed calls. Scroll to search.
- Placing a Call: Enter number on keypad and press Talk, or press Talk then enter number. Alternatively, select from Phonebook (Menu > Phonebook) or Call History (CID).
- Call Hold/Resume: During a call, select HOLD. Select HOLD again to resume.
- Call Waiting: Activate by dialing *43, deactivate by dialing #43#.
- Conference Call: During a call, Menu > 4 = Conference. Enter the other party's number. Select CALL, wait for them to answer, then CONF to connect. (Max 3 parties).
- Call Forward:
- Always: Activate *72 (enter forward number), Deactivate *73.
- No Answer: Activate *92 (enter forward number), Deactivate *93.
- Busy: Activate *90 (enter forward number), Deactivate *91.
- Internal Call Transfer (Blind & Supervised):
- Blind: During a call, Menu > INTERCOM. Select other party's phone. Select CALL. Press OFF when receiving phone rings.
- Supervised: During a call, Menu > INTERCOM. Select other party's phone. Select CALL. Wait for them to answer and announce transfer. Press OFF when accepted.
- External Call Transfer (Blind & Supervised):
- Blind: During a call, Menu > 3 = Blind Transfer. Enter other party's phone number.
- Supervised: During a call, Menu > 2 = Blind Transfer. Enter other party's phone number. Select CALL. Wait for them to answer and announce transfer. Press OFF when accepted.
Maintenance Features:
Troubleshooting:
- Unable to use new phone line: If connecting a new line, restart the Base Unit by disconnecting and reconnecting its power supply.
- Unable to connect service after entering Authentication ID/Password: Repeat service activation steps (page 10) or perform a local restart of the Base Unit (disconnect/reconnect power). Ensure Embedded Web is switched ON (Menu > IP Service > Network Settings > Embedded Web > ON) if unable to access the Base Unit's web interface.
- Internet working, but no calls: Perform a local restart of the DOT router (disconnect/reconnect power).