Advanced (Recording pictures)
- 100 -
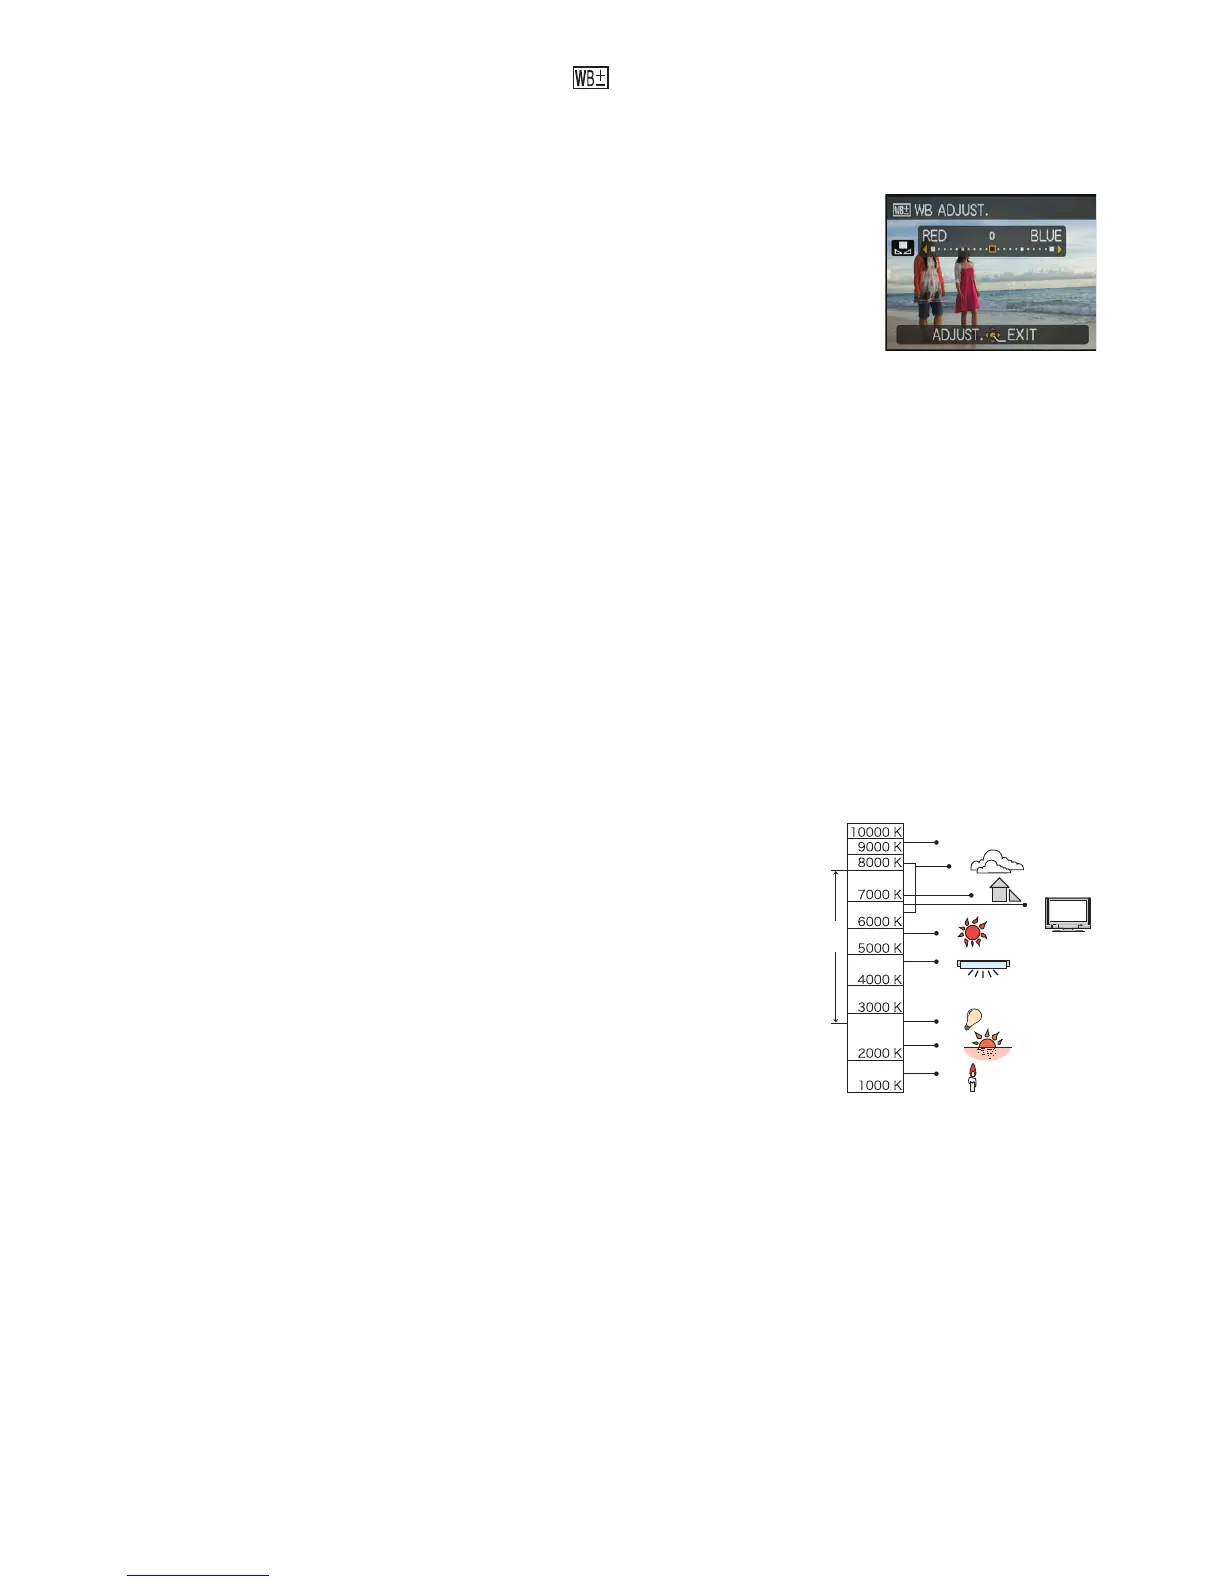
∫ Finely adjusting the White Balance [ ]
You can finely adjust the White Balance when you cannot acquire the desired hue by
setting the White Balance.
•
Set the White Balance to [V]/[Ð]/[î]/[Ñ]/[Ò].
1 Press 3 [È] several times until [WB ADJUST.] appears
and then press
2/1 to adjust the White Balance.
• Select [0] to return to the original White Balance.
2 Press [MENU/SET] to finish.
•
You can also press the shutter button halfway to finish.
• The White Balance icon on the screen turns red or blue.
• You can finely adjust the White Balance independently for each White Balance item.
• The White Balance fine adjustment setting is reflected in the picture when using the flash.
• The White Balance fine adjustment setting is memorised even if the camera is turned off.
• The White Balance fine adjustment level in [Ò] returns to [0] when you reset the White
Balance using [Ó].
• In the [UNDERWATER] in Scene Mode, the White Balance is fixed at [AWB], but it can be
finely adjusted.
• White Balance fine adjustment cannot be set for [B/W], [SEPIA], [COOL] and [WARM] in
[COLOR MODE].
∫ Auto White Balance
Depending on the conditions prevailing when pictures are taken, the pictures may take on
a reddish or bluish tinge. Furthermore, when a multiple number of light sources are being
used or there is nothing with a colour close to white, Auto White Balance may not function
properly. In this case, set the White Balance to a mode other than [AWB].
1 Auto White Balance will work within this range
2Blue sky
3 Cloudy sky (Rain)
4 Shade
5 TV screen
6 Sunlight
7 White fluorescent light
8 Incandescent light bulb
9 Sunrise and sunset
10 Candlelight
KlKelvin Colour Temperature
2 [RED]: Press when the hue is bluish.
1 [BLUE]: Press when the hue is reddish.
1)
2)
3)
4)
5)
6)
7)
8)
9)
10)
 Loading...