EasyManua.ls Logo

Panasonic NV-GS5 User Manual

Panasonic NV-GS5
20 pages
To Next Page IconTo Next Page
Page #1 background imageLoading...
Page #1 background image
37
To Select a Desired File and Play It Back
1
Set the [TAPE/CARD/CARD MODE] Selector to [CARD].
2
Slide the [TAPE/CARD/CARD MODE] Selector to
[CARD MODE] until the desired type of data indication
appears. (NV-GS5 only)
3
Press the [MULTI] Button.
The files recorded on the Card are displayed in Multi-Picture Mode.
1
4
Turn the [PUSH] Dial and select a desired file.
The selected file is marked with a frame.
When 7 or more files have been recorded, turn the [PUSH] Dial to
display the next file. (The [6] Button or [5] Button can be used
instead of the [PUSH] Dial.)
5
Press either the [PUSH] Dial or the [MULTI] Button.
The selected file is shown on the entire screen.
2
Picture Size (When [PICTURE] is selected at Step 2)
FINE or NORMAL (When [MPEG4] is selected at Step 2)
3
File Number
4
Folder-File Number (When [PICTURE] or [MPEG4] is selected at Step 2)
Using File Search Mode
1
11
1
Set [CARD FUNCTIONS] >> [CARD EDITING] >>
[FILE SEARCH] >> [YES].
2
22
2
Turn the [PUSH] Dial and select the desired file number, and
press the [PUSH] Dial.
5
For other notes concerning this item, see page 46.
~~~~~~~~~~~~~~~~~~~~~~~~~
Recording Pictures on a Card to a Tape
Card Images can be recorded on the Tape one at a time or all automatically.
After setting to Card Playback Mode, please carry out the following
procedures.
To Copy 1 Picture
1
Slide the [TAPE/CARD/CARD MODE] Selector to
[CARD MODE] until the [PICTURE] Indication appears.
(NV-GS5 only)
2
Display a desired picture.
3
Set the [TAPE/CARD/CARD MODE] Selector to [TAPE].
4
Press the [PHOTO SHOT] Button.
During the copying, the indication
1
appears.
It takes a few seconds to record a picture to the Tape.
When recording to tape, select the tape position before recording. The
picture will be recorded to the tape position when the [PHOTO SHOT]
Button is pressed at Step 4.
To Copy All the Pictures
1
11
1
Slide the [TAPE/CARD/CARD MODE] Selector to
[CARD MODE] until the [PICTURE] Indication appears.
(NV-GS5 only)
2
22
2
Display the first picture.
If a picture other than the first one is displayed, only the subsequent
pictures will be copied.
3
33
3
Set [CARD FUNCTIONS] >> [CARD EDITING] >>
[RECORD TO TAPE] >> [YES].
During the copying, the indication
1
appears.
It takes a few seconds for each picture to be copy on the Tape. To stop
the copying midway, press the [] Button.
Moving Picture (MPEG4) and Voice data cannot be recorded from a Card to
tape. (NV-GS5 only)
For other notes concerning this item, see page 47.
3, 5
1, 2
1
5
34
PICTURE
No.25 100-0014
2
640
640
640
640
640
640
FILE SEARCH
PRESS MENU TO RETURN
1
4, 5
2
M
E
N
U
TAPE
CARD
CARD
CARD MODE
MULTI/
P-IN-P
1
NOW RECORDING
REC
4
1, 3
1
3
M
E
N
U
TAPE
CARD
CARD
CARD MODE
PHO
PHO
TO
SHO
SHO
T
B.book37ページ2002年1月28日 月曜日 午後3時48分
Question and Answer IconNeed help?

Do you have a question about the Panasonic NV-GS5 and is the answer not in the manual?

Panasonic NV-GS5 Specifications

General IconGeneral
TypeMiniDV
Optical Zoom10x
Digital Zoom500x
Sensor TypeCCD
LCD Screen Size2.5 inches
Media FormatMiniDV
Sensor Size1/6 inch
Recording MediaMiniDV Tape
BatteryLithium-ion
Image Sensor1/6 inch
Zoom10x optical
LCD Screen2.5-inch color LCD
ViewfinderColor
Image StabilizationElectronic
MicrophoneStereo
InterfaceIEEE 1394 (FireWire)

Summary

Selecting and Playing Back Files

Using File Search Mode

Learn how to search and play files using the File Search mode.

Recording Pictures from Card to Tape

Copying a Single Picture

Procedure to copy a single picture from the card to the tape.

Copying All Pictures

Procedure to copy all pictures from the card to the tape.

Slide Show Playback

Play Back All Pictures Continuously

How to play back all recorded pictures in a continuous slideshow.

Pause Slide Show Playback

Instructions on how to pause the slideshow playback.

Stop Slide Show Playback

Instructions on how to stop the slideshow playback.

Editing a Slide Show

Select Pictures for Slide Show

Select desired pictures to include in your slide show.

Play Back Preset Slide Show

How to play back the slide show after setting it up.

Verify Selected Picture in Slide Show

Check the pictures that have been selected for the slideshow.

Delete Selected Picture from Slide Show

Remove a specific picture from the slide show selection.

Reset Slide Show Setup

Reset all custom slide show settings to default.

Creating and Managing Titles

Adding a Title to Pictures

Learn how to add a title to existing pictures.

Clearing the Title Display

Remove the displayed title from the screen.

Protecting and Deleting Card Files

Lock Setting for Card Files

How to lock files to prevent accidental erasure.

Select and Delete Specific Files

Delete specific files from the memory card.

Select and Delete All Card Files

Erase all files from the memory card.

Card Formatting and DPOF Settings

Formatting the Memory Card

Learn how to format the memory card to ensure proper functionality.

Verify DPOF Setting

Check the DPOF settings to confirm print orders.

Camera Indications and Symbols

Customizing Camera Display Settings

Change Counter Display Mode

Adjust how the counter is displayed on the screen.

Display Date and Time Indication

Configure the display of date and time information.

Change Overall Display Mode

Set the display mode to ALL, PARTIAL, or OFF.

Owner ID Setup and Verification

Register and Verify Owner ID

Set up and verify owner identification information.

Warning and Alarm Indications

Power Supply Notes and Hints

Cassette Handling and Alarm Sounds

Insert and Remove Cassette

Instructions for inserting and removing the video cassette.

Understand Alarm Sounds

Learn the meaning of different alarm sounds issued by the camera.

Recording Operations and Features

Recording Checks and Modes

Check recording quality and understand different recording modes.

Progressive Photoshot Function

Utilize the function for capturing still pictures during recording.

About Progressive Setup

Understand the settings and limitations of the Progressive setup.

Camera Feature Explanations

Zoom In/Out Functions

How to use the zoom capabilities of the camera.

Image Stabilizer Function

Learn how to use the image stabilization feature.

Cinema Function Usage

Explore the use of the Cinema Mode for recording.

Backlight Compensation Function

Adjust backlight compensation for better exposure.

Wind Noise Reduction Function

Reduce wind noise during audio recording.

Programme AE Modes

Sports Mode

Use Sports Mode for capturing fast-moving subjects.

Portrait Mode

Use Portrait Mode for capturing subjects with blurred backgrounds.

Low Light Mode

Use Low Light Mode for shooting in dim environments.

Special Recording Modes

Spotlight Mode

Use Spotlight Mode for brightly lit subjects.

Surf & Snow Mode

Use Surf & Snow Mode for bright outdoor scenes.

Image Settings: White Balance and Shutter Speed

White Balance Adjustment

Adjust white balance for accurate color reproduction.

Manual Shutter Speed Adjustment

Manually adjust shutter speed for creative control.

Manual Iris Adjustment

Manually adjust iris for depth of field control.

Digital Effect Functions

Playback Features and Navigation

Wipe and Mix Mode Playback

Playback using Wipe and Mix digital effects.

Picture-in-Picture Playback

Playback using the Picture-in-Picture effect.

Multi-Picture Mode Playback

Playback using the Multi-Picture mode.

Repeat Playback Function

Set the camera to repeat playback continuously.

Listen Through Headphones

Use headphones for private audio monitoring during playback.

Choose Sound During Playback

Select audio output settings for playback.

Index Search Functions

Use index search to quickly find scenes on the tape.

Playback Zoom Function

Zoom in on playback images for detailed viewing.

Playback with Digital Effects

Playing Back on Television

Audio Dubbing for TV Playback

Perform audio dubbing while playing back on TV.

Recording from External Equipment

Record to Card from External Signals

Use the Card Photoshot function for external input signals.

Analog-to-Digital Conversion

Convert analog video signals to digital for output.

Digital Dubbing with DV Cable

Use a DV cable for digital dubbing operations.

Card Recording and Playback

Record to Card (Photoshot)

Use Card Photoshot for external input signals.

Record Moving Pictures (MPEG4) and Voice

Record MPEG4 moving pictures and voice data.

Play Back Card Content

Playback images and videos recorded on the card.

Voice Power Save (NV-GS5 only)

Transferring Card Images to Tape

Slide Show and Title Management

Slide Show Playback Details

Set playback time and understand title interaction with slideshows.

Create and Add Titles to Pictures

Learn to create and add titles to pictures.

Lock Setting for Card

Apply a lock setting to protect card contents.

Using the Memory Card with a PC

PC Folder Structure for Memory Cards

Understand the folder structure when using a card with a PC.

General Cautions for Camera Use

Cautions After Camera Use

Steps to take after using the movie camera.

Precautions for Wet Conditions

Protect the camera from water during use.

Environmental Precautions for Camera

AC Adaptor Information and Usage

Condensation and Lens Fogging

Handle Condensation Indoors

Steps to take when condensation forms inside the camera.

Clear Fogged Lens

Procedure to clear fog from the camera lens.

Video Head Care and Cleaning

Clean Video Heads

Use a head cleaner to maintain video head performance.

Important Notes and Maintenance Checks

Periodic Maintenance Check-up

Recommended periodic check-ups for optimal performance.

Optimal Battery Usage and Care

Tips for maximizing battery life and performance.

Detach Battery After Use

Proper procedure for detaching the battery after use.

Battery Disposal Guidelines

Guidelines for safely disposing of unusable batteries.

Clean Battery Terminals

Keep battery terminals clean for reliable operation.

Storage Precautions for Camera and Accessories

Store Movie Camera and Battery

Proper procedures for storing the movie camera and battery.

Store Cassette and Memory Card

Guidelines for storing video cassettes and memory cards.

LCD Monitor, Viewfinder, and Lens Hood

LCD Monitor Details

Information about the camera's LCD monitor.

Viewfinder Details

Information about the camera's viewfinder.

Lens Hood Usage

How to attach and use the lens hood.

Troubleshooting: Before Requesting Repair

Power Issues

Solutions for problems with the movie camera power.

Battery Performance Issues

Battery Runs Down Quickly

Reasons and solutions for rapid battery drain.

Battery Cannot Be Charged

Solutions for issues preventing battery charging.

Recording and Playback Troubleshooting

Normal Recording Issues

Solutions for problems starting normal recording.

Other Recording Problems

Resolve issues with Auto Focus and other recording settings.

Editing and Dubbing Problems

Solutions for audio dubbing and editing issues.

Playback and Indication Troubleshooting

Time Code and Tape Time Issues

Address inaccuracies in Time Code and tape time indications.

Picture Playback Problems

Resolve issues like no playback or unclear images.

Sound Playback Problems

Troubleshoot sound issues during playback.

Card Playback and Image Quality Issues

Card Recorded Picture Clarity

Improve clarity of pictures recorded on the card.

Card Photoshot Playback Issues

Solutions for abnormal card photoshot playback images.

Card Formatting and Usage Problems

Address issues with card formatting or usability.

Explanation of Terms and Concepts

Digital Video System Explained

Understand the principles of digital video systems.

S-VHS/VHS Compatibility

Information on compatibility with S-VHS or VHS cassettes.

Output Signal Compatibility

Details on AV signal output compatibility.

Focus Adjustment Methods

Auto Focus Adjustment

How the auto focus system works and its limitations.

Time Code Recording and Memory Stop

Understanding Time Code

Data indicating time measured in hours, minutes, seconds, and frames.

Memory Stop Function Usage

Use memory stop for rewinding/fast-forwarding or editing.

Camera Specifications

Digital Video Camera Specifications

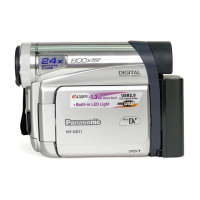
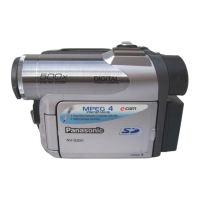
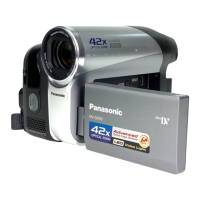
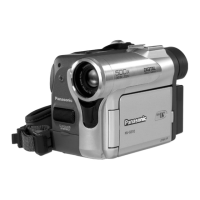
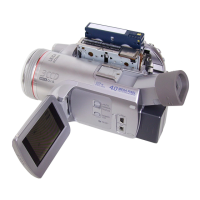
Detailed specifications for the digital video camera.

AC Adaptor Specifications

Technical specifications for the AC adaptor.

Related product manuals