4 OPERATION GUIDE
Quick Operation Guide
Built-in Auto Light
1 Attach fully charged Battery.
2 Slide TAPE EJECT to open door.
3 Insert cassette.
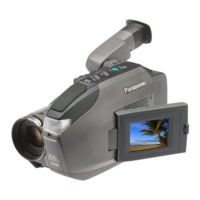
1 Press LCD-OPEN to unlock the
LCD monitor. Swing it fully open
and adjust the angle.
2 Set POWER
to CAMERA.
3 Press RECORD/PAUSE to start
recording.
Press
RECORD/PAUSE again to
pause recording.
When the LCD monitor is open, the EVF automatically turns OFF.
4
Press here to close door.
Charge Battery Pack fully before operation.
1 Plug in AC Adaptor.
2 Insert Battery.
CHARGE Lamp
lights and then goes
out when charging is
done.
CAMERACAMERA
OFFOFF
VCRVCR
BAT
TERY
P
AC
K
90
180
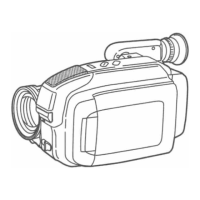
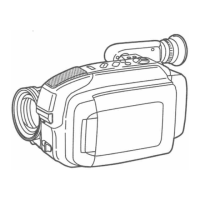
(PV-L650 shown)
(PV-L650 shown)
Camera Recording
Insert Cassette
Charging the Battery Pack
Before you begin...
• Charge Battery Pack fully before operation.
When the LCD monitor is open, the EVF
automatically turns OFF.
2
Set POWER to VCR.
3
Press REWIND/SEARCH
to rewind tape.
4
Press PLAY to
start playback.
1
Press LCD-OPEN to
unlock the LCD monitor.
Swing it fully open and
adjust the angle.
5
Press STOP to
stop playback.
STOP
STILL
PLAY
REW
FF
CAMERA
OFF
VCR
RE
90
180
(PV-L650 shown)
Playback using the LCD
Monitor
(PV-L550/PV-L600/PV-L650/VM-L450)
Using the Light
For recording in dim lighting.
Before you begin...
• Connect Camcorder to power source.
• Set POWER to CAMERA.
Replacing the Bulb
DANGER:
Use only replacement bulb (PART NO.
VLLW0015) supplied by Panasonic to
reduce risk of fire.
Handle new bulb with cloth or tissue as
skin oils will decrease bulb life.
Remove lens cover and allow bulb to
cool before replacing to avoid possible
burn hazard.
Note:
• Using Light reduces battery operating time.
• Provide proper ventilation when using Light
extensively in hot environment.
• Using Light when the Camcorder is powered
by a car battery may shorten bulb life.
• Set Light to OFF when not in use.
• Handle bulb gently. Excessive force may
cause bulb to crack.
Caution:
Light becomes hot. Never cover Light while
on.
appears in EVF or LCD Monitor when
Light is on.
Set
LIGHT to AUTO.
Light turns on/off automatically according
to lighting conditions.
Or, set
LIGHT to ON/OFF manually.
1
Press in on both sides of lens
cover and pull straight out and off.
2
Using Tweezers or needle-nose
pliers, carefully remove bulb.
•
Take unit to service center if you
need assistance.
3
Replace bulb using a clean cloth or
tissue.
4
Replace lens cover.
Before you begin...
• Order Part No. VULS0001 (VLLW0015 and
cushions) for replacement bulb unit.
• Set POWER to OFF.
LIGHTLIGHT
OFF AUTO
ON
1
x
SP
REC
12:00:00
AMAM
JANJAN
1 20001 2000
Camera Recording
Simple Recording
PAUSE
EVF or
LCD Monitor
RECORDRECORD
Record/Pause mode.
2 Look into EVF and adjust VISION
ADJUSTMENT to your eyesight.
3 Slide TAPE SPEED to SP or SLP.
4 Press RECORD/PAUSE to start or
pause recording.
Tally lamp lights if set to ON.
5 Set POWER to OFF when finished.
• To remove cassette,
slide TAPE EJECT in Record/
Pause mode.
Note:
• When Camcorder is aimed at excessively
bright objects, or bright lights, a vertical bar
may appear in the picture. This is normal for
the CCD pick-up. Try to avoid this when
possible.
1
Tally Lamp
3
1 Set POWER to CAMERA.
Lens Cover opens.
Power lamp lights.
• Be sure POWER
is fully turned to
CAMERA
position.
5
SPEED
SLPSP
4
Built-in Twin Capsule
2-Way Microphone
System
Before you begin...
• Connect Camcorder to power source.
• Insert cassette with record tab.
2
CAMERA
OFF
VCR
POWER
REC
VISION
ADJUSTMENT
5
PV-D300 / VM-D100 / PV-L550 / PV-L600 / PV-L650 / VM-L450
 Loading...