7.3.7. VR ADJUSTMENT
7.3.7.1. CAMERA SECTION
7.3.7.1.1. Frequency Adjustment
Purpose: To set the chroma subcarrier.
Symptom of
Misadjustment:
The picture will be no color. (The burst
shifts)
Specifications: 14.31818 MHz±80 Hz
Adjustment Procedure:
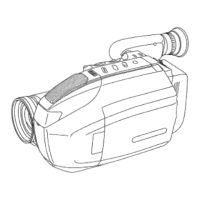
1. Remove the Side Case (L) Unit. Refer to "CABINET
SECTION" in DISASSEMBLY/ASSEMBLY
PROCEDURES.
Connect the Side L FPC unit to the camcorder as shown in
Fig. E5-1
2. Connect the Frequency counter to TP601 of Main C.B.A.
3. Adjust C610 on the Main C.B.A. so that the frequency
becomes 14.31818 MHz±80 Hz.
Fig. E5-1
7.3.8. MONOCHROME EVF SECTION
Note:
Camcorder need NOT to be powered off and on after each
adjustment procedure.
Preparation
1. Before adjusting the Monochrome EVF, Camera section
and VCR section adjustments must be completely adjusted.
2. Remove the EVF Case B Unit to gain access to VRs on the
EVF C.B.A. (Refer to "DISASSEMBLY/ASSEMBLY
PROCEDURES OF CABINET".)
7.3.8.1. Vertical Size Adjustment
Purpose: To set the standard vertical size on the
EVF picture.
Symptom of
Misadjustment:
The vertical EVF picture size will be
abnormal.
Test Point: ----------
Adjustment: VR901 (EVF C.B.A.)
Specification: Best Vertical size
Input: Gray Scale Chart
Mode: SP REC
Equipment: Viewfinder
Adjustment Procedure:
1. Aim the camcorder at the gray scale chart.
2. Adjust the VERTICAL SIZE CONTROL (VR901) so that the
vertical picture size becomes correct.
Fig. E5-2
73
PV-D300 / VM-D100 / PV-L550 / PV-L600 / PV-L650 / VM-L450
 Loading...