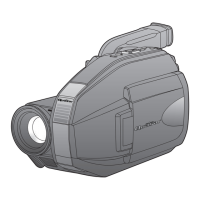
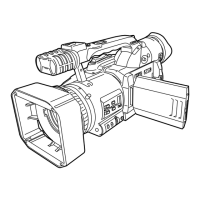
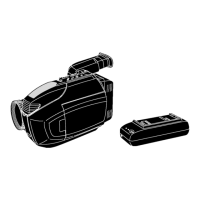
This document describes the Panasonic Compact VHS Camcorder, covering its functions, technical specifications, usage, and maintenance. The camcorder models covered are PV-D300, VM-D100, PV-L550, PV-L600, PV-L650, and VM-L450.
Function Description
The Panasonic Compact VHS Camcorder is a versatile device designed for recording and playing back video using Compact VHS cassettes. It features a built-in auto light for dim lighting conditions, a four-speed power zoom, high-speed shutter for improved still or slow-motion playback, macro focus for close-up shots, and digital electronic image stabilization (E.I.S.) to help stabilize pictures during recording. The camcorder also includes a tally lamp to indicate recording status and digital zoom for increased magnification.
Important Technical Specifications
- Power Source: The camcorder operates on a compact VHS DC 6V power source. The AC Adaptor (PV-A17) provides AC 100/120/220/240V, 50/60 Hz, with a DC 6V output.
- Power Consumption: When operating on a compact VHS DC 6V power source, the camcorder consumes 4W (when not in use) and 1.2W (when the EVF is off).
- Video Signal: The device supports EIA standard (525 lines, 60 fields) NTSC color signal.
- Audio: The camcorder features a 2-head rotary plus flying erase head for audio recording and playback. The signal-to-noise ratio is more than 45 dB.
- Viewfinder: The viewfinder is a 0.44-inch liquid crystal display (LCD) with 112,000 pixels. The horizontal resolution is more than 300 lines, and the vertical resolution is more than 350 lines.
- LCD Monitor: The LCD monitor is a 2.5-inch liquid crystal display with 61,000 pixels. The horizontal resolution is more than 300 lines, and the vertical resolution is more than 350 lines.
- Weight: The camcorder weighs approximately 0.87 kg (1.92 lbs) with a battery and tape, and 0.70 kg (1.54 lbs) without. The AC Adaptor weighs 0.25 kg (0.55 lbs).
- Tape Speed: The recording and playback speeds are SP (Standard Play) at 33.35 mm/s and SLP (Super Long Play) at 11.12 mm/s. The recording time is SP: 30 min, SLP: 90 min. The fast forward/rewind time is approximately 1 min 30 sec with T-30 tape.
- Dimensions: The camcorder measures 101 mm x 118 mm x 180 mm (W x H x D) or 100 mm x 114 mm x 178 mm (W x H x D).
Usage Features
- Charging the Battery Pack: The battery pack is charged using the AC Adaptor. The CHARGE lamp lights during charging and turns off when complete.
- Inserting Cassette: Cassettes are inserted by sliding the TAPE EJECT button to open the door, inserting the cassette, and closing the door.
- Camera Recording: Recording is initiated by setting the POWER switch to CAMERA and pressing RECORD/PAUSE. The LCD monitor can be used for viewing, with adjustable brightness.
- Playback: Playback can be done on the EVF or LCD monitor. Functions include rewind/search, play, stop, brightness adjustment, and volume control.
- Special Effects: The camcorder offers quick visual search (3x normal for SP, 9x normal for SLP) and still picture (freeze frame) features.
- Auto Tracking: Continuously analyzes recordings for optimum picture quality. Manual tracking is available for adjustment.
- Programmed Recording: Allows setting a recording start and stop time, or a 5/10 second interval recording each minute.
- Easy Edit Stand-by: Facilitates smooth transitions between scenes if recording is stopped and restarted within 24 hours.
- Manual Easy Editing: Provides continuity when taping from stop mode or after attaching a new battery.
- TV Playback/Viewing: The camcorder can be connected to a TV for viewing playback or recordings in progress, using either Audio/Video IN jacks or an optional RF Adaptor.
Maintenance Features
- Safety Precautions: The manual emphasizes the importance of using manufacturer-specified replacement parts for critical components to prevent hazards. It also recommends using an isolation transformer during servicing and performing leakage current checks.
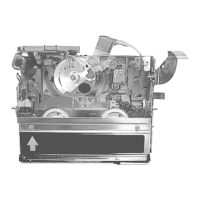
- Cleaning Procedure for the Upper Cylinder Unit: The video heads should be gently rubbed with a Head Cleaning Stick moistened with Isopropyl Alcohol 91%, turning the Upper Cylinder Unit counterclockwise. Vertical rubbing and clockwise turning are to be avoided.
- Tape Interchangeability Adjustment: This procedure ensures proper tape tracking and playback quality. It involves connecting a TP Board Kit, putting the unit into service mode, and removing the Cassette Lid Cover from the tape.
- Envelope Output Adjustment: This adjustment ensures a satisfactory picture and precise tracking by adjusting S and T post heights to achieve a flat RF envelope waveform.
- A/C Head Height Adjustment: This ensures the tape runs properly along the Control Head, adjusting screws A, B, and C on the A/C Head Unit to achieve the specified sub control signal level.
- A/C Head Azimuth Adjustment: This adjusts the position and height of the A/C Head for proper tape track alignment, maximizing audio output.
- A/C Head Horizontal Position Adjustment: This adjusts the horizontal position of the A/C Head to achieve maximum envelope output at the neutral position of the tracking control circuit.
- Digital E.I.S. Calibration: The digital E.I.S. helps stabilize the picture during recording in unstable situations.
- Cleaning EVF (Electronic Viewfinder): The EVF eyepiece can be removed for cleaning lint or dust particles with a soft, clean cloth.
- EEPROM Data Management: Instructions are provided for saving, writing, and initializing EEPROM data using the PC-EVR Program, which is crucial before and after service and adjustment.
- Extension Cables for Service: Specific extension cables are listed for various parts to facilitate servicing.
- Jammed Tape Removal: Detailed steps are provided for removing a jammed tape, including applying power to unload the mechanism.
- TP Board Kit Usage: Instructions for assembling and installing the TP Board Kit for various adjustments and troubleshooting.